


Inca Machine Embroidery Design Instructions
|
Supplies
|
Designs
|
|
Details
|
Size/Quantity/Maker
|
Name
|
No.
|
|
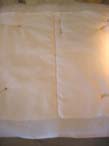
Fabric for quilt
Iron on pellum Backing fabric |
75 x 75cm or 30 x 30inch
75 x 75cm or 30 x 30inch 75 x 75cm or 30 x 30inch |
xolotl01.pcs chimu.pcs
pattern.pcs pat02.pcs maya03.pcs |
1
4 4 4 2 |
|
Colour Chart for Inca Minature Quilt
|
|
Design
|
Colour
No. |
Colour
|
Design
|
Colour
No. |
Colour
|
Design
|
Colour
No. |
Colour
|
||
|
chimu.pcs
|
|
dark red
blue green purple aqua |
maya03.pcs
|
1 2 3 |
blue green
aqua orange |
|
xolotl01.pcs
|
1
|
aqua
|
|
|
pattern.pcs |
1
2 3 4 5 6 7 8 9 10 |
dark red
mauve aqua golden yellow royal blue orange pale lemon tan purple blue green |
pat02.pcs
|
1
2 3 4 5 6 7 8 |
royal blue
blue green purple tan dark red aqua orange pale lemon |
|
Threads for Inca Minature Quilt
|
|
Aqua
|
Blue green
|
Dark red
|
Golden yellow
|
Mauve
|
|
Orange
|
Pale lemon
|
Purple
|
Royal blue
|
Tan
|
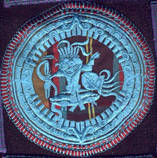 |
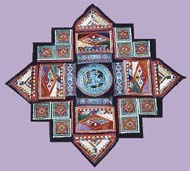
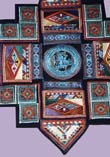
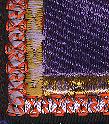
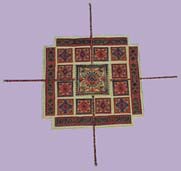
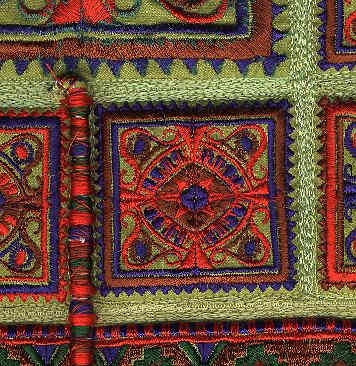
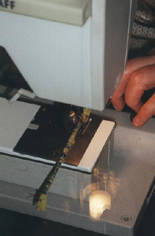
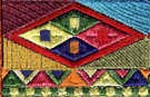
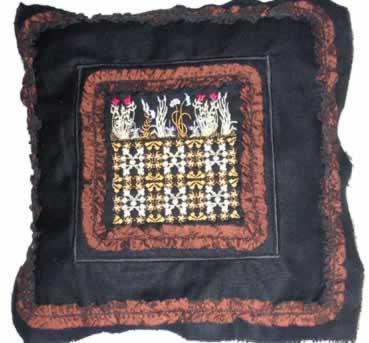
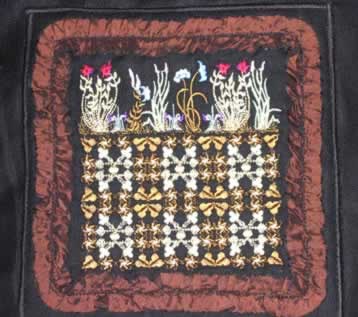
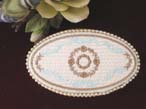
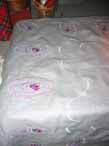
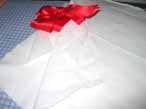
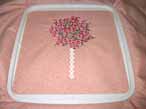
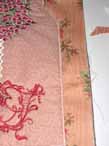
In the centre of the fabric, stitch xolotl01.pcs design (shown to the left), using stitch No.02 L =.30 W = 4.5 in aqua coloured thread. |
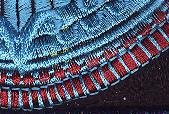 |
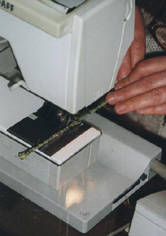
Over the top of the aqua satin stitched border, sew stitch No 165 L = 4.0 using dark red coloured thread, Outside the aqua satin stitch border of the design, sew an additional border using stitch No.02 L =.30 W = 6.0 Over the top of the outer dark red satin stitched border, sew stitch No.111 L = 3.0 W = 6.0 using aqua coloured thread, (shown to the left). |
| |
|
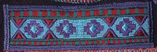 |
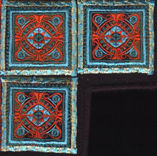
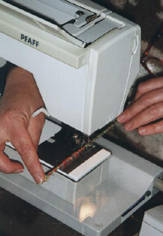
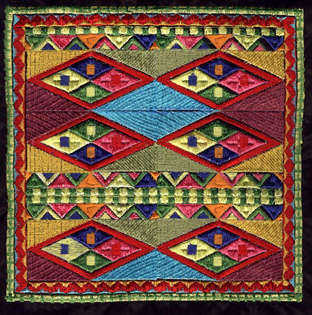
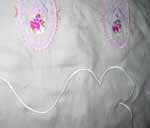
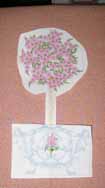
Around xolotl01.pcs design stitch the four chimu.pcs designs, (shown to the left), using stitch No.02 L =.30 W = 6.0 in purple coloured thread. |
| |
|
 |
Over the top of the purple satin stitched border of each design, sew stitch No.132 L = 4.0 W = 6.0 using blue green coloured thread, (shown to the left). |
 |
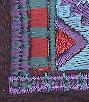
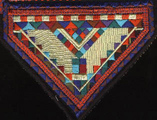
Above each chimu.pcs design, stitch each of the four pattern.pcs designs, (shown to the left), using stitch No. 02 L =.30 W = 6.0 in golden yellow coloured thread. |
 |
Over the top of the golden yellow satin stitch border of each design, sew stitch No. 65 L = 10 W = 6.0 using mauve coloured thread, (shown to the left).
Outside this border, sew an additional border around each design using stitch No. 02 L =.30 W = 4.5 in mauve coloured thread.
Over the top of the outer mauve border of each design, sew stitch No. 143 L = 8.0 W = 5.0 using orange coloured thread (shown to the left). |
| |
|
 |
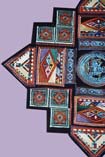
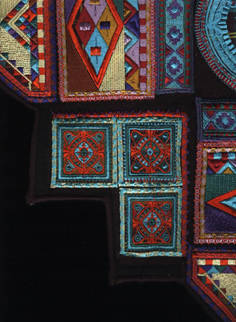
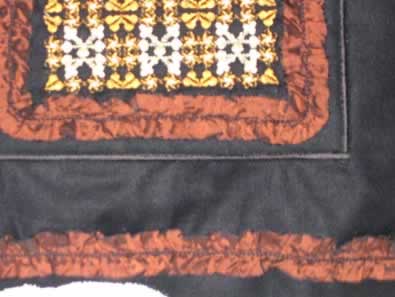
Above each of pattern.pcs designs, stitch each of the four pat02.pcs designs, (shown below) using stitch No.02 L =.30 W = 6.0 in orange coloured thread. |
| |
|
 |
Over the top of the orange satin stitched border of each design, sew stitch No.147 L = 4.0 W = 6.0 using purple coloured thread, (shown to the left). Outside this border, sew an additional border around each design using stitch No. 02 L =.30 W = 6.0 in royal blue coloured thread, (shown to the left).
Over the top of the outer royal blue border of each design, sew stitch No. 63 L = 10 W = 6.0 using tan coloured thread (shown to the left). |
| |
|
 |
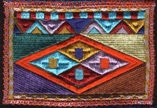
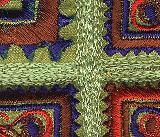
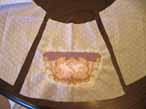
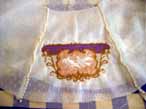
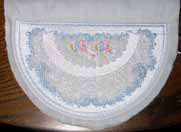
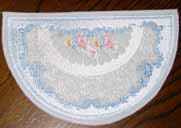
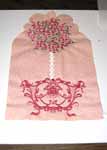
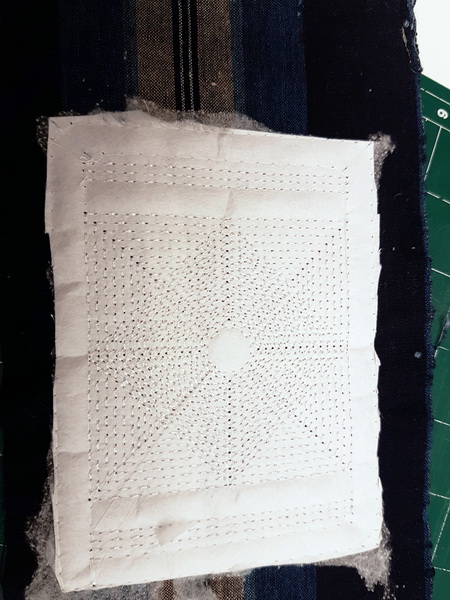
Stitch each of the twelve maya02.pcs designs, (shown below and in diagram No.01 below) using stitch
|
 |
|
| |
|
 |
Over the top of the pale lemon satin stitched border of each design, sew stitch No. 64 L = 10 W = 6.0 using aqua thread, (see below). |
| |
|
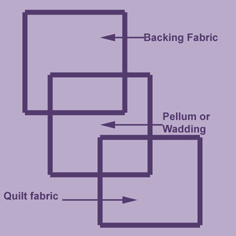
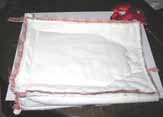
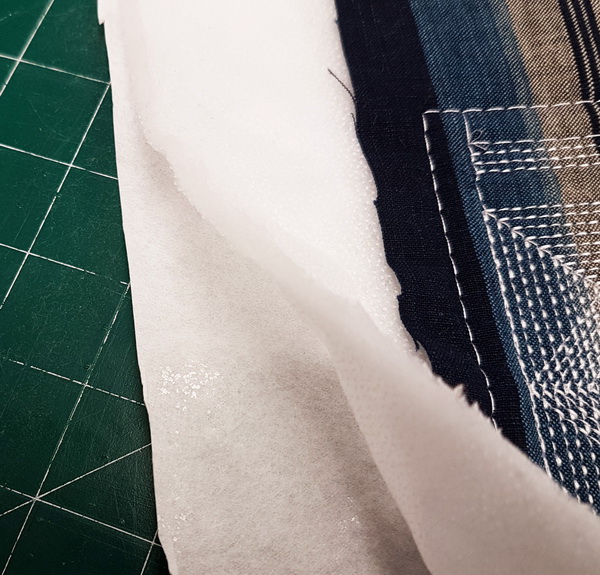
| Having appliqued all the designs onto the quilting fabric, iron on the pellum to the back of the quilt. | |
| |
|
| Attach backing fabric. | |
| |
|
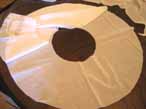
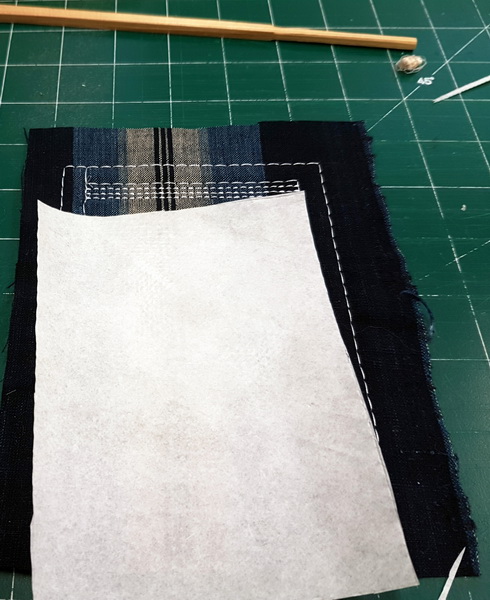
| Cut top fabric, pellum and backing fabric around the outer edges of the designs on the quilt. | |
|
Notions for Chancay Minature Quilt
|
|
Supplies
|
Designs
|
|
Details
|
Size/Quantity
|
Name
|
No.
|
|
Fabric for quilt - yellow green
Iron on pellum Backing fabric Bamboo (satay) sticks |
44 x 44 cm or 17 x 17 inch 44 x 44 cm or 17 x 17 inch 44 x 44 cm or 17 x 17 inch 4 |
maya01.pcs
mayo02.pcs chimu.pcs |
1
12 8 |
|
Colour Chart for Chancay Quilt
|
|
Tip: To produce a dramatic effect, decrease your bobbin so that the bobbin thread shows through whilst you sew maya01.pcs pattern. I used green thread in the bobbin.
|
|
Pattern
|
Colour
No. |
Colour
|
Pattern
|
Colour
No. |
Colour
|
Pattern
|
Colour
No. |
Colour
|
|
maya01.pcs |
|
royal blue
tan red/orange |
maya02.pcs
|
1
2 3 |
|
xolotl01.pcs
|
1
2 3 4 |
royal blue
red/orange bottle green tan |
|
Threads for Chancay Minature Quilt
|
|
Bottle green
|
Red/orange
|
Royal blue
|
Tan
|
|
Bobbin thread for maya01.pcs design - light bottle green.
|
 |
|
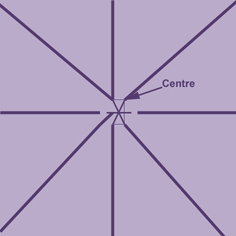
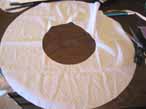
| Mark the centre of your fabric. Tip: I centre my fabric by ironing it into quarters. This will produce the exact centre. |
|
| |
|
| Iron the pellum onto the back of your fabric. | |
| |
|
| Choose a backing fabric. Tip: I like to use up old pieces of fabric. If you don't have enough fabric to fit the square, sew together another piece of fabric. This is a good way of using up those old and odd pieces of fabric. |
|
| |
|
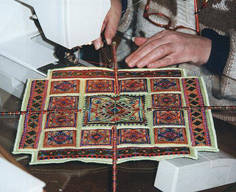
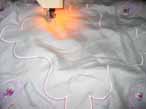
| From the marked centre of your fabric, commence stitching diagonally, using a basting stitch. Tip: Always stitch from the centre, as shown below in diagram 2, below. In that way, you will not experience any puckering. |
|
|
Diagram 1 & 2 |
|
| Pin maya01.pcs design to the centre of the quilt. | |
| |
|
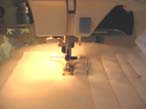
| Lower your feed dogs and put on your darning foot | |
| |
|
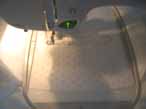
| Free machine embroider, using a straight stitch. | |
| |
|
| Free machine embroider around maya01.pcs design. Free machine embroider around it just once. Note: We will return to this point when all the designs are stitched onto the quilt. |
|
| |
|
|
Diagram 3 |
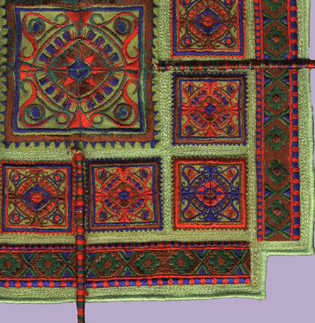
Pin the twelve maya02.pcs designs around the maya01.pcs design, as shown in diagram 3, to the left. After pinning each design onto the quilt, free machine embroider around each of the twelve maya02.pcs designs. |
| |
|
|
Diagram 4 |
Pin each of the eight chimu.pcs designs around the twelve maya02.pcs designs, as shown in diagram 4, to the left. After pinning each of the eight designs, free machine embroider around each of the eight chimu.pcs designs. |
| |
|
|
Now for the fun part! Having stitched all the designs onto the quilt, free machine embroider using the straight stitch around each of the designs on the quilt. Just proceed carefully but quickly, back and forth. Diagrams 5 and 6 show you the free machine embroidery stitching. |
|
|
Diagram 5 & 6 |
|
| |
|
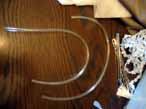
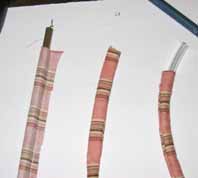
| Now I'll show you how to cover the four bamboo (satay) sticks. This is also a lot of fun | |
| |
|
| Cut off the sharp ends of the bamboo (satay) sticks. | |
| |
|
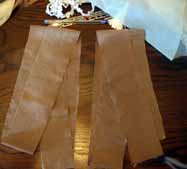
| Cut rectangular pieces of fabric slightly larger than the bamboo sticks and about 7cm (3inches) wide. | |
| |
|
| Lower your feed dogs and attach your darning foot. | |
| |
|
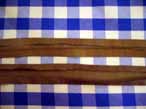
| Fold the rectangular piece of fabric over and along the length of the bamboo stick. | |
| |
|
|
Diagram 7 |
Bring your bobbin thread up and sew a couple of stitches at one end of the stick to tie it down, as shown to the left in diagram 7. Cut both bobbin and top threads. |
| |
|
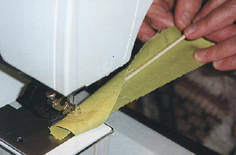
| Set your machine on the zig zag. Stitch at the widest, around 6. | |
| |
|
|
Diagram 8 |
Zig zag over fabric and bamboo stick, as shown to the left in diagram 8. |
| |
|
|
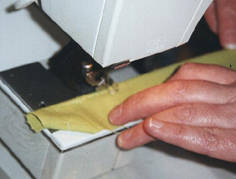
Diagram 9 |
Cut away the extra fabric up to the zig zag stitch, as shown to the left in diagram 9. |
| |
|
|
Diagram 10 |
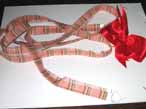
Thread your needle with the royal blue thread and sew using the zig zag stitch. Ensure that you randomly stop it in places. This will produce nice big bulges along the length of the stick. It will only be necessary to do that every now and again, as there are three other colour threads to sew after the first colour. Tip: I normally take my darning foot off, as the thread is starting to get to bulky for the foot to go over. Warning: I must warn you, to be very carfully where you place your fingers. Please keep them a good distance away from your work when doing this. Refer to the position of my fingers asshown below in diagrams 10, 11 and 12. |
| |
|
|
Repeat with procedure, as shown below in diagram 11 and 12, using the bottle green, red orange and tan coloured threads. |
|
|
Diagram 11 & 12 |
|
| |
|
|
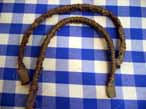
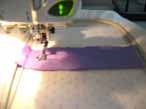
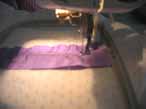
Attach the covered bamboo sticks onto the quilt, sewing them in the same manner that the individual bamboo sticks were stitched. Refer to this procedure, which is shown below in diagrams 13, 14 and 15. Tip:I always completed this stitching procedure by highlighting each one using the red orange coloured thread last. |
|
|
Diagram 13, 14 & 15 |
|


|
Supplies
|
Designs
|
|
Details
|
Size/Quantity
|
Name
|
No.
|
|
Cornflower fabric |
1.5 metres or 1.5 yards |
sun.pcs
|
9
|
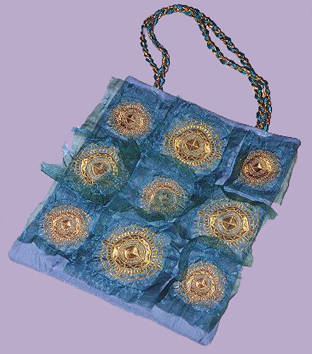
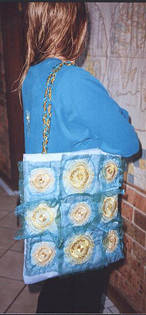
Cut nine pieces of cornflower coloured fabric to fit hoop.
Cut nine pieces of aqua coloured silk organza to fit hoop.
Sew sun.pcs designs onto each of the nine pieces of fabric.
Cut each of the nine pieces of fabric and designs into the shape of a square.
Cut the organza silk into squares. Ensure that they are slightly larger than the size of the fabric squares and designs to create a border around each of approximately 2 cm (1 inch). It doesn't matter if they are all not the same size as they should be slightly different sizes.
Cut four pieces of fabric in the shape of a square of approximately 40 x 40 cm (16 x 16 inches) each in size. These are for the front and back of the bag.
Cut two pieces of wadding in the shape of a square of approximately 40 x 40 cm (16 x 16 inches) in size.
Sew together the front fabric, wadding and backing fabric.
Pin the sun.pcs design in the centre of the fabric pieces. Then pin back the edges of the silk organza so that you do not stitch them down.
Stitch around the sun.pcs motive
Stitch the rest of the sun.pcs motives, as can be seen in the picture of the finished bag, below.
Rub briskly each of the silk organza squares with your hands. This will make the organza fray. As you use the bag, the more the slik organza frays, the better will be its effect on the bag.
For the handles, I braided and then used some gold and aqua piping, which I bought many years ago.

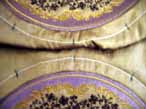
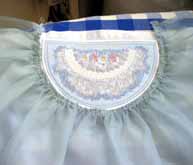
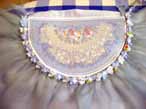
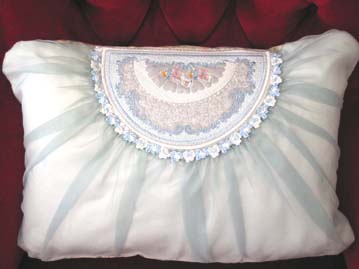
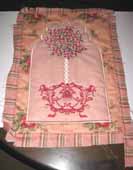
Matching Bedroom and Bathroom Sets
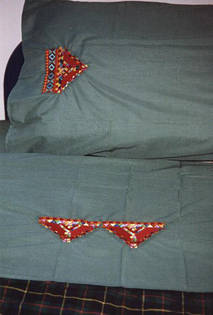 |
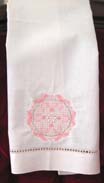
pat02.pcs design used on sheet set |
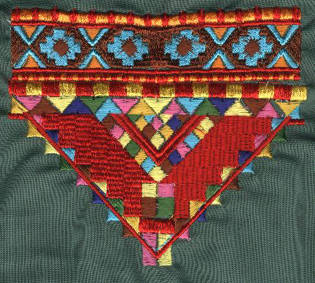 |
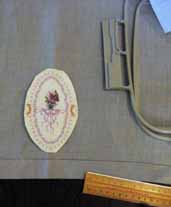
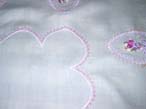
Magnified view of chimu.pcs & pat02.pcs designs used on pillowslip. Stitch the chimu.pcs design first then bring in the pat02.pcs design. |
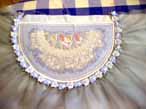
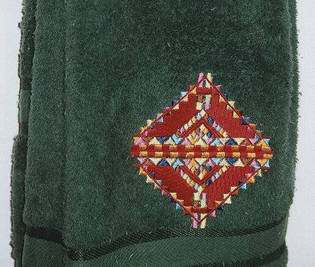 |
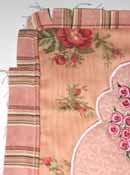
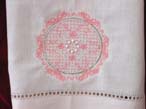
pat02.pcs design used on towel |
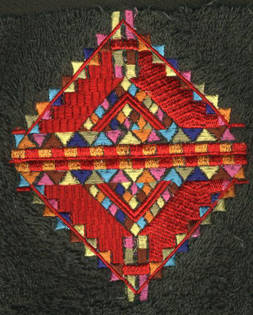 |
Magnified view of pat02.pcs design. Used back to back on towel. |
| I stitched the pat02.pcs design, back to back on the towel. There was however, a slight gap between the two designs, so I used a satin stitch between the base of the two designs using red coloured thread |
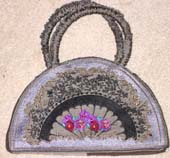
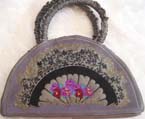
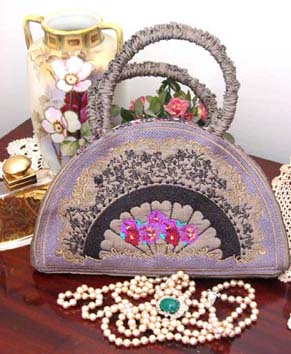
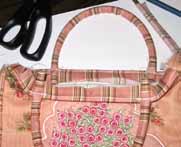
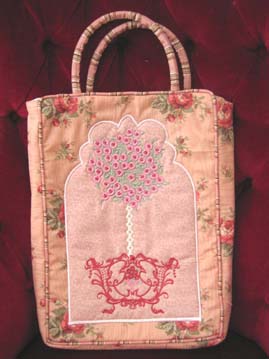
Inca Bag
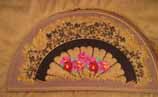
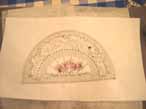
Pattern 2.PCS
Inca Bag
Cut six pieces of fabric to fit hoop. These pieces are for the designs.
On one piece of fabric, locate the top LHS of your hoop. Stitch out pattern2.pcs design.
Repeat procedure 2 using the pattern2.pcs design on each of the other five pieces of fabric. This is your opportunity to be creative - try mirroring the design in every position. Look closely at my bag pattern, above and notice the mirror methods which I have deployed to create an intricate, overall interesting and attractive pattern.
Cut the fabric into rectangles. Ensure that they are slightly larger than the size of the pattern2.pcs design to create a border around each of approximately 2 cm (1 inch). They should all be approximately the same size.
Cut four pieces of fabric in the shape of a square of approximately 35 x 35 cm (14 x 14 inches) each in size. These are for the front and back of the bag.
Cut two pieces of wadding in the shape of a square of approximately 35 x 35 cm (14 x 14 inches) in size.
Sew together the front fabric, wadding and backing fabric.
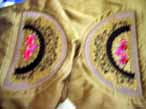
Arrange the six pattern2.pcs designs, closely together, in the centre of the front fabric piece as one would do for patchwork.
When you are completely satisfied with the overall appearance of your creative work, then pin each and all the pattern2.pcs designs in place.
Stitch the first pattern2.pcs design into place on the front fabric panel.
Continue stitching .the rest of the designs into place, adjacent to one another, forming a continuous block. Ensure that there are no gaps between them.
Around the block of six patterns, sew an inner border using stitch No. 02 L =.30 W = 9.0 in red coloured thread.
Over the top of the red coloured border, sew stitch No. 63 L = 10 W = 4.5 using golden yellow coloured thread.
Over the top of the red coloured border, sew stitch No. 63 L = 10 W = 4.5 using aqua coloured thread.
Outside the red border, create an outer border by sewing stitch No. 02 L =.30 W = 6.0 using lemon coloured thread
Over the top of the outer lemon coloured border, sew stitch No. 74 L = 70 W = 6.0 in dark yellow green coloured thread.
For the handles, I purchased some black piping, which I braided, then attached.
Betty Machine Embroidery Design Instructions
|
Using the design Betty in a combination with another design called Charlotte |
|
| |
|
 |
I had a small amount of Liberty fabric from London left over. I used the same colour thread as in the liberty fabric. Then I used the small amount of Liberty fabric to make a unique border. I stitched using a satin stitch the Liberty fabric onto the white linen |
| |
|
 |
|
| |
|
 |
As you can see both of these cushions are from the Betty design set but look so different. You can use the same design set over and over again by changing fabric, borders and thread colour's. |
| |
|
 |
I bought many years ago this beautiful silk taffeta tan ruffle. As you can see it does not look over the top with the two layers of silk taffeta due to the black background fabric and the colour's in the Betty design are subtle |
| |
|
 |
|
 |
|
Bright and Beautiful Instructions
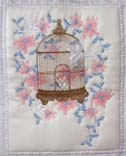
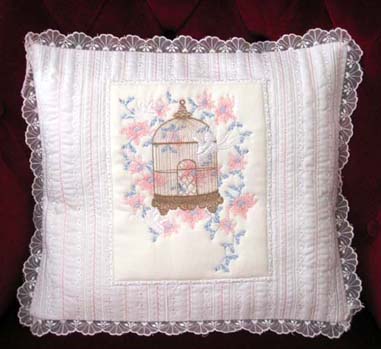
Birdcage Cushion
|
|
 |
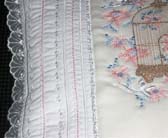
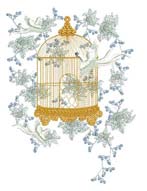
I could not find the right fabric from my fabric stash to match the "Birdcage" design that I had just stitched. So I made my own fabric by using white cotton fabric and then stitching decorative stitches using the same colour thread that I used in the "Birdcage design Stabilizer
|
| |
|
 |
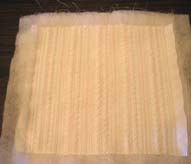
I ironed the centre which gives you a good base to do your first stitch the stitch I used was
|
| |
|
 |
|
| |
|
 |
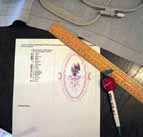
This photograph explains how I use the tool for the exact distance between each triple straight stitch |
| |
|
 |
Still going with the triple pink straight stitch |
| |
|
|
|
| |
|
|
Over the top of the triple straight stitch in pink colour thread I stitched No. 18 L=1.0 W=6.0 in a cream colour thread |
| |
|
|
I then stitched using the zigzag stitch a satin stitch in a cream colour thread 02 L=.35 W=2.5 |
| |
|
 |
A better photograph of the decorative stitches |
| |
|
 |
Applique the "Birdcage" design over the decorative stitches using a zigzag stitch and then satin stitch over the zigzag stitch. |
| |
|
|
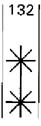
Once I had satin stitched and appliqued the "Birdcage" design I then stitched on top of the satin stitch No. 132 using white colour thread No. 132 L=12 W=6.0 |


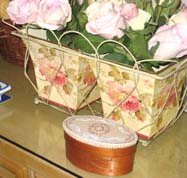
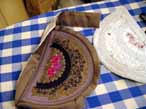
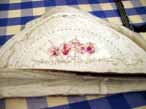
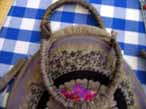
Bows and Things Skaker Box
|
|
 |
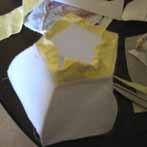
I stitched "Bows and Things" design on a very fine cream silk and I used as a stabilizer the following
|
| |
|
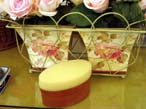 |
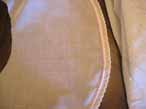
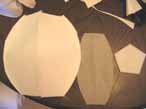
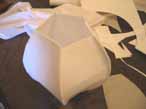
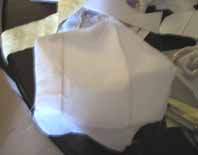
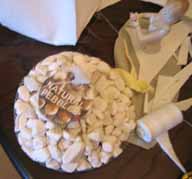
I purchased the oval Shaker Box from a Museum in the States I looked up on the net and you can purchase the box or boxes. Click on the URL below I also found another place where you can purchase the most gorgeous boxes |
| |
|
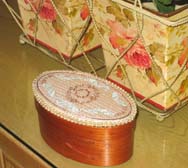 |
The instructions showing you how to cover the lid came with the box. |
 |
|
 |
|

My Lovely Handbag
|
|
 |
I stitched "My Lovely" on a smoky gray silk |
| |
|
 |
Stabilizer
|
 |
Stitch out of both sides |
| |
|
 |
Stitch out of both sides sorry about the photograph. I stitched around each of the "My Lovely" designs. This gives you an exact place to put the two sides together |
| |
|
 |
Handles for the purse. I purchased the plastic tubing from the Hardware shop in the pool section |
| |
|
 |
The same silk as the purse for the handles. I cut 3 times the length of the plastic tubing |
| |
|
 |
Using your iron press edges on both sides |
| |
|
 |
Stitch the pressed sides together |
| |
|
 |
Gather the pressed silk fabric through the tubing |
| |
|
 |
Mark the centre of "My Lovely" purse and then mark from the centre where you would like the handles placed |
| |
|
 |
Stitch a panel onto each of the "My Lovely" stitch outs |
| |
|
 |
Both stitch outs stitched to the panel |
| |
|
 |
Stitch the handles onto purse and then hand stitch your lining inside the bag |
| |
|
 |
Close up of finished purse with the lining inside |
| |
|
 |
Another close up |
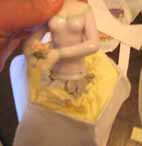
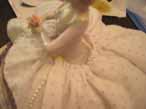
Porcelain Doll
|
|
 |
I purchased the half doll at a Stitches and Craft fair a few years ago in Sydney but it came without any instructions. If anyone has better instructions, please email me. As I would like to make more of these half dolls I did find using Goggle this web site below if you are interested in making a half doll. Click on the URL below http://www.brierrose.com/halfdoll.htm
|
| |
|
 |
|
| |
|
 |
|
| |
|
 |
|
| |
|
 |
Note: The best gold thread I have found and have used for over 15 years is King Star. I belonged to the local Pfaff Club and all the ladies raved about this gold thread. Have used it ever since |
| |
|
 |
|
| |
|
 |
|
| |
|
 |
|
| |
|
 |
|
| |
|
 |
|
| |
|
 |
|
| |
|
 |
Sorry the photo is a bit blurry |
| |
|
 |
Just to add a bit of dimension I marked with my fabric marker pen where I wanted to cut the fabric to use the pearls |
| |
|
 |
Cut the fabric |
| |
|
 |
Stitch the pearls or what ever you may wish |
| |
|
 |
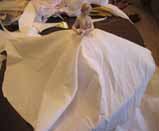
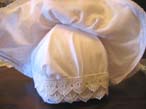
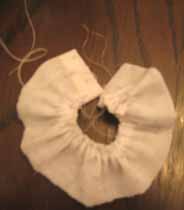
As I used a very fine Swiss Cotton fabric I needed to cut out a fine cotton for the petticoat |
| |
|
 |
I used a lovely scolloped cotton edging for the petticoat |
| |
|
 |
|
| |
|
 |
|
| |
|
 |
All the sides stitched together |
| |
|
 |
Bottom panel stitched |
| |
|
 |
|
| |
|
 |
|
| |
|
 |
I put the two bags of pebbles into the base |
| |
|
 |
|
| |
|
 |
|
| |
|
 |
|
| |
|
|
Glue a few layers of lace, which finishes it off nicely |
| |
|
 |
|
| |
|
 |
|
| |
|
|
|
| |
|
|
|

My Lovely Cushion
|
|
|
|
| |
|
 |
|
| |
|
 |
zigzag where you wish to cut your fabric |
| |
|
 |
You can see in this photo where I zigzaged and cut the blue linen fabric |
| |
|
 |
|
| |
|
 |
|
| |
|
 |
Stitch the pale blue silk voile where you had pinned the voile |
| |
|
 |
I had some lovely blue and white flowers to put around the gathering which matched perfectly but you can use lace etc. |
| |
|
 |
Pin the flowers or lace etc over your gathers |
| |
|
 |
Stitch the flowers, lace etc. |
| |
|
 |
This is the back of the cushion turned inside out and ready to cut the excess fabric on the seams |
| |
|
 |
Cutting away all the excess fabric from the seams |
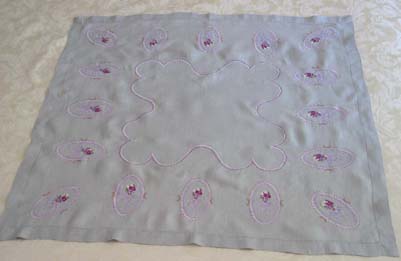
Tablecloth
|
|
 |
|
| |
|
 |
Work out where you would like all the "Ellipse" designs to be placed on your table cloth |
| |
|
 |
|
| |
|
 |
Mark with a pin the centre of the "Ellipse" design and then use a fabric marker pen where the centre pin is, as this will be the placement for your sewing machine needle |
| |
|
 |
Use a wash away stabilizer I suggest 2 sheets |
| |
|
 |
Design a very simple pattern for the centre of the table cloth |
| |
|
|
The decorative stitches I have used you will find most machines do have the stitches but if not, use a similar type of stitch or experiment and have fun with those decorative stitches When experimenting with your decorative stitches also change the lengths and widths. |
| |
|
 |
To enable for you to get a raised satin stitch this is what I suggest |
| |
|
|
|
 |
You can see in the photograph above the raised satin stitch |
| |
|
 |
On the outside of the satin stitch using the same coloured thread that is in your "Ellipse" design I used the same stitch. All the machines have this decorative stitch
No. 156 L=6.0 W=4.0 |
| |
|
 |
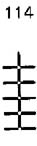
Over the top of your white satin stitch use the same colour threadas you have used in the "Ellipse" design and stitch No. 114
No. 114 L=3.0 W=4.0 |
| |
|

Essence Bag
|
|
 |
Stabilizer
|
| |
|
 |
|
| |
|
 |
Where you have marked the centre of each template put a pin through the centre and mark your design fabric with a fabric marker pen |
| |
|
 |
Showing you both templates being marked on your choice of fabric for the design |
| |
|
 |
|
| |
|
 |
Stitch Essence_a1 out first |
| |
|
 |
|
| |
|
 |
|
| |
|
 |
Put the tracing paper frame over the Essence design Pin the tracing paper over the design |
| |
|
 |
Cut out the frame |
| |
|
 |
Already to stitch |
| |
|
 |
|
 |
Applique the Essence design frame onto the bag fabric using your zigzag stitch |
| |
|
 |
|
| |
|
 |
I made bias binding in a contrasting fabric |
| |
|
 |
Stitch the bias binding to the front of the bag as shown |
| |
|
 |
To make a nice clean edge to your corners cut close to the bias binding as shown |
| |
|
 |
Sew the bag together |
| |
|
 |
|
| |
|
 |
Sew the handles on the bag |
Bows and Things Handbag
|
|
 |
|
| |
|
 |
Close up of the design |
Grand Entrance Instructions
Instructions to make Grand Entrance Jewellery
I used these old earrings that I purchased in South America on one of the necklaces.
For the backing of each piece of jewellery I use a thick heavy weight tear a way, medium weight wadding
Cut away the tear a way and wadding from the border

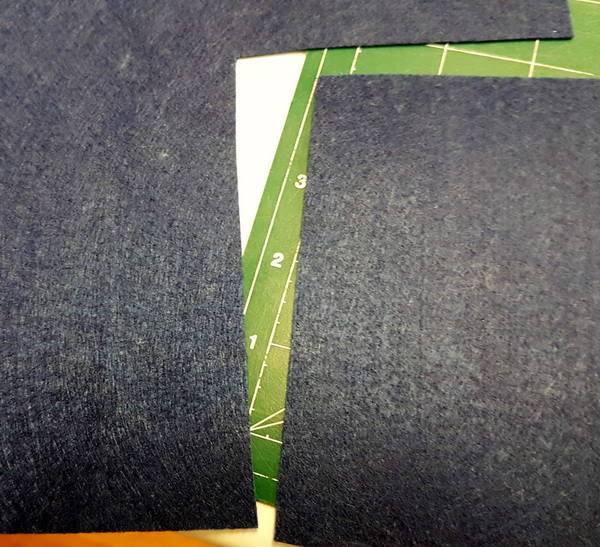
Trace on grease proof paper the outer border to make a template
Cut the grease proof paper for your template
I used a very thick water resistant cardboard for the backing board (I only used this as I had some on hand) but you can use ice cream plastic buckets as it is easy to cut and it is a good excuse to buy your favourite ice cream.
Cut the backing board using the template
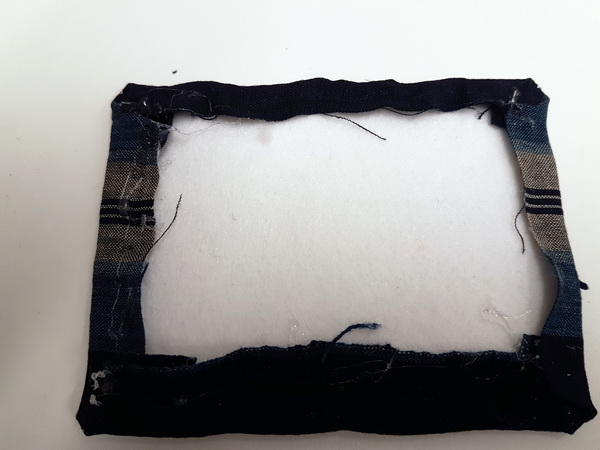
Hot glue down the fabric to the backing board or ice cream plastic
From your template cut felt to cover the back plate
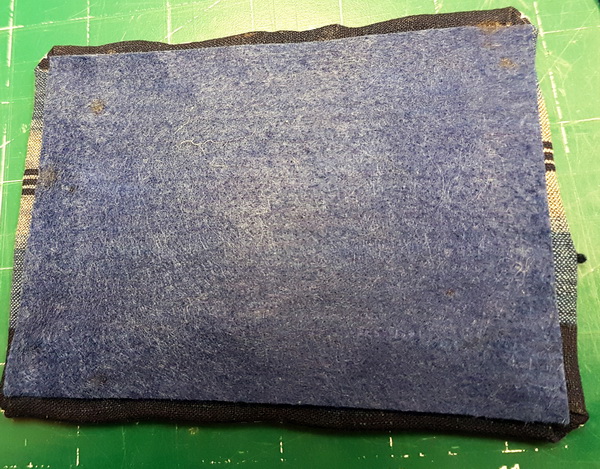
Hot glue the felt onto the fabric, this gives your work a nice clean finish
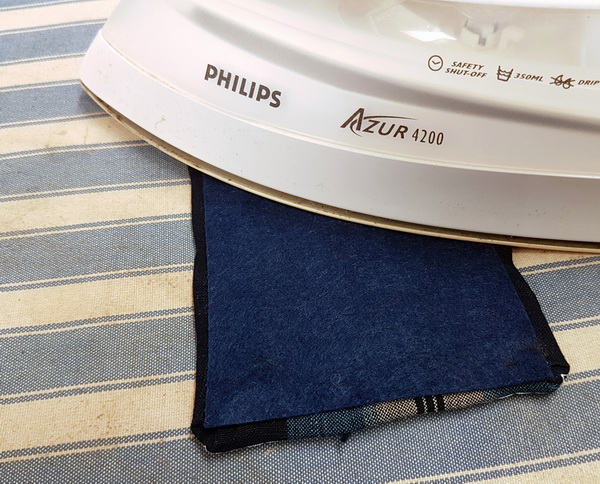
Press with your iron on very hot (No steam) over the felt this makes the hot glue spread so the glue is not lumpy
Machine Embroidery Designs
Latest Releases
Folklore Machine Embroidery Designs
Released on the 25th June 2019

6 designs included in the Folklore machine embroidery design set.
The Folklore design is suitable for a 6 x 10 inch or 240mm x 150mm hoop.
The Folklore design is available in DST, EMB, EXP, HUS, JEF, PES, VIP, VP3 and XXX.
The colour chart is included in the design set
As I am now digitizing with Wilcom embroidery software (which is a commercial software) we are unable to convert files to ART format. Bernina embroidery machines will now need to purchase designs in EMB or EXP format. Sorry for the inconvenience.


