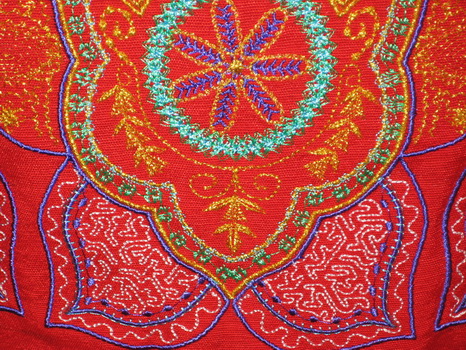
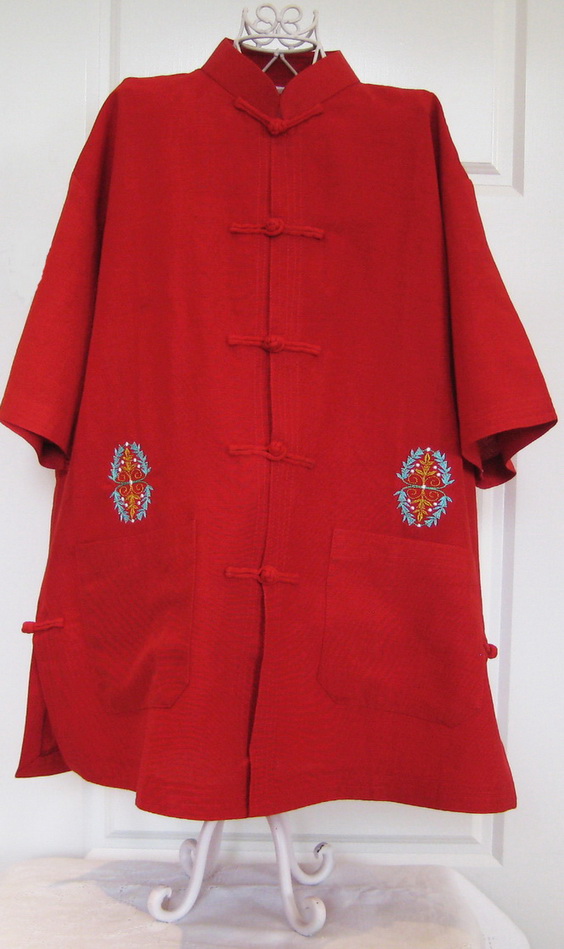
Back of Red Jacket Instructions
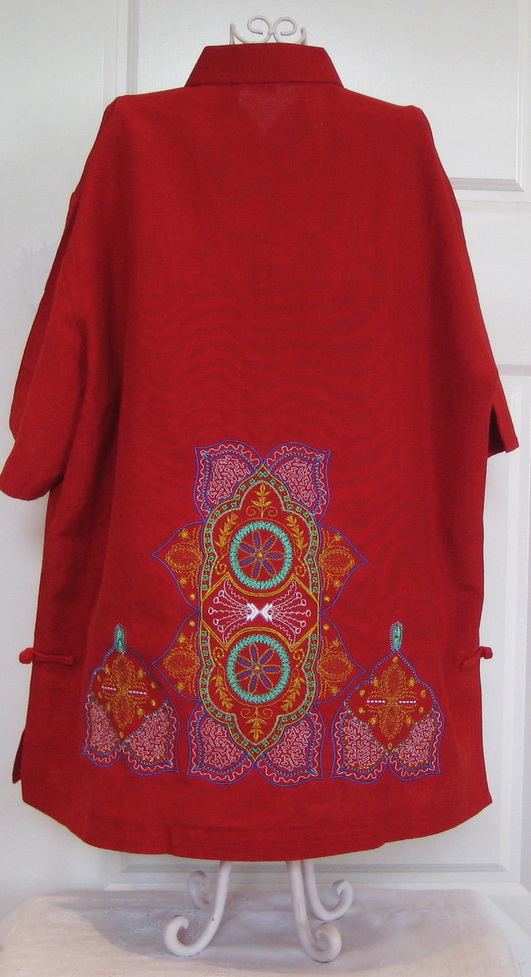
The overall design length and width
- 31 cm or 12.2 inches in length
- 39 cm or 15.4 inches in width
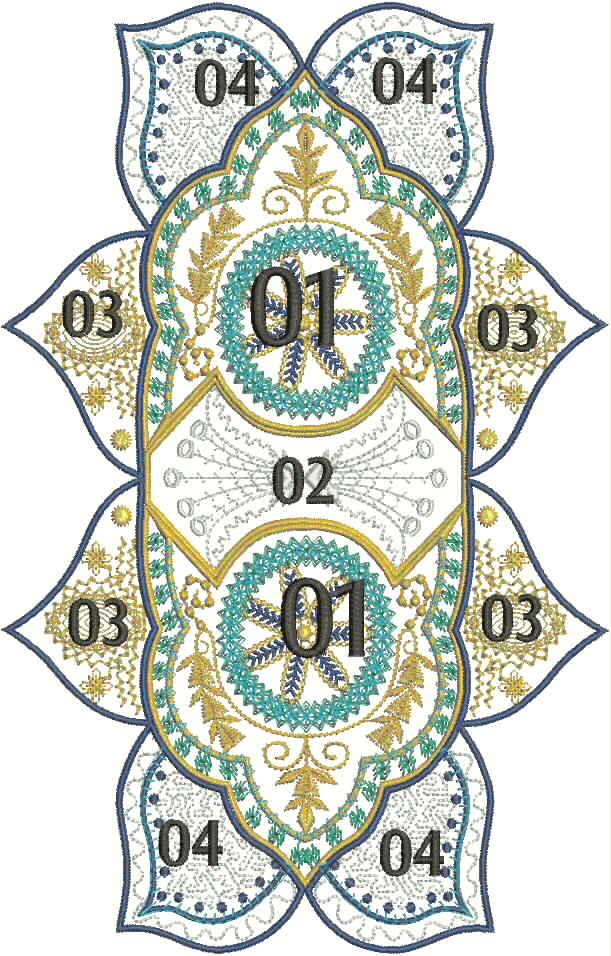
Above photo is showing you the numbers of the all the designs, this should make it easy for you to place the designs
Instructions for 5 x 7 inch or 180 x 130 size hoop
Stitch out the following:
- 2 x “Add a touch_01”
- 1 x “Add a touch_02”
- 1 x “Add a touch_03”
- 1 x “Add a touch_04”
- 2 x “Add a touch_08”
- Zigzag stitch “Add a touch_01” to “Add a touch_02”
- On the other side of “Add a touch_02” zigzag stitch the other “Add a touch_01”
- Zigzag stitch the four “Add a touch_03” and “Add a touch_04”
- Zigzag stitch the whole design down onto a Jacket, cushion, bed topper or whatever
On either side of the centre design stitch:
- “Add a touch_08”
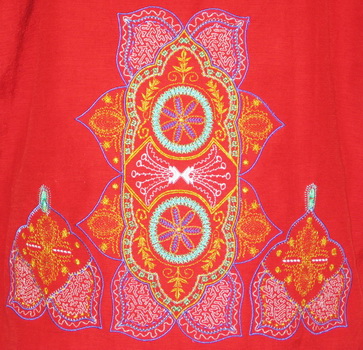
Instructions for 6 x 14 inch or 150 x 360 size hoop
Stitch out the following
- 1 x “Add a touch_05”
- 1 x “Add a touch_03”
- Stitch “Add a touch_05” onto the jacket or whatever you are stitching this design on
- Stitch out “Add a touch_03”
- Cut away any excess fabric from the designs
- Zigzag stitch all four designs in their correct position
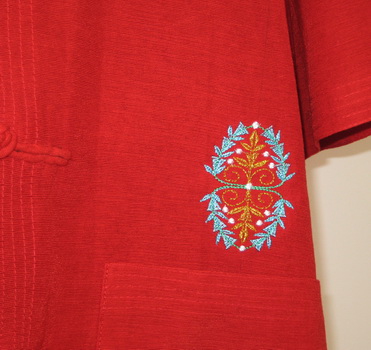
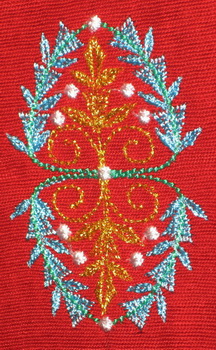
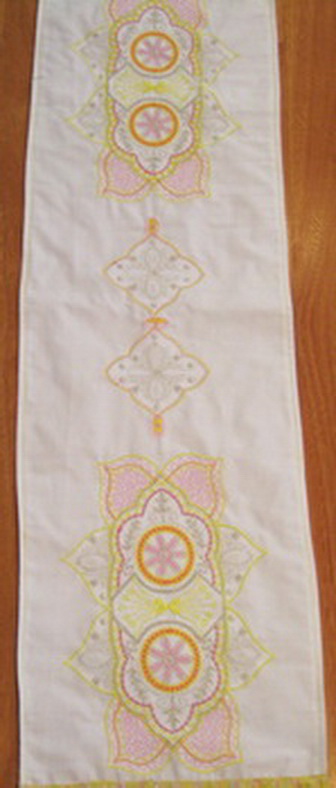
Close up of design
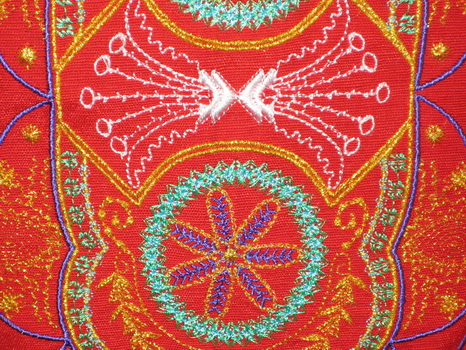
Close up of design
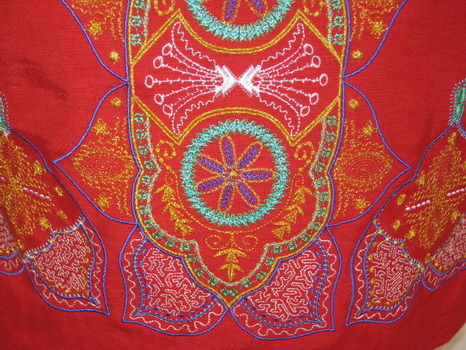
Close up of design
Close up of design
Instructions for the front of the Red Jacket
Stitch two of “Add a touch_17” on either side of front panel
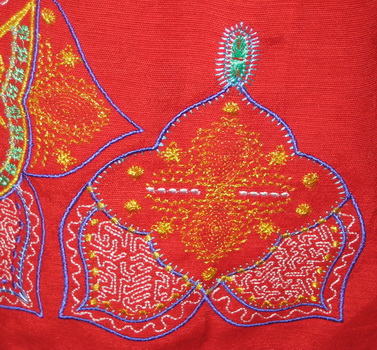
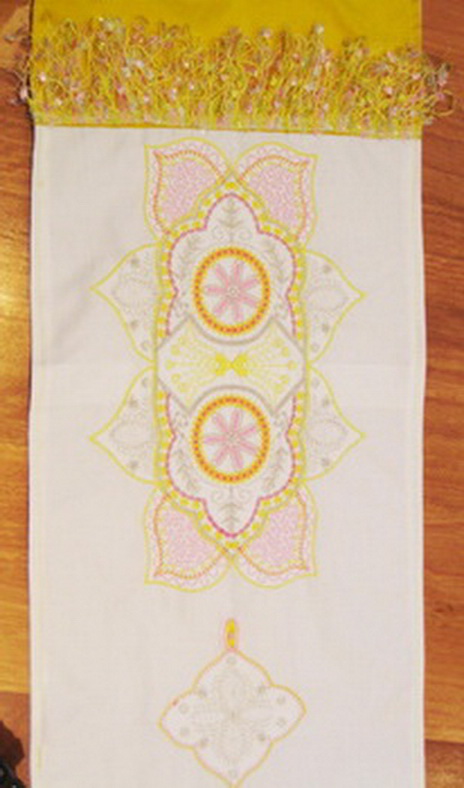
Close up of design
Close up of design
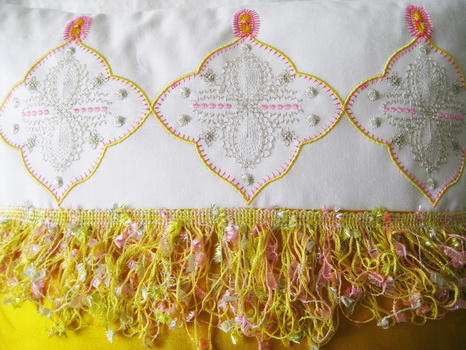
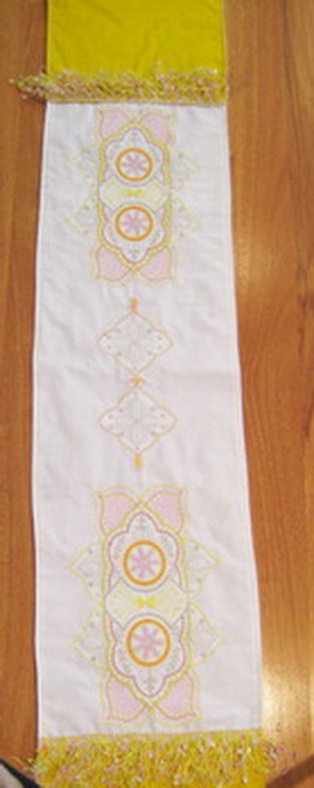
Instructions for the Bed Topper
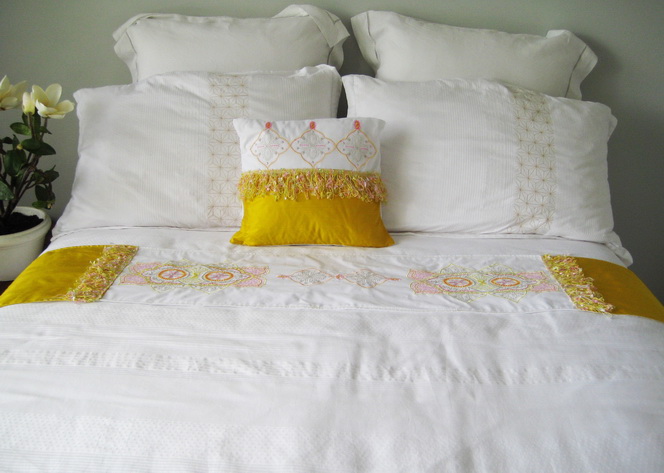
The overall length and width
- 158 cm or 62.2 inches in length
- 28 cm or 11 inches in width
Instructions for 5 x 7 inch or 180 x 130 size hoop
Stitch out the following designs:
- 4 x “Add a touch_01”
- 2 x “Add a touch_02”
- 2 x “Add a touch_03”
- 2 x “Add a touch_04”
- Zigzag stitch on the satin stitch border “Add a touch_01” to “Add a touch_02”
- On the other side of “Add a touch_02” zigzag stitch the other “Add a touch_01”
- Zigzag stitch the four “Add a touch_03” and “Add a touch_04”
- Zigzag stitch the whole design down onto a Jacket, cushion, bed topper or whatever
Stitch as shown in the photo in the centre
- “Add a touch_23” first
- “Add a touch_25”
Instructions for 6 x 14 inch or 150 x 360 size hoop
Stitch out the following:
- 2 x “Add a touch_05_150x360”
- 2 x “Add a touch_03”
- Stitch “Add a touch_05_15-x360” onto the fabric
- “Add a touch_03” Cut away any excess fabric from the satin stitch border
- Zigzag stitch all four designs in their correct position to make one complete design
Stitch as shown in the photo in the centre
- “Add a touch_24_150x360”
Add a Touch Cushion Instructions
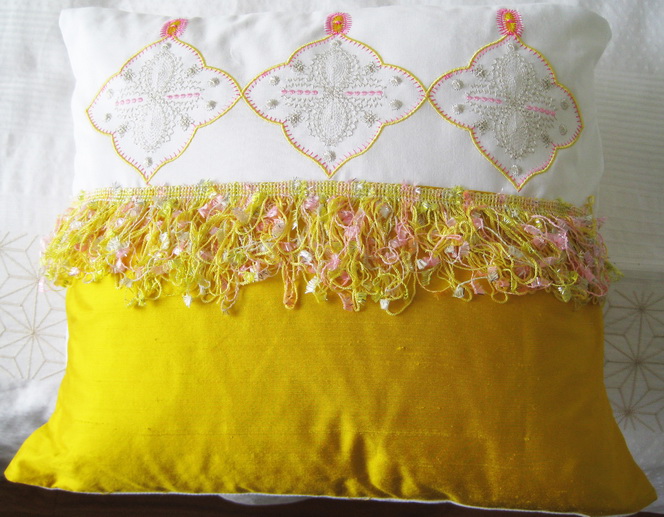
• Stitch 3 “Add a touch_23” side by side