Notions:

  • 3 meters of cream linen
  • 1 cone of 2,000meters of blue thread (I used King Star No. 306)


Instructions for stitching the blocks together to form a wall hanging


Stitch all the 16 blocks out


Trim fabric away from each of the 16 blocks with your scissors as close to the satin stitched edge as possible (HINT when cutting the fabric with your scissors always keep the fabric to your right, that way you will never cut the satin stitch edging)


Centre your backing fabric to be ready for you to place the first stitch out block with a + for placing the blocks


On the back of the No. 6 block spray glue, as seen in the photograph to the left.


Place No. 6 block on one side of the + As seen in the photograph below and stitch a zigzag stitch over the satin stitch border that is part of the block

   
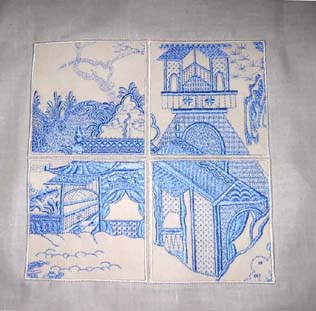
Place No. 7 block on the other side of the + 


Place No. 10 block below No. 6


Place No. 11 block below No. 7


Glue and stitch all the other blocks in their right position

   
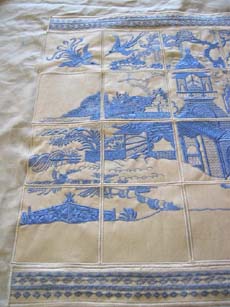
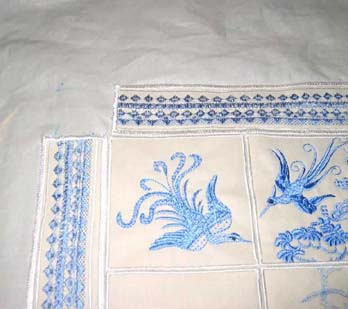
  Place the decorative stitch border as seen in the photographs below
 
   
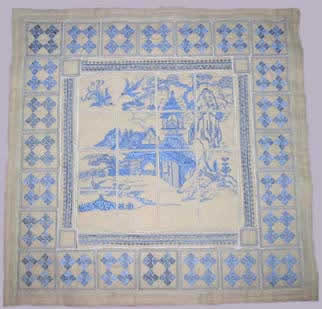
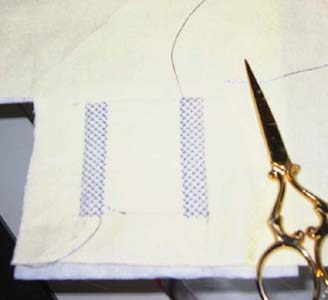
  Stitch the small square border as seen in the photograph to the left.
Stitch all the 24 border squares around the decorative stitch border, as you can see in the photograph above.
   
   
 Border using the decorative stitches from your machine
   
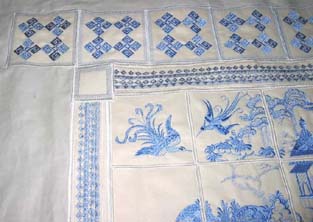
Photo of the border for the quilt using the decorative stitches from the sewing machine
   
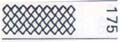
  First stitch out the satin stitch Length .35 Width 7.0 Blue thread matching the same blue in the quilt
   
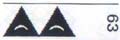
Triangle stitch Length 10 Width 9.0 Blue thread
   
Stitch over the top of the satin stitch (No.1) Length 5.0 Width .50 in white thread
   
  On either side of the blue satin stitch (No. 1) use the double straight stitch Length 3.0 in white thread
   
  Beside the triangle stitch (No. 2) Length 3.0 Width 6.0 in blue thread
   
Over the top of the stitch you just did (No. 5) Length 10 Width 6.0 in blue thread
   
In between the triangle (No. 2 and No. 5) I stitched in every second gap the round satin stitch Length 4.0 in blue thread
   
Once again I did another triangle stitch beside the satin stitch and double straight stitch (No.1 and No. 4) in blue thread.
   
   
 Border small square at each end of the wall hanging
   

Stitch Length 3.0 Width 6.0 in Blue thread 
   
Stitch a satin stitch border
Satin Stitch border
length 1.0 Width 2.5 Do this twice (This gives the satin stitch a heavier border)
length .35 Width 5.0 Over the top of the satin stitch you just stitched out


 Instructions for the Serenity Cushion


Notions:

  • 2 meters of black linen
  • 4 Tassels
  • 1 Sulky Ultra Twist 700yds/640meters Colour No. 923-3035 (I have never used the twist threads before and found these threads excellent to work with)

Follow the instructions from the Wall Hanging

  1. Instructions from No's 1 to No. 9


Machine Embroidery Designs

 Latest Releases


Folklore Machine Embroidery Designs

Released on the 25th June 2019


 Folklore Machine Embroidery Designs by StitchingArt


6 designs included in the Folklore machine embroidery design set.

The Folklore design is suitable for a 6 x 10 inch or 240mm x 150mm hoop.

The Folklore design is available in DST, EMB, EXP, HUS, JEF, PES, VIP, VP3 and XXX.

The colour chart is included in the design set

As I am now digitizing with Wilcom embroidery software (which is a commercial software) we are unable to convert files to ART format. Bernina embroidery machines will now need to purchase designs in EMB or EXP format. Sorry for the inconvenience.

View the Folklore Machine Embroidery Designs

Mayil Machine Embroidery Designs

 
Mayil Machine Embroidery Designs

 Released on the 28th May 2019

6 designs included in the Mayil machine embroidery design set.

The Mayil design is suitable for a 14 x 8, 14 x 7 or 360mm x 200mm, 360mm x 150mm hoop.

The Mayil design is available in DST, EMB, EXP, HUS, JEF, PES, VIP, VP3 and XXX.

The colour chart is included in the design set

As I am now digitizing with Wilcom embroidery software (which is a commercial software) we are unable to convert files to ART format. Bernina embroidery machines will now need to purchase designs in EMB or EXP format. Sorry for the inconvenience.

View the Mayil Machine Embroidery Designs


springoflife4


Spring of Life Machine Embroidery Designs

 Released on the 27th April 2019

9 designs included in the Spring of Life machine embroidery design set.

The Spring of Life design is suitable for a 5 x 7, 6 x 10, 8 x 12 inch or 180mm x 130mm, 240mm x 150mm and 360mm x 200mm hoop.

The Spring of Life design is available in DST, EMB, EXP, HUS, JEF, PES, VIP, VP3 and XXX.

The colour chart and instructions are included in the design set

As I am now digitizing with Wilcom embroidery software (which is a commercial software) we are unable to convert files to ART format. Bernina embroidery machines will now need to purchase designs in EMB or EXP format. Sorry for the inconvenience.

 View the Spring of Life Machine Embroidery Designs


Wild and Free Machine Embroidery Designs


Wild and Free Machine Embroidery Designs

 Released on the 2nd February 2019

6 designs included in the Wild and Free machine embroidery design set.

The Wild and Free design is suitable for a 6 x 10 inch or 240mm x 150mm hoop.

The Wild and Free design is available in DST, EMB, EXP, HUS, JEF, PES, VIP, VP3 and XXX.

The colour chart and instructions are included in the design set

As I am now digitizing with Wilcom embroidery software (which is a commercial software) we are unable to convert files to ART format. Bernina embroidery machines will now need to purchase designs in EMB or EXP format. Sorry for the inconvenience.

 View the Wild and Free Machine Embroidery Designs