


Bold and Beautiful Machine Embroidery Design Instructions
Garden Scene Instructions
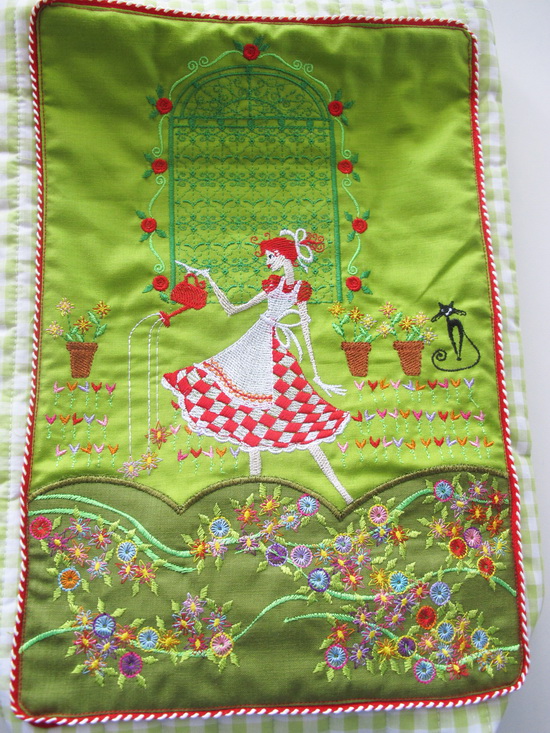
Suggestions for using the Garden Scene designs:
- Apron
- Frame your work (would look lovely in a kitchen)
- Cushion
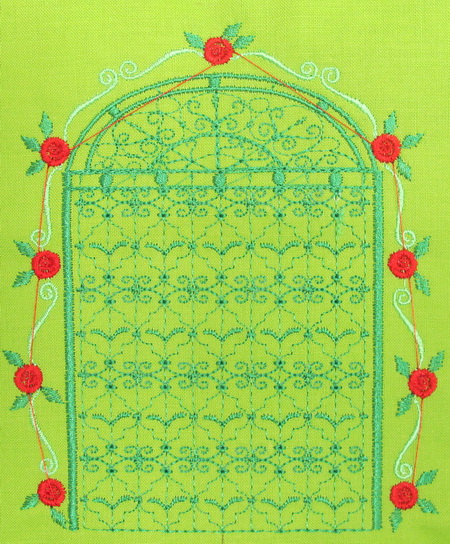
Stitch out Bold and Beautiful_06
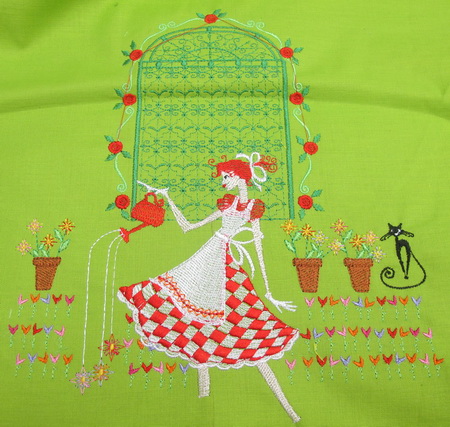
Place over the gate “Bold and Beautiful_08” as seen in the photo above
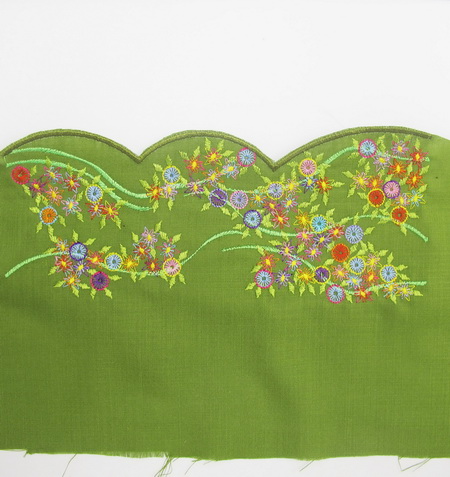
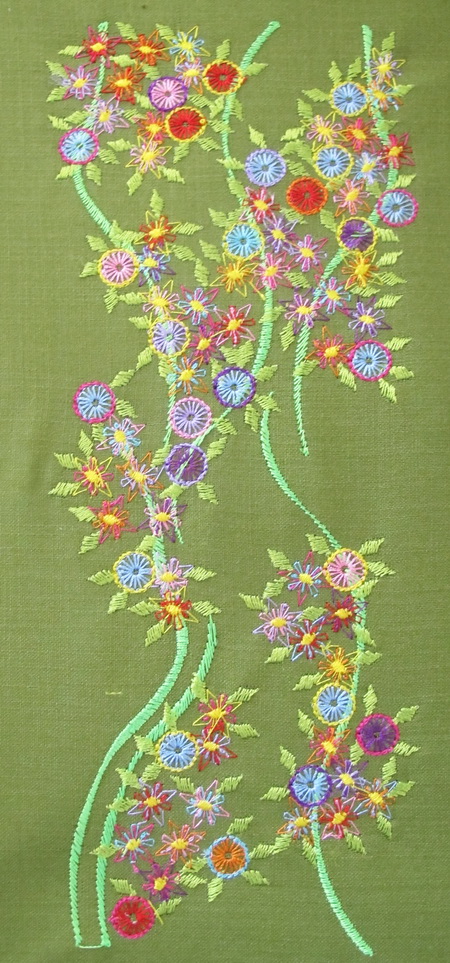
- Stitch on a darker green fabric “Bold and Beautiful_11”
- Cut around the excess fabric from the satin stitch border
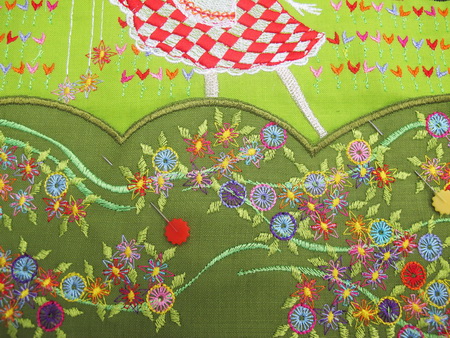
Place the flower garden over the ladies legs as seen in the photo above
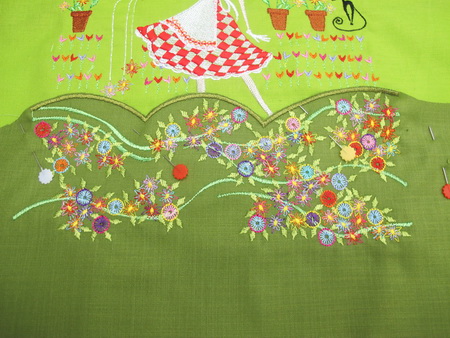
Zigzag stitch the satin stitch down onto the background fabric
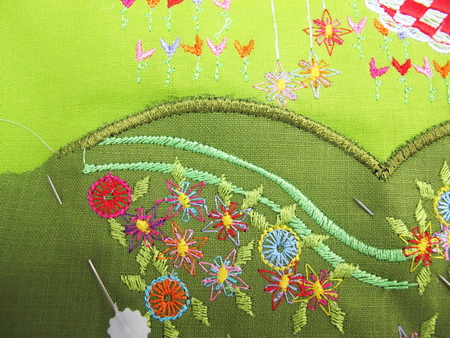
Photo showing the zigzag stitch to the background fabric
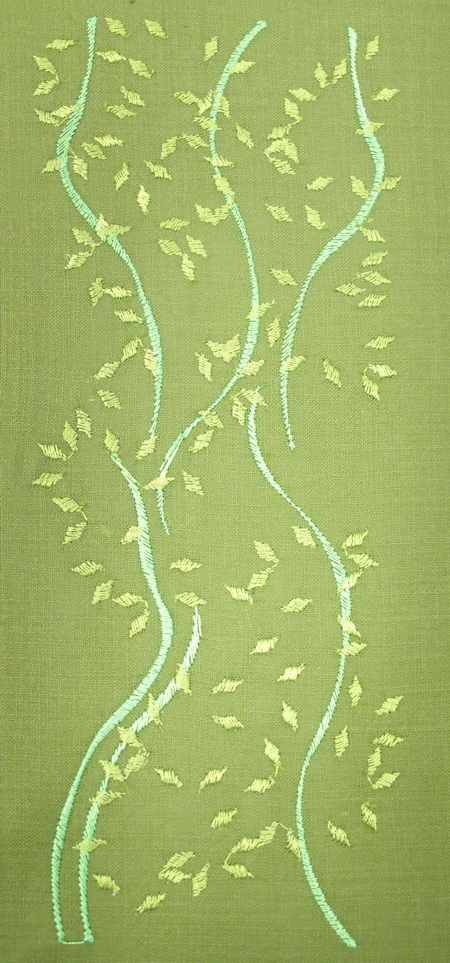
I stopped at the second colour; this would look stunning on clothing.

Close up photo showing the stitches
Another photo showing a close up of stitches
Sewing Machine Caddy
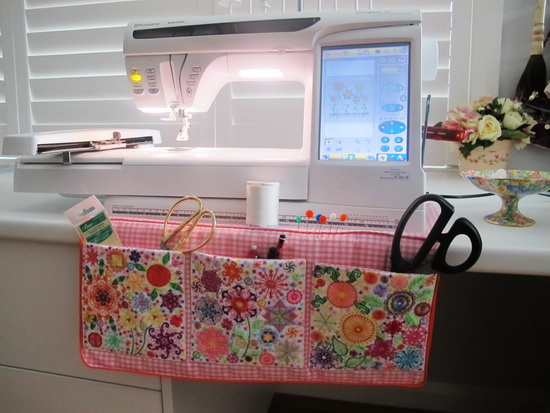
I made a sewing caddy for the machine using the following designs
- Bold and Beautiful_01
- Bold and Beautiful_02
- Bold and Beautiful_03
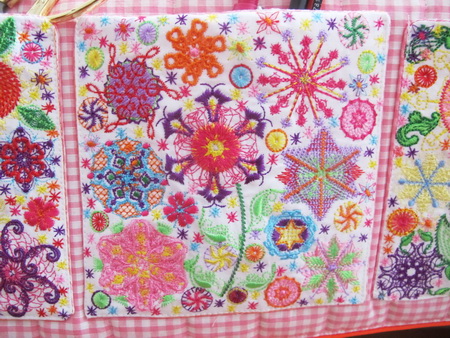
Close up of “Bold and Beautiful_02”
Close up of “Bold and Beautiful_02”
Close up of “Bold and Beautiful_01”
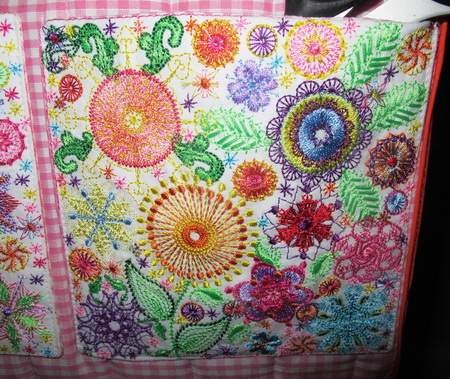
Detail of embroidery
Detail of work
Detail of work
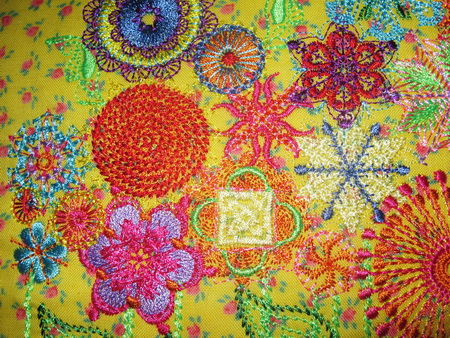
Bold and Beautiful Cushion
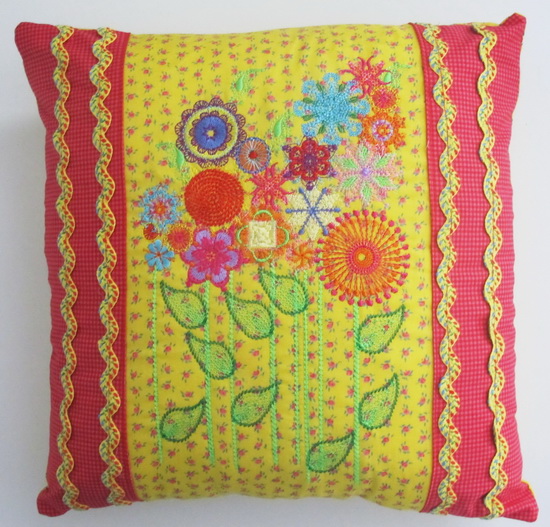
In the centre of the cushion, the stitch out was “Bold and Beautiful_04”
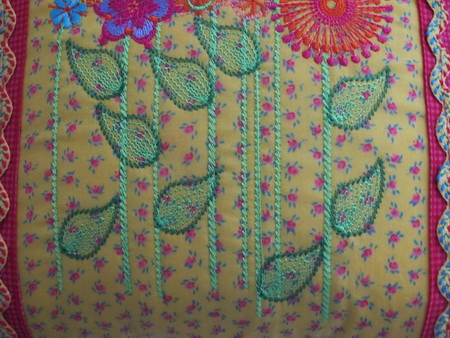
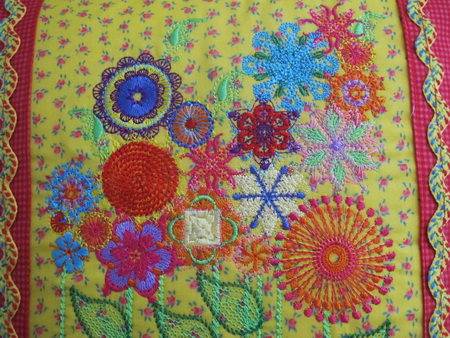
Close up of embroidery
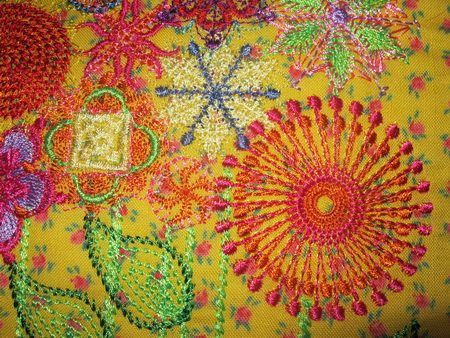
Close up of embroidery
Close up of embroidery
Bold and Beautiful Frame
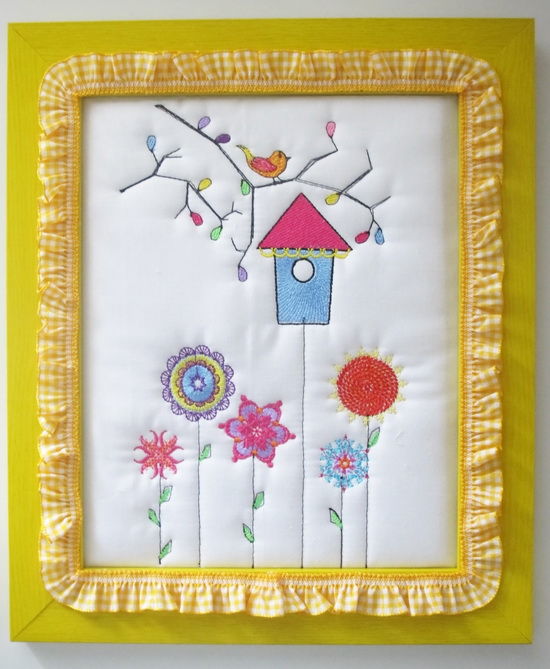
Hot glued the gingham ribbon around the frame this makes the work a little bit more unique
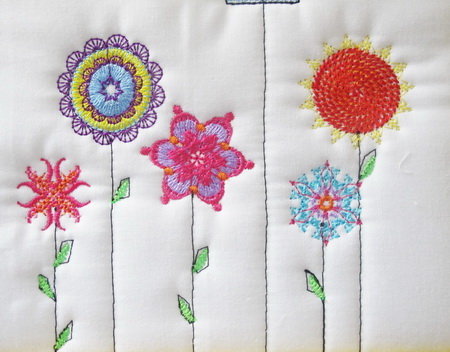
Close up of embroidery
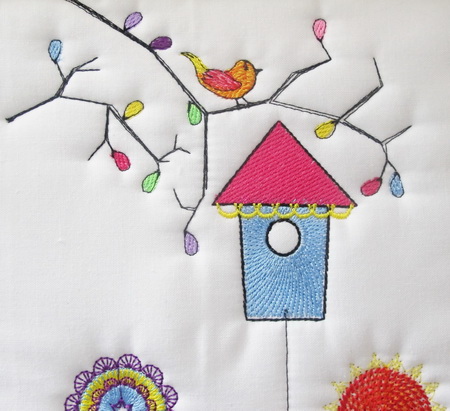
Close up of embroidery

Close up of the ribbon surrounding the frame
Bold and Beauitful Jumper
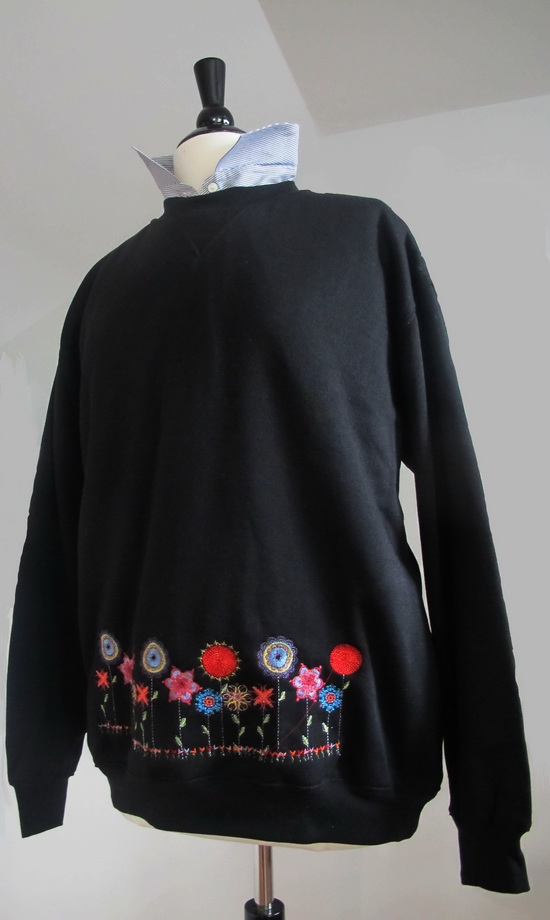
Stitched out twice “Bold and Beautiful_15” on the jumper
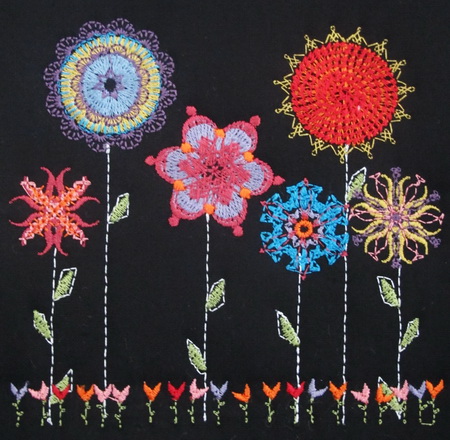
Close up of embroidery
Let's Sew Machine Embroidery Designs - Instructions
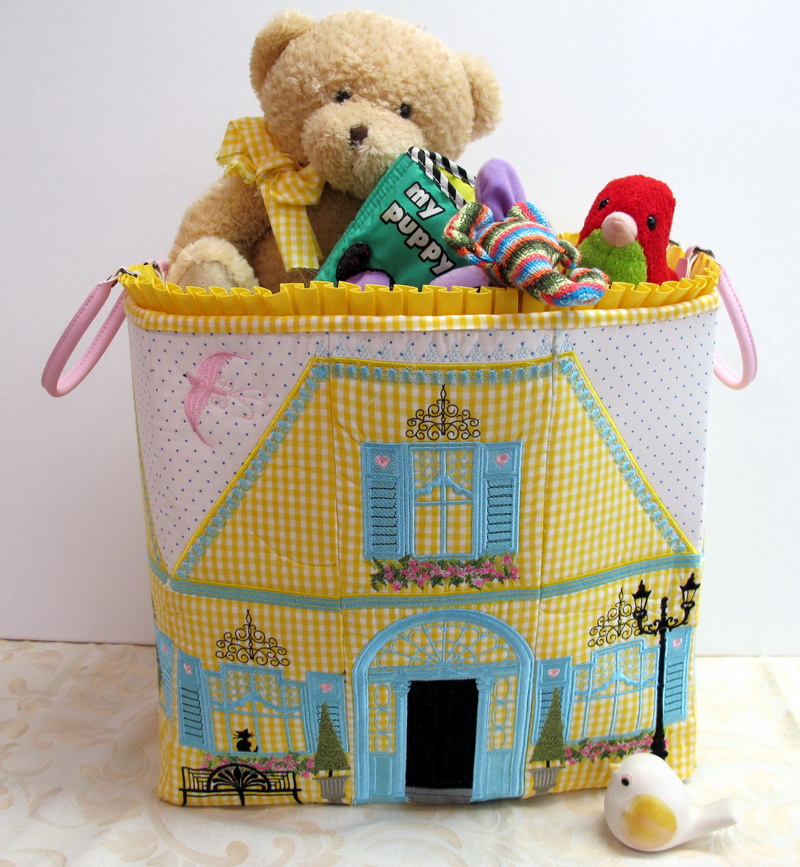
Let's Sew Bag
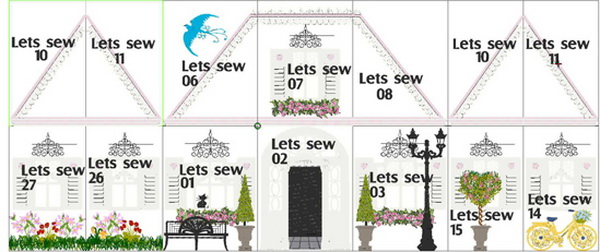
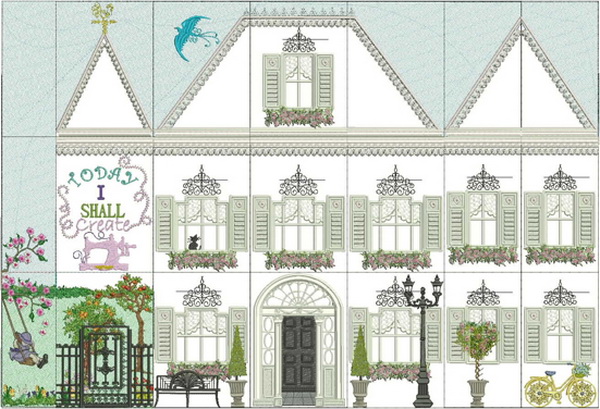
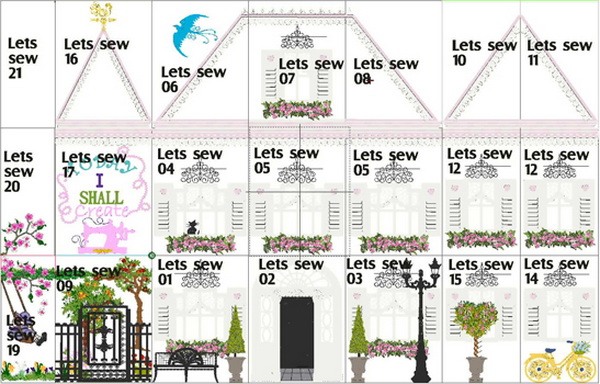
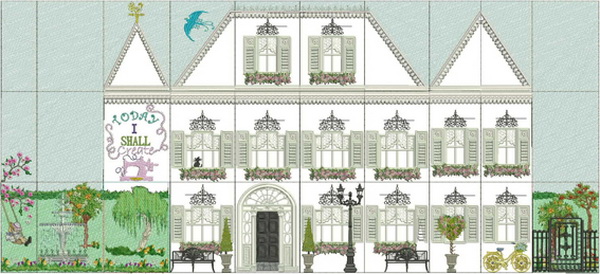
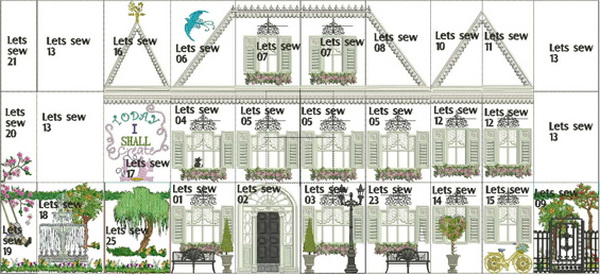
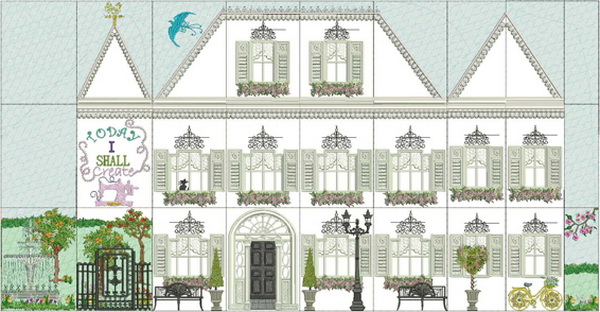
Examples of configuring the designs
Below are 4 different examples showing you how you can configure the designs to what ever size of machine you have or container you wish to have, you can make any size you wish by using the designs within the set.
This is the example I used for the container Measurements
- 35 x 20 cm
- 14 x 8 inches
Measurements
- 53 x 20 cm
- 21 x 8 inches
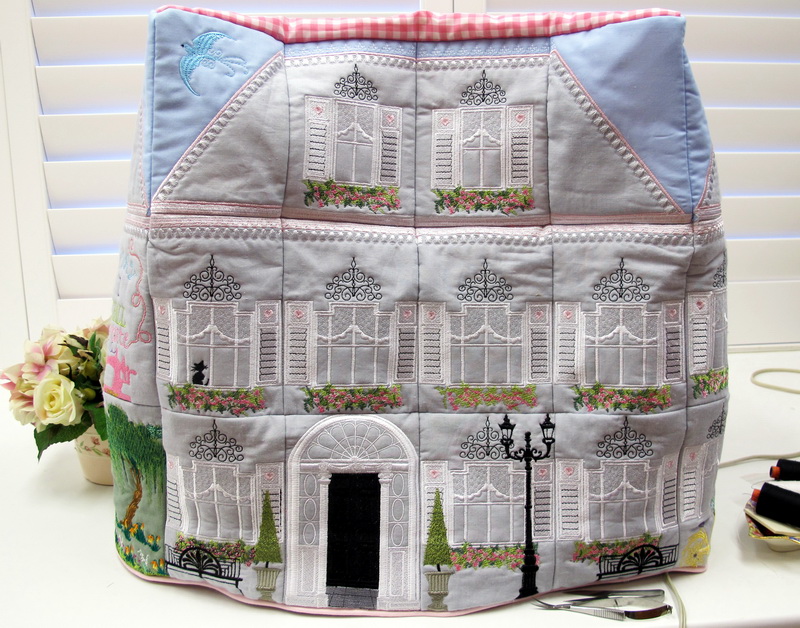
This is the example I used to cover my sewing machine Measurements
- 53 x 33 cm
- 21 x 13 inches
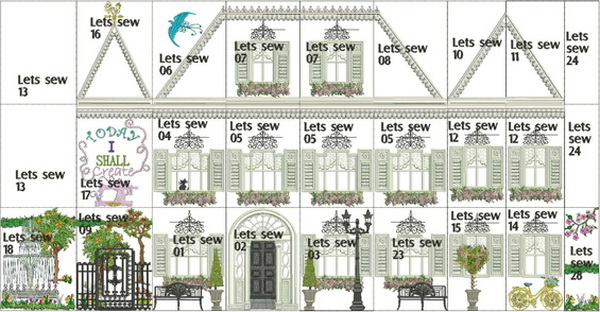
Measurements
- 53 x 26 cm
- 21 x 10 inches
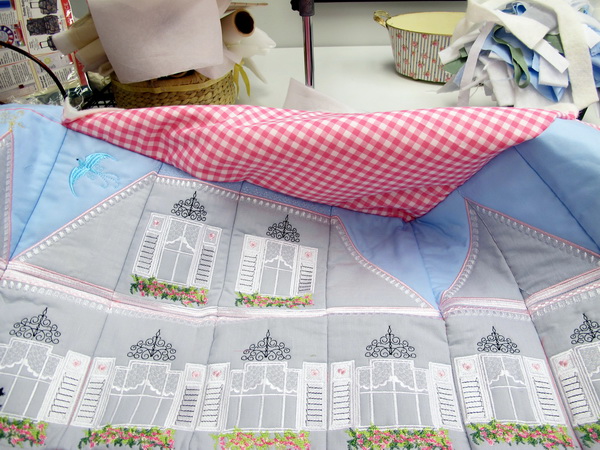
Instructions for the Let's Sew Sewing Machine Cover
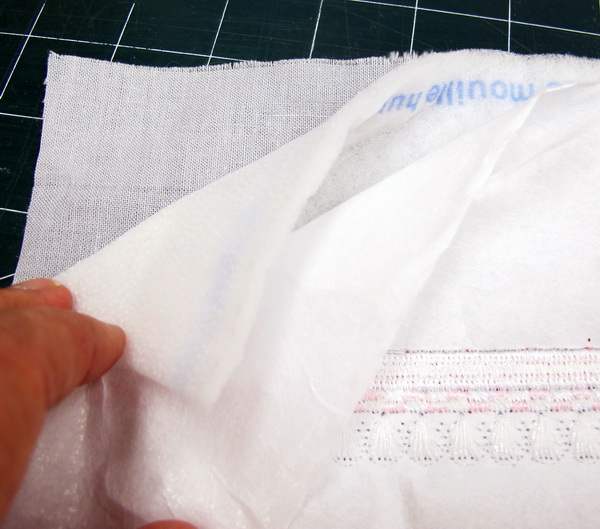
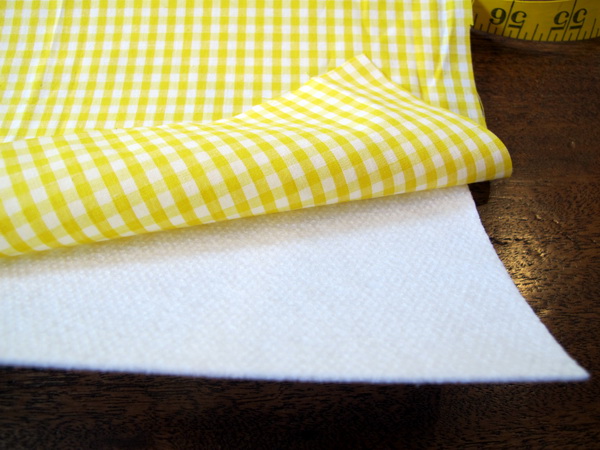
Showing in the photo above the materials I used to stitch the designs out
- Fabric
- Thin pellon (wadding)
- Cut away stabilizer 1 sheet for the panels with a small amount of stitching, for the more dense stitching 2 sheets
Materials you will need to make the sewing machine cover
- Grey Fabric for the exterior of the house 3 meters, I always buy more than I need
- Thin pellon (wadding) 3 meters
- Blue fabric for the sky 1 meter
- Green fabric for the garden scenes 1 meter
- 3 meters of Cut Away stabilizer. Depending on the density of each design panel I used 1 or 2 sheets
- 2 meters Heavy wool batting or just a heavy batting as the wool can be expensive, I only used the wool as I had it on hand but I would have used a heavy batting if I had it at hand
- Piping for the base edge of the sewing machine cover optional
- Lining fabric
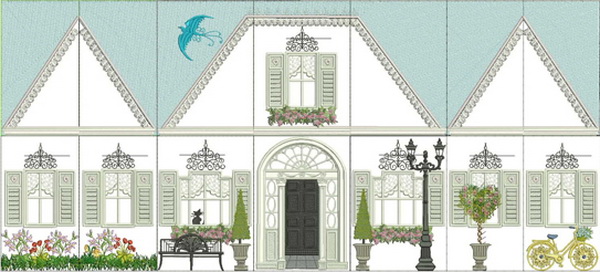
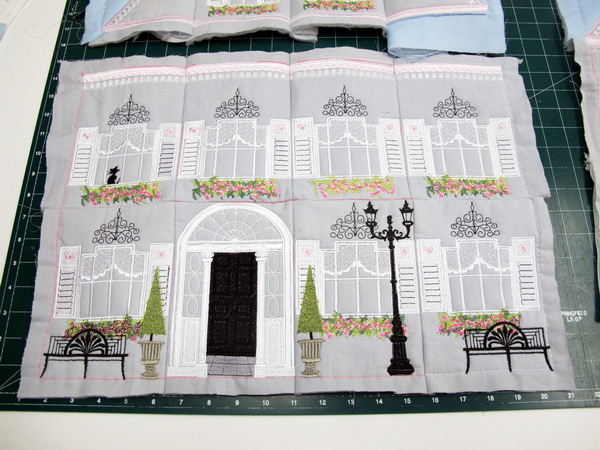
The following photos are also in the colour chart for you to follow the step by step to do the applique work
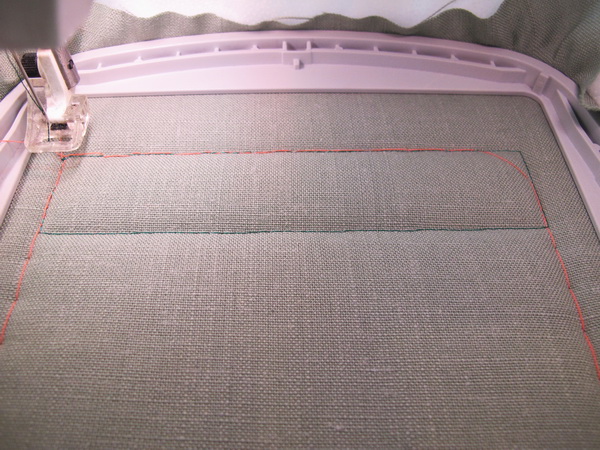
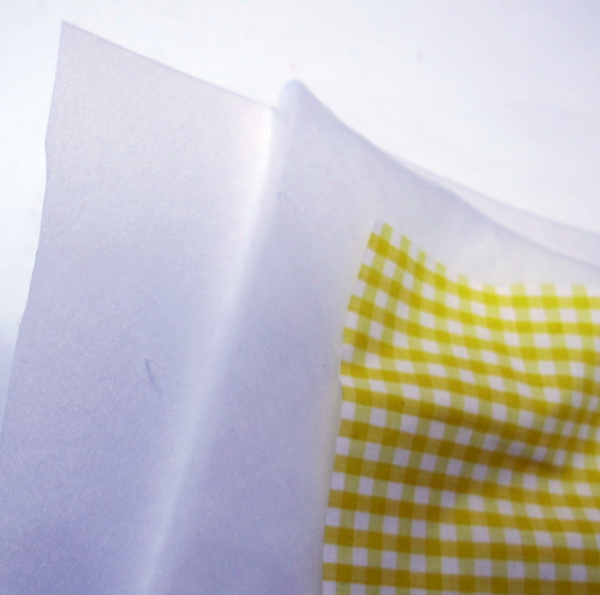
- This colour thread is to stitch out, as it will show you how much fabric you need for the sky fabric as you can see in the photo above
- (a)Lay the sky fabric over the stitches you had just stitched out, the following photo will show you (b) Stitch out over the sky fabric. Once you have stitched out over the sky fabric, (c) Take the hoop out of your machine and cut the sky fabric as close as you can to the stitches, you just stitched. Put your hoop attachment back into your machine
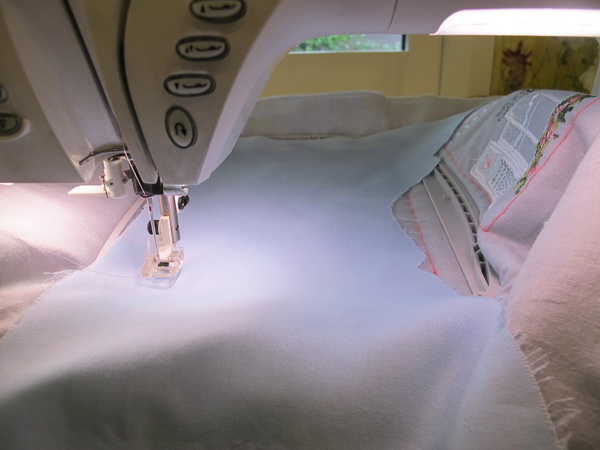
(a)
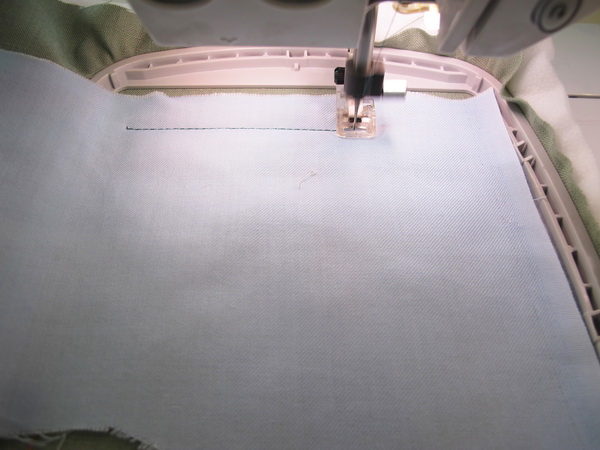
(b)
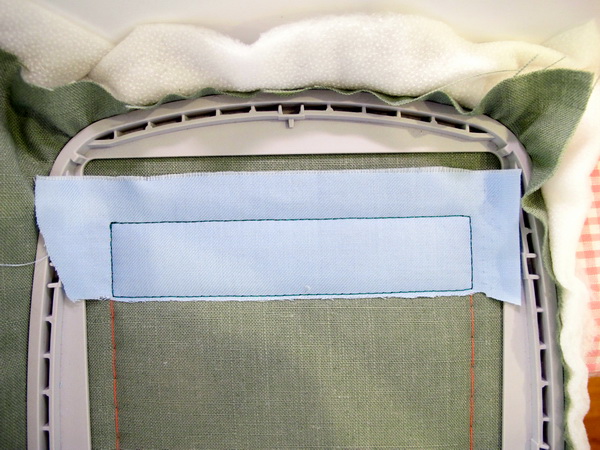
(c)
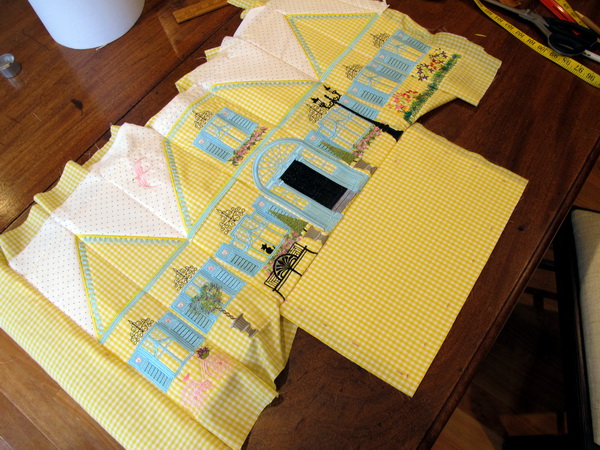
Once you have stitched all the designs out
- Match up the outline stitches and stitch the designs together
- I suggest for the front, sides, back and top panels you stitch at this stage the thick batting to each panel. Just stich the batting around the edge of each large panel
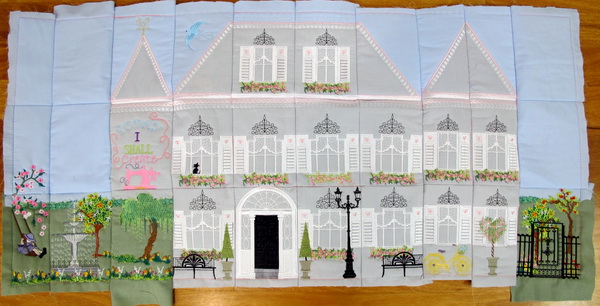
The front panel, and side panels stitched together
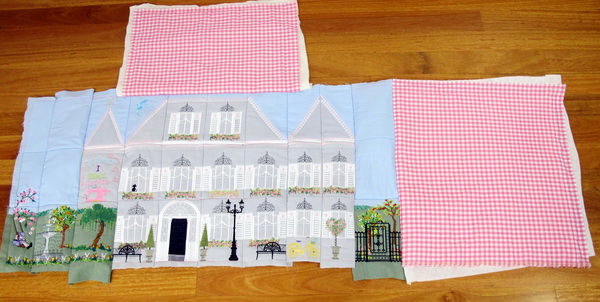
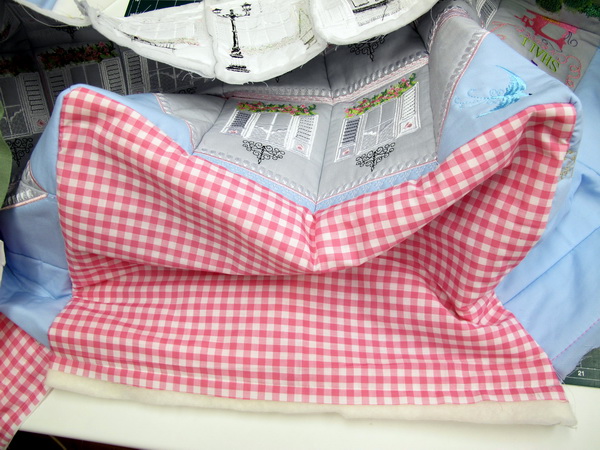
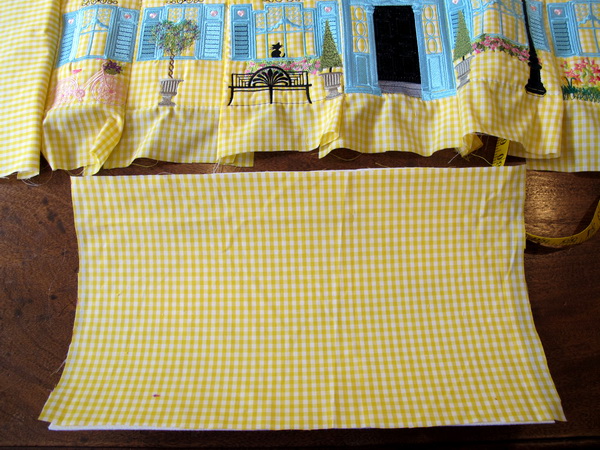
- I chose a gingham fabric for the top and back panels
- BACK Measure the width and length of the house panels
- Stitch the back panel to one of the side panels of the house
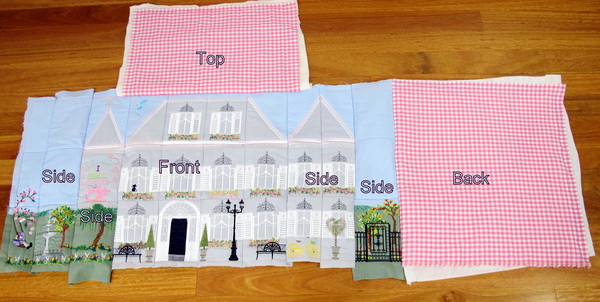
- TOP Measure the width of the house front panel and the width of the side panel of the house for the top of the machine cover
- Stitch the top panel to the front panel of the house
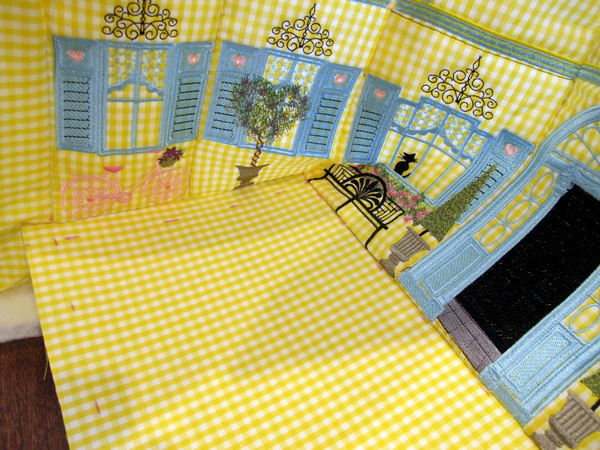
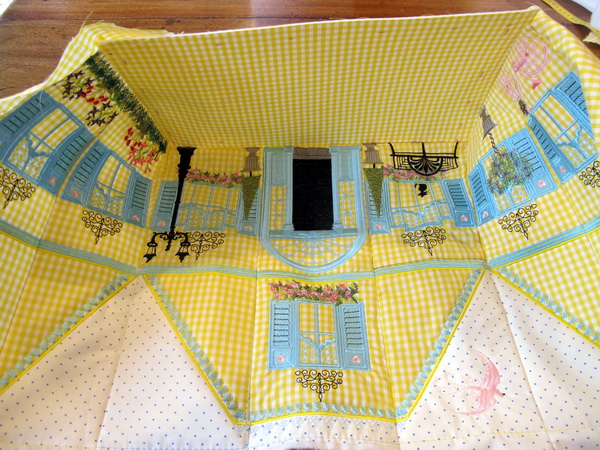
Stitch the top panel to both side panels of the house
Stitch the back panel to the top panel
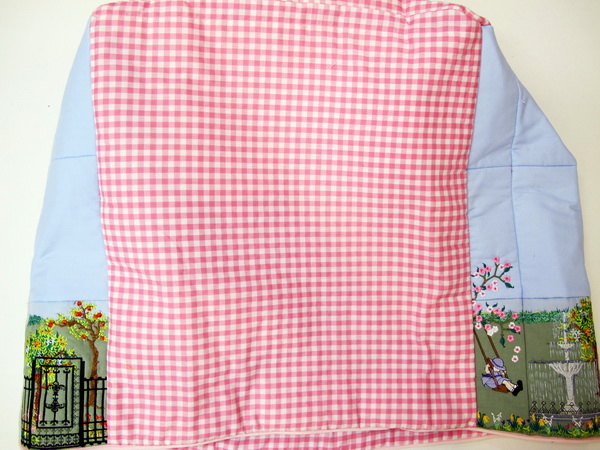
The back panel stitched to both side panels
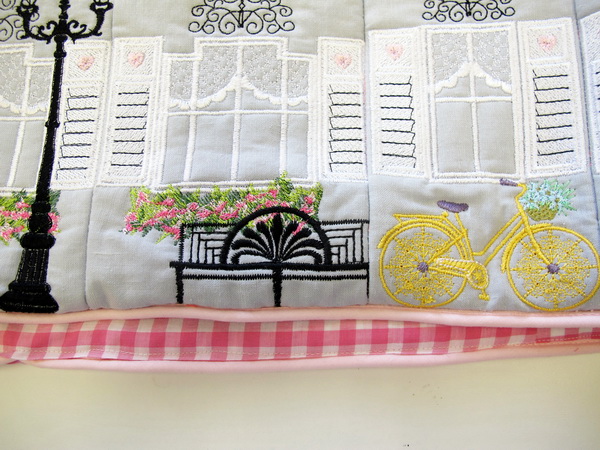
- Just to give a nice finish to the machine cover I added piping to the base of the cover
- I then made a lining
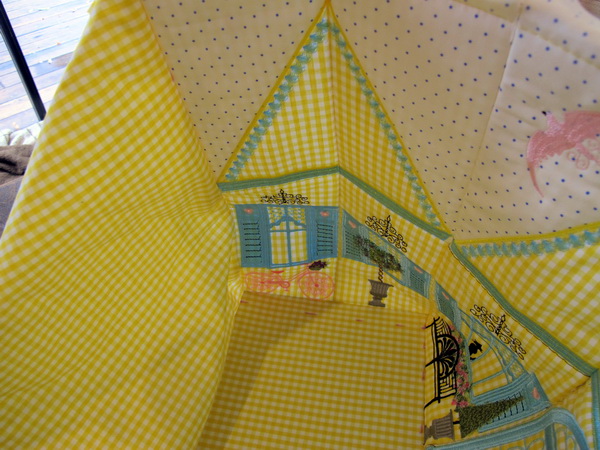
Instructions for the Let's Sew Container
-
Showing in the photo above the materials I used to stitch the designs out
- Fabric
- Thin pellon (wadding)
- Cut away stabilizer 1 sheet for the panels with a small amount of stitching, for the more dense stitching 2 sheets Materials you will need to make the container cover
- Yellow gingham Fabric for the exterior of the house 3 meters, I always buy more than I need
- Thin pellon (wadding) 3 metersBlue and white poker dot fabric for the sky 1 meter
- 3 meters of Timtex, it is a sew-in stabilizer, non-woven, 100% polyester, machine wash and dry. The photo above showing you the Timtex stabilizer
- Piping or something decorative for the top edge of the container, optional
- Hot glue gun
- Lining fabric
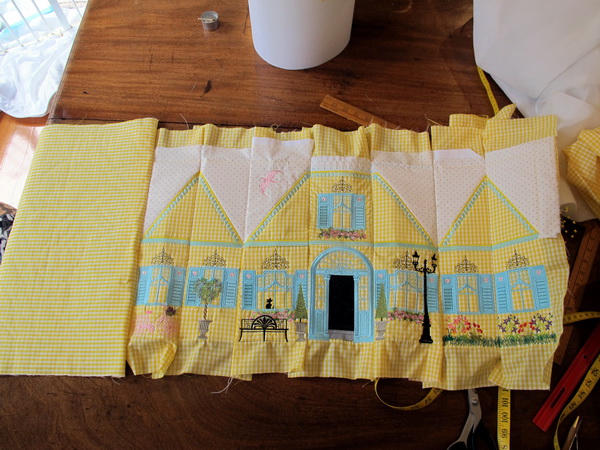
Stitch out each of the design panels for the container
- Match up the outline stitches and stitch the designs together
- Do not stitch the sides and base to the front of the container at this stage
- I suggest for each of the front, sides, back and base panels, you baste at this stage the Timtex to the front panel, base then do the two side panels, Trim down your seam allowance as much as possible of the Timtex;.
- I chose a gingham fabric for the top and back panels BACK Measure the width and length of the house panels
- Stitch the back panel to one of the side panels of the house BASE Measure the width of the house front panel and the width of the side panel of the house for the base of the container
Once you have stitched the two side panels to the front panel, stitch the base to the front panel
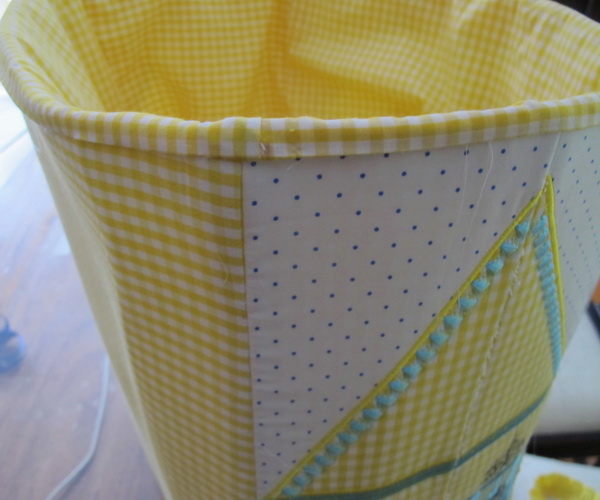
The base stitched to the front and one side panel
The base stitched to the front and two side panels
Back panel stitched to the base
Make the lining for the container, I made the lining slightly longer
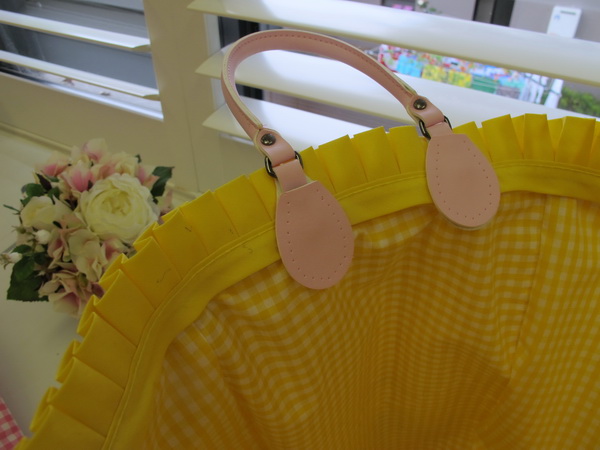
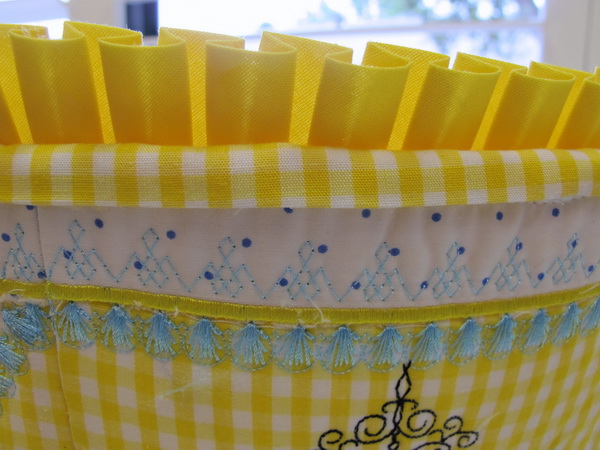
- To give the container a nice finish I stitched the pleating around the top of the container
- Glued and then stitched the two leather handles to the container
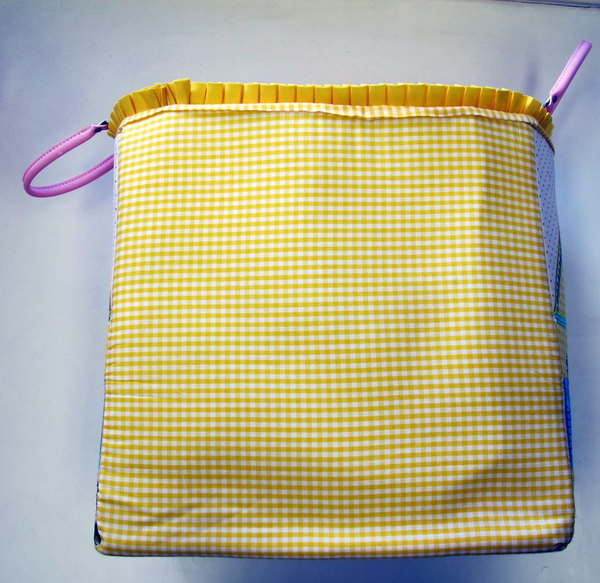
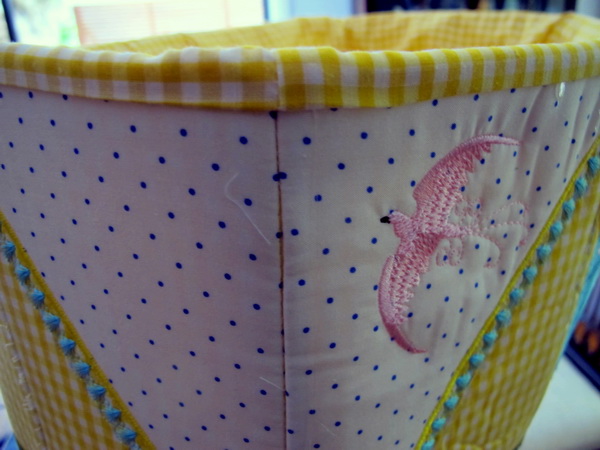
Showing you the back of the container
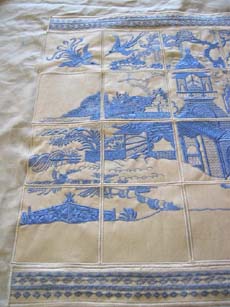
Serenity Machine Embroidery Designs - Instructions
Notions:
- 3 meters of cream linen
- 1 cone of 2,000meters of blue thread (I used King Star No. 306)
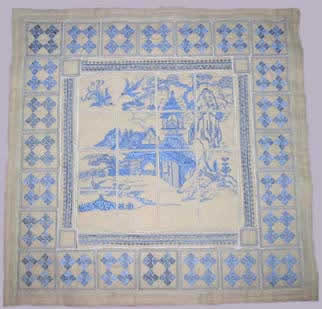
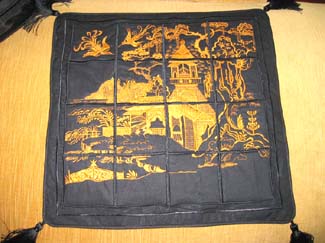
Instructions for stitching the blocks together to form a wall hanging
|
Stitch all the 16 blocks out |
|
|
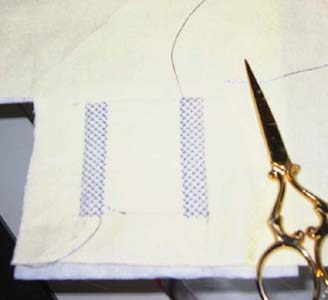
Trim fabric away from each of the 16 blocks with your scissors as close to the satin stitched edge as possible (HINT when cutting the fabric with your scissors always keep the fabric to your right, that way you will never cut the satin stitch edging) |
|
|
Centre your backing fabric to be ready for you to place the first stitch out block with a + for placing the blocks |
|
 |
On the back of the No. 6 block spray glue, as seen in the photograph to the left. |
|
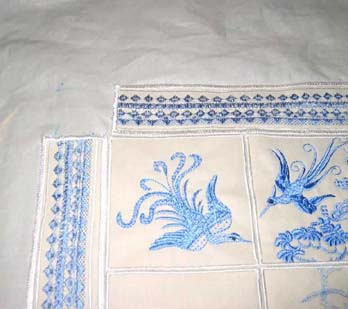
Place No. 6 block on one side of the + As seen in the photograph below and stitch a zigzag stitch over the satin stitch border that is part of the block |
|
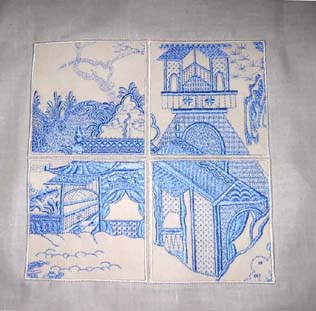 |
Place No. 7 block on the other side of the + |
|
Place No. 10 block below No. 6 |
|
|
Place No. 11 block below No. 7 |
|
|
Glue and stitch all the other blocks in their right position |
|
| Place the decorative stitch border as seen in the photographs below | |
  |
|
| Stitch the small square border as seen in the photograph to the left. Stitch all the 24 border squares around the decorative stitch border, as you can see in the photograph above. |
|
| Border using the decorative stitches from your machine | |
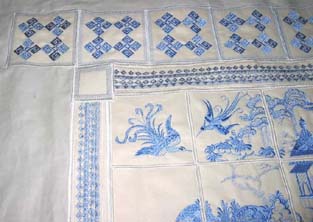 |
Photo of the border for the quilt using the decorative stitches from the sewing machine |
 |
First stitch out the satin stitch Length .35 Width 7.0 Blue thread matching the same blue in the quilt |
 |
Triangle stitch Length 10 Width 9.0 Blue thread |
 |
Stitch over the top of the satin stitch (No.1) Length 5.0 Width .50 in white thread |
 |
On either side of the blue satin stitch (No. 1) use the double straight stitch Length 3.0 in white thread |
 |
Beside the triangle stitch (No. 2) Length 3.0 Width 6.0 in blue thread |
 |
Over the top of the stitch you just did (No. 5) Length 10 Width 6.0 in blue thread |
 |
In between the triangle (No. 2 and No. 5) I stitched in every second gap the round satin stitch Length 4.0 in blue thread |
 |
Once again I did another triangle stitch beside the satin stitch and double straight stitch (No.1 and No. 4) in blue thread. |
| Border small square at each end of the wall hanging | |
|
|
Stitch Length 3.0 Width 6.0 in Blue thread |
 |
Stitch a satin stitch border Satin Stitch border length 1.0 Width 2.5 Do this twice (This gives the satin stitch a heavier border) length .35 Width 5.0 Over the top of the satin stitch you just stitched out |
|
Instructions for the Serenity Cushion
Notions:
Follow the instructions from the Wall Hanging
|
|

Machine Embroidery Designs
Latest Releases
Folklore Machine Embroidery Designs
Released on the 25th June 2019

6 designs included in the Folklore machine embroidery design set.
The Folklore design is suitable for a 6 x 10 inch or 240mm x 150mm hoop.
The Folklore design is available in DST, EMB, EXP, HUS, JEF, PES, VIP, VP3 and XXX.
The colour chart is included in the design set
As I am now digitizing with Wilcom embroidery software (which is a commercial software) we are unable to convert files to ART format. Bernina embroidery machines will now need to purchase designs in EMB or EXP format. Sorry for the inconvenience.


