Avion Machine Embroidery Design Instructions
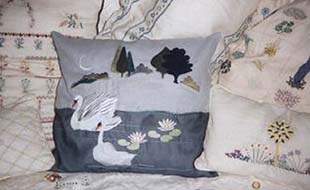
Avion Tranquility Cushion
Notions
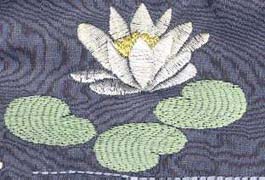
- Seven separate Tranquility designs – “n01”, “n02”, “n03”, “n04”, “n05”, “n06” and “lilly” designs.
- Grey blue coloured linen (to portray early evening).
Navy blue coloured silk organza (for the water).
Set up your chosen blue grey linen material in your hoop. Position your hoop at the top left hand side of your linen piece.
Stitch the ‘n01.” design
Reposition your hoop to the right hand side of and adjacent to the “n01.pcs” design which you have sewn. Next, stitch out the “n02.
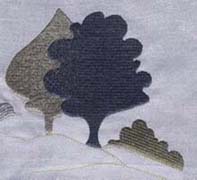
Reposition the hoop once again, to the right hand side of and adjacent to the “n02.” design which you have sewn. Next, stitch out the “n03.” design.
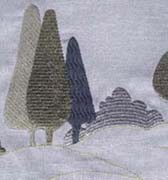
The combination and co-ordination of these three designs on your piece of linen will produce a lovely, serene, landscaped, rural scene.
Position the top edge of your navy blue coloured voile material over the the base of the linen piece. Align it across your linen, approximately 8 cm (2.5 inches) below the centre of the landscape scene. It should be positioned just at the base of the tree trunks in that design, directly below the “n02.” design. Pin down the piece of voile.
Sew the navy blue coloured voile material over the top of the piece of linen using mirrored stitch No. 79. It has the appearance of a grass stitch. Use a bottle green coloured thread. Ensure that you vary the stitch width as the machine is stitching. This will make the grass look a bit more realistic. Over the top of the grass stitch, free machine embroider more grass using khaki coloured thread.
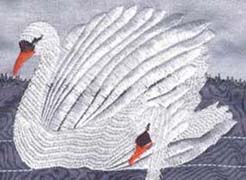
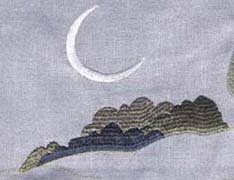
Reposition your hoop once again, so that when the head of the swan in “n04.” design is stitched out, it is positioned so that it will stitch out on the linen, over the top of embankment. (That is, the top, grassy edge of the voile material piece). Please refer to the “n04 design.”
Once again, reposition your hoop and stitch the “n05.” design, so that the second swan’s head is positoned over the top to the rear of the first swan’s body, (That is, to the bottom right hand side of the “n04.” design which you have stitched out).
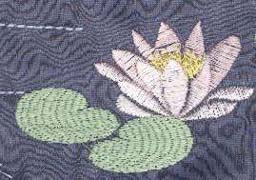
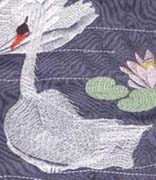
Reposition your hoop to the right hand side of the “n05” design. Stitch out the “lilly.” design. Please refer to the design panels shown below.
Once again move your hoop to the right. Stitch out the “n06.” design to the right of the “lilly.” design.
To further enhance your tranquility pillow, sew No. 01 (double straight) stitch, using a pale blue coloured thread for the water, making fine curves.
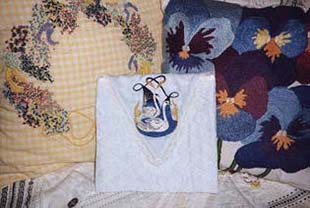
Avion Swans Hankerchief or Jewellery Bag
Notions
- “swan.pcs” design.
- Pale blue voile fabric.
- Cream lining fabric.
- Lace.
- Pellum
Approximate hoop size is 21 x 21 cm or 8 x 8 inches
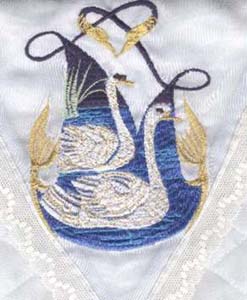
Stitch swan.pcs design onto a piece of blue voile fabric
Cut the voile fabric containing the “swan” design into the shape of a triangle.
Cut the cream lining into a triangle of the same size as the voile.
Stitch the voile and lining together.
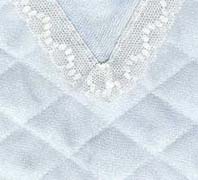
I realize that “hand stitching” is an unpleasant phrase for some of us, but I actually hand stitched the lace onto the triangle lip as shown in diagram No. 2.
Cut other pieces of voile, pellum and lining 45 x 25 cm or 17 x 10 inches.
Position the triangle lip at the long end, between the pellum and the lining and stitch together.
Quilt the voile, pellum and lining together.
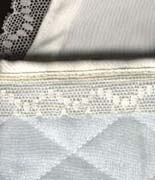
Sew a bias binding over the raw edges on the front of the square. I suggest that you use the lining fabric as the bias binding. Sew some lace down from the edge, as in diagram No. 3.
French seam the sides together.
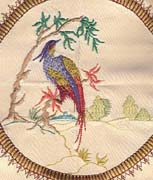
Avion Bird of Paradise Bag
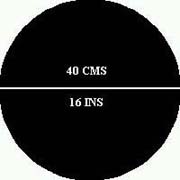
Cut both the black fabric and lining material into identical circles of 40 cm (16 inches) in diameter, as shown in diagram No 1.
Cut the plastic lid of an ice cream container into a circle of 6 cm (2.5 inches) in diameter.

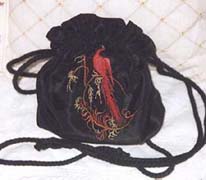
Fold the fabric circle in half (along the line of the diameter), as shown in the photo.
Mark the centre point of both half circles of the fabric, on the outer side.
Position your hoop over the centre marked on one side of the half circle of fabric.
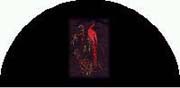
Stitch the “bird01.pcs” design on one side of of the half circle, as shown in the photo

Over the centre mark of the other half circle, stitch the “birdaa.pcs” design, as shown in the photo.
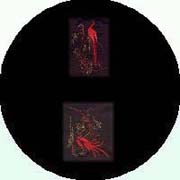
The two Birds of Paradise designs should now appear stitched out on your fabric as shown in the photo.
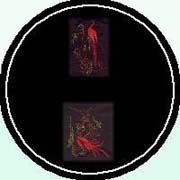
Measure and mark the circular hem 15 mm (5/8 inch) in from the circumference (outer edge) of the circle of the fabric, as shown in the photo.
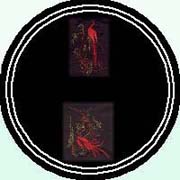
Measure and mark another inner circle 17.5 mm (1 and 5/8 inch) in from the circumference (outer edge) of the circle of the fabric. You should now have two, concentric circles marked 2.5 cm (1 inch) apart, as shown in the photo.

Mark the fabric for two buttonholes on each side, between the two concentric circles, as shown in the photo, marked in yellow. Later, this is where the cord will be threaded.
Sew the two buttonholes on either side of the material, where marked.
Pin the circle of lining over the circle of fabric and stitch around the edge, leaving an opening of approximately 8 cm (3 inches), so that you can turn the bag out.
Turn the bag out and hand press it completely around. This makes the job of ironing a lot easier.
Iron the bag around the edges.
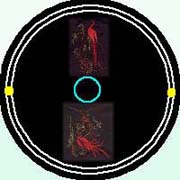
Insert the plastic circle through the opening between the fabric and the lining. Position it in the centre of the bag, as shown in the photo, marked in blue.
Pin the plastic circle in position and then stitch around it.
Close the opening with stitches.
Stitch all the way around both the marked concentric circles, on each side of of the buttonholes.
Insert the cording through the buttonholes and tie the ends.
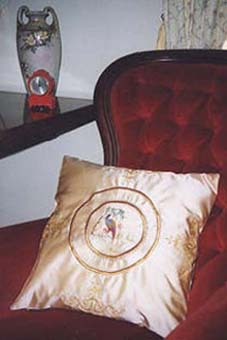
Avion Derby Cushion
Notions
“bord.pcs” design.
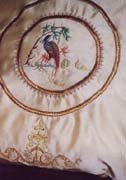
Mark the centre of your satin fabric. Stitch out the “darby” design.
Using a dinner plate as a template, mark a circle on the back of the fabric.
Sew the circle using a striaght stitch in order to provide a guide for the next stitch.
Using a side plate as a template, carefully position and mark the fabric with a smaller circle. This smaller circle should be positioned inside the larger circle, previously marked in 1.
Sew the inner circle using a straight stitch in order to provide a guide for the next stitch.
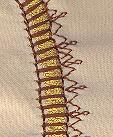
Sew stitch No 02 L = .50 W = 4.5 using gold Madeira No. 8 thread.
To create an attractive, raised appearance to your needlework, sew stitch No. 02 W= .30 L = 6.0 over the top of the first stitch, using gold Madeira No. 8 thread.
Sew stitch No. 111 L= 3.0 W= 6.0 over the the top of the satin stitch. using a tan thread as shown in the photo abovce.
Repeat the sewing procedures detailed in 6 to 8, above for the outer circle.
Adjacent to the outer edge of the satin stitch of the inner circle, sew stitch No. 156 (mirrored) W= 6.0 L= 6.0 using tan coloured thread. Please refer to the photo above.
As shown on the Darby Pillow at the top of the screen, stitch the “bord.” design on the four sides of the pillow. The “bord” design is below