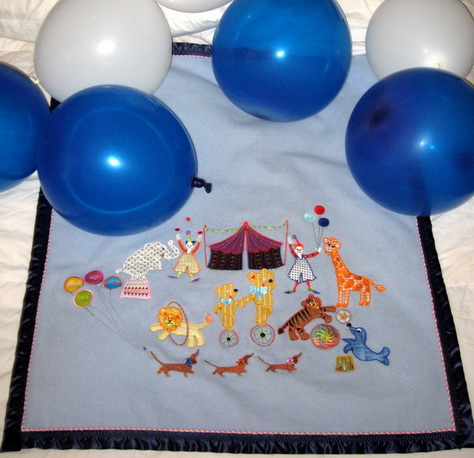
Hey Day Circus Machine Embroidery Design Instructions
What you need:
Wool blanket purchased from Country Bumpkin 1 meter by 83cm or 39 x 33 inches click below to see the wool blankets http://www.countrybumpkin.com.au/index.php?cPath=21_41_154&pageFrom
Hoop sticky paper
2 sheets of “Soft multi purpose backing” from www.stirlingembroidery.com
“Water soluble Vilene”
Many verities of small pieces of fabric for the clowns and animals
1.2 meters or 47 inches long for backing fabric
1.2 meters or 47 inches long for thin wadding
5 meters of blanket satin ribbon
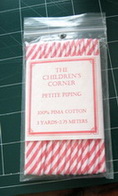
2 packets of stripped piping
Safety pins
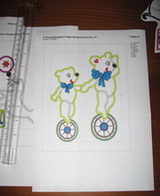
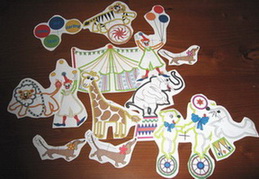
Print in “Actual Size” the following designs:
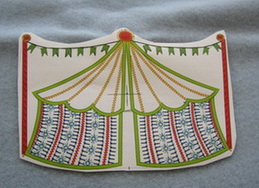
- Big top
- Clown_01
- Clown_02 (Only if you have a large enough hoop)
- Clown_a02
- Clown_b02
- Elephant
- Giraffe
- Lion
- Mister
- Otto
- Seal
- Simba
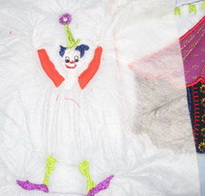
- Sweet dreams appliqué
- Teddy
- Tiger
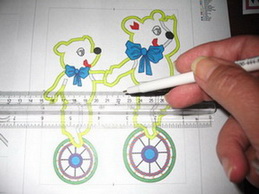
Marking the centre of the design.
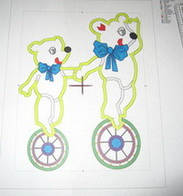
The centre of the design marked with a cross.
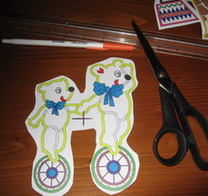
Cut out the design using your scissors.
All the designs marked in the centre and cut out.
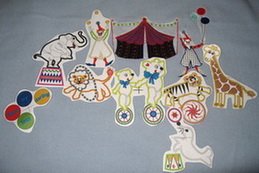
Work out on the blanket where you would place all the designs.
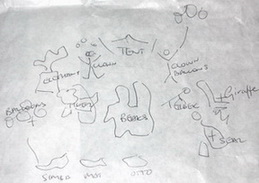
Make a rough drawing of your finished idea of the placement of each design.
As the Big Top will be the centre piece of the blanket position it first on the blanket.
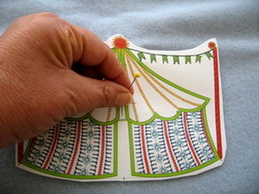
Place a pin in the centre where you had marked the centre cross previously.

The pin in the centre of the cross on the design through to the blanket.
Mark the blanket where the pin goes through.
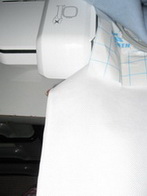
Hoop the sticky type paper. This type of sticky paper is ideal for blankets, towels, velvet etc. due to the thickness of the material.
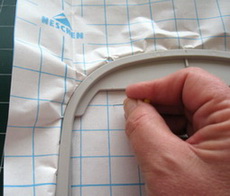
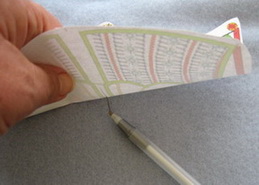
Once you have inserted the sticky paper into your hoop chose a sharp pin and go around the edge of the hoop trying to only penetrate the wax paper.
Once you have penetrated the wax paper with the pin then take the wax paper away from the sticky paper that is underneath.
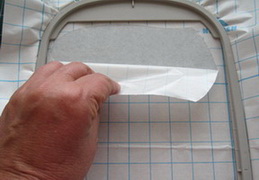
The top layer, wax paper has been removed all that is left is the sticky paper

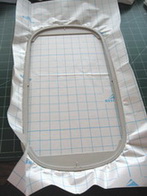
Cut a large enough hole in the centre but not large as you need that sticky paper to hold the blanket or whatever you may be using. If you leave the sticky part as a stabilizer the needle in your machine collects the sticky part and accumulates on your needle.
2 sheets of “Soft multi purpose backing” from www.stirlingembroidery.com
This is an excellent stabilizer for children as it is so very soft and it tears away very easily.
Slide the 2 sheets of “Soft multi purpose backing” under the hoop and sticky paper.
Lay the blanket over the hoop with the sticky paper, making sure you have the centre mark on the blanket in the centre of the hoop.
Lay the blanket over the hoop with the sticky paper, making sure you have the centre mark on the blanket in the centre of the hoop.
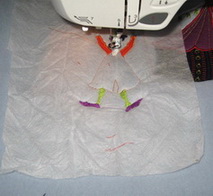
Once you have the hoop inserted in the machine and the blanket in the correct position. Over the blanket lay “Water soluble Vilene” over the top of where you will be stitching. The “Water soluble Vilene” will stop the embroidery thread from sinking into the wool pile
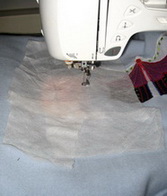
Stitch out the first stitch which shows you where you should lay the appliqué fabric on the blanket.
Over the top of the stitch out you just stitched lay your selected appliqué fabric.
Stitch out the first stitch which shows you where you should lay the appliqué fabric on the blanket.
Over the top of the stitch out you just stitched lay your selected appliqué fabric.
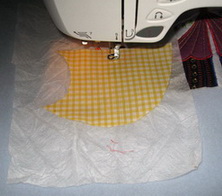
Stitch out the stitch that will allow you to cut the fabric away using your scissors.
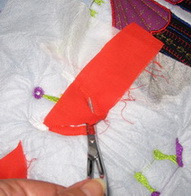
Appliqué fabric cut away using your scissors.
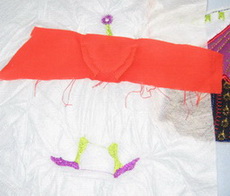
Stitching out the first stitch for the clowns overalls.
Lay the fabric you have selected for the clown Overalls over the stitches you just stitched out.
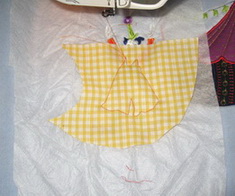
Stitch out the next colour for your clown overalls and cut away excess fabric.
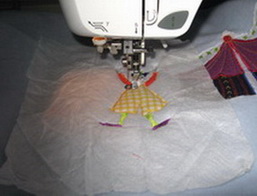
The clown overalls excess fabric has been cut away and then you stitch out the next colour, you then cut the excess threads from the applique.

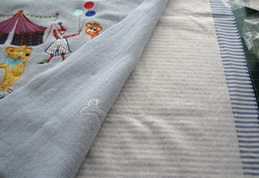
Then you reposition all the designs back on the blanket and do your next design, as you can see I have positioned the Giraffe and in the centre of the Giraffe.

Put a pin through and then mark the blanket where the pin was inserted for your next design.
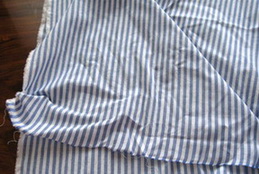
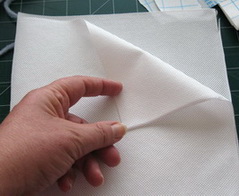
Chose a fabric that would contrast well with the blanket for your backing fabric.
I suggest you wash the fabric using the hot water and put in the dryer as this will shrink the fabric.
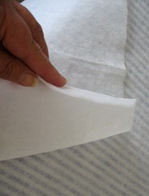
Chose a thin iron-on wadding.
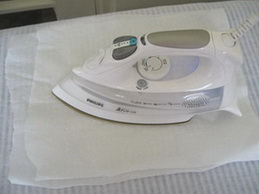
Ironing the thin iron on wadding to the blanket backing fabric. Notice I put paper over the wadding so the iron on wadding will not stick to the iron.
Placing the blanket over the backing fabric and positioning it correctly.
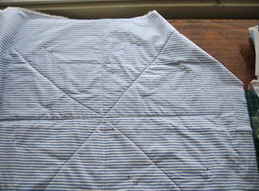
Using safety pins through the backing and blanket fabrics. This will keep the designs all together when you are stitching all the layers.
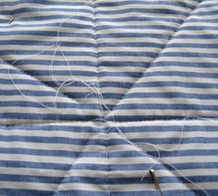
When you stitch the all three layers together start from the centre and stitch out as you can see in the photo. Use a very long stitch for doing this, you do not want to be pulling stitches out all day when finished.
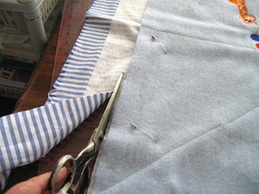
Cut away from your blanket all excess backing fabric.
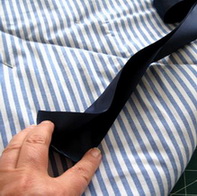
Purchase blanket satin ribbon (this ribbon you should be able to purchase as it is already creased down the centre of the ribbon).
You can purchase this online http://www.childrenscornerstore.com or at
Children’s Corner, 3814 Cleghorn Avenue, Nashville, TN, 37221.
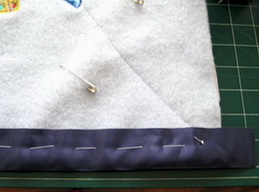
Using a running stitch to stitch the satin blanket ribbon onto the blanket.
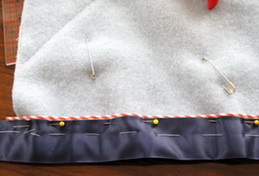
Put the piping under the satin ribbon, this give the blanket a lovely finish.
Once you have the blanket satin ribbon and piping all stitched by hand and positioned nicely then use your machine to stitch both down properly.
Take your safety pins and running stitches out.