Christmas 2009 Machine Embroidery Design Instructions
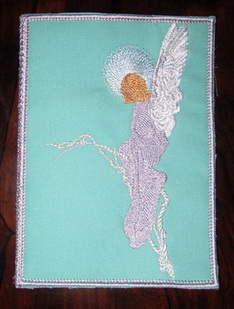
Christmas 2009 Blessed Angel
![Christmas 2009 Machine Embroidery Design Instructions](https://stitchingart.com/wp-content/uploads/2024/07/christmas2009inst.jpg)
- Stitch out “Blessed angel_02” first
- Place “Blessed Angel_01” above the red and gold star, this is such a simple placement as you can place the “Blessed Angel_01” anywhere
- Stitch a satin stitch border and over the top of the satin stitch, stitch the chain stitch that is in most machines or use another stitch of your preference.
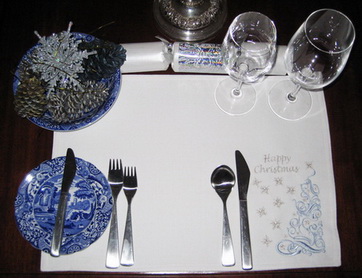
Christmas 2009 Placemat
![Christmas 2009 Machine Embroidery Design Instructions](https://stitchingart.com/wp-content/uploads/2024/07/christmas2009inst1.jpg)
![Christmas 2009 Machine Embroidery Design Instructions](https://stitchingart.com/wp-content/uploads/2024/07/christmas2009inst2.jpg)
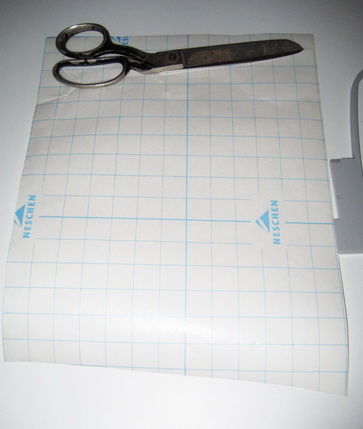
Cut out enough to cover your hoop (I have no idea what this paper is called) So I call it sticky paper!
![Christmas 2009 Machine Embroidery Design Instructions](https://stitchingart.com/wp-content/uploads/2024/07/christmas2009inst3.jpg)
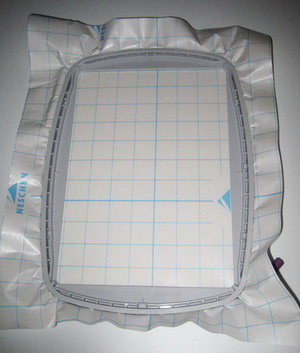
Hoop the sticky paper
![Christmas 2009 Machine Embroidery Design Instructions](https://stitchingart.com/wp-content/uploads/2024/07/christmas2009inst4.jpg)
Cut the centre out of the sticky paper, I try to keep enough for the fabric to stay glued to the sticky paper around the hoop.
![Christmas 2009 Machine Embroidery Design Instructions](https://stitchingart.com/wp-content/uploads/2024/07/christmas2009inst5.jpg)
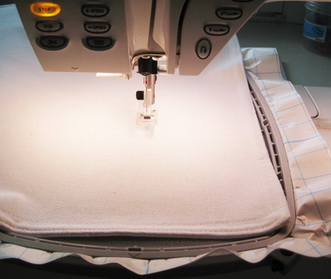
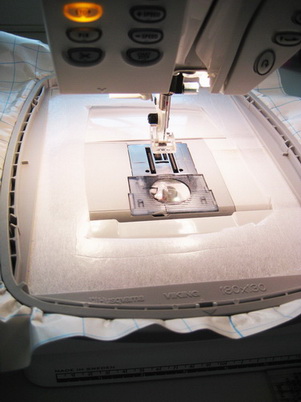
Lay the purchased mat over the sticky paper and then stitch out “Happy Christmas_01”
![Christmas 2009 Machine Embroidery Design Instructions](https://stitchingart.com/wp-content/uploads/2024/07/christmas2009inst6.jpg)
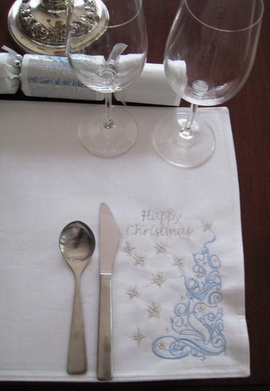
This design is just lovely for a mat, so very quick and easy to stitch out
Christmas 2009 Brown Placemat
![Christmas 2009 Machine Embroidery Design Instructions](https://stitchingart.com/wp-content/uploads/2024/07/christmas2009inst7.jpg)
![Christmas 2009 Machine Embroidery Design Instructions](https://stitchingart.com/wp-content/uploads/2024/07/christmas2009inst8.jpg)
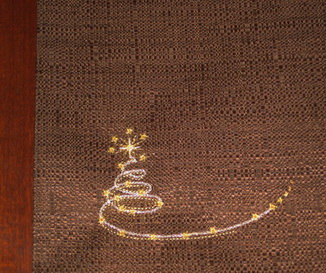
I stitched “Joy and happiness_02” by following the instructions for the white mat
I chose this brown mat as this coloured mat would appeal to young people and using a simple design “Joy and happiness_02”on the mat would go nicely with young people’s decor
Christmas 2009 Hand Towel
![Christmas 2009 Machine Embroidery Design Instructions](https://stitchingart.com/wp-content/uploads/2024/07/christmas2009inst9.jpg)
![Christmas 2009 Machine Embroidery Design Instructions](https://stitchingart.com/wp-content/uploads/2024/07/christmas2009inst10.jpg)
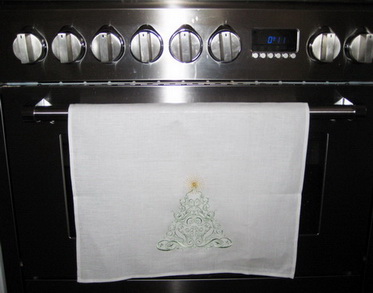
A purchased linen tea towel where I stitched “Happy Christmas_02”
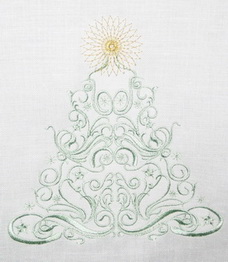
Christmas 2009 Apron
![Christmas 2009 Machine Embroidery Design Instructions](https://stitchingart.com/wp-content/uploads/2024/07/christmas2009inst11.jpg)
![Christmas 2009 Machine Embroidery Design Instructions](https://stitchingart.com/wp-content/uploads/2024/07/christmas2009inst12.jpg)
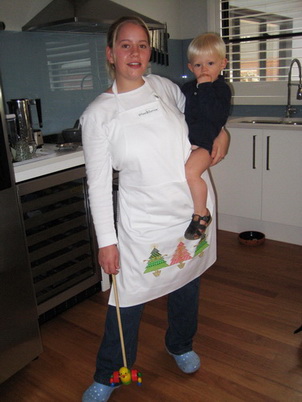
I stitched out first “Christmas tree_02” which is the centre tree
I then stitched out on either side of the pink tree “Christmas tree_01” (If you look closely at the green tree on the left you will see it did not stitch out very well, due to my Pfaff machine gave up on me and I had to race the machine to my dealer to be repaired, I kept my work in the hoop until my machine arrived back to my sewing room where upon I resumed stitching out that green tree)
Christmas 2009 Bag
![Christmas 2009 Machine Embroidery Design Instructions](https://stitchingart.com/wp-content/uploads/2024/07/christmas2009inst13.jpg)
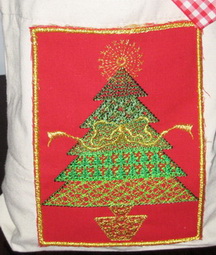
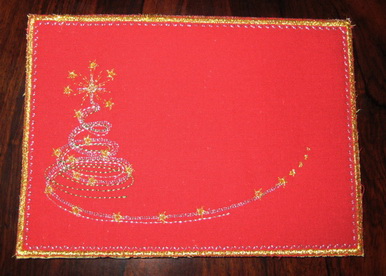
I stitched out on red cotton fabric “Christmas tree_03”
Cut away any excess red fabric from the gold border using scissors
Glued the design using a hot glue gun on a calico bag I purchased so cheaply from a local craft shop
Christmas 2009 Aqua Christmas Card
![Christmas 2009 Machine Embroidery Design Instructions](https://stitchingart.com/wp-content/uploads/2024/07/christmas2009inst14.jpg)
Stitch out “Angel of the moon_02”
![Christmas 2009 Machine Embroidery Design Instructions](https://stitchingart.com/wp-content/uploads/2024/07/christmas2009inst15.jpg)
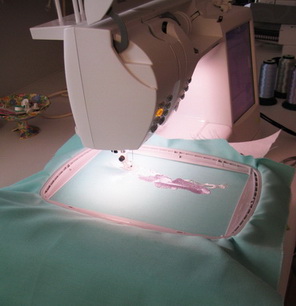
Have matching or contrasting fabric ironed and ready to lay under your work
![Christmas 2009 Machine Embroidery Design Instructions](https://stitchingart.com/wp-content/uploads/2024/07/christmas2009inst16.jpg)
Once you get to the colour change for the border thread
![Christmas 2009 Machine Embroidery Design Instructions](https://stitchingart.com/wp-content/uploads/2024/07/christmas2009inst17.jpg)
Slide under the hoop either your matching or contrasting fabric, making sure that the fabric is positioned correctly
![Christmas 2009 Machine Embroidery Design Instructions](https://stitchingart.com/wp-content/uploads/2024/07/christmas2009inst18.jpg)
Start your machine at the border colour change
![Christmas 2009 Machine Embroidery Design Instructions](https://stitchingart.com/wp-content/uploads/2024/07/christmas2009inst19.jpg)
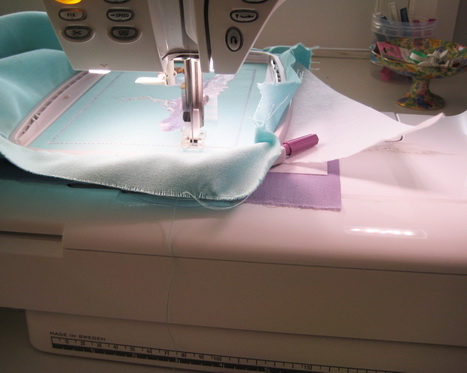
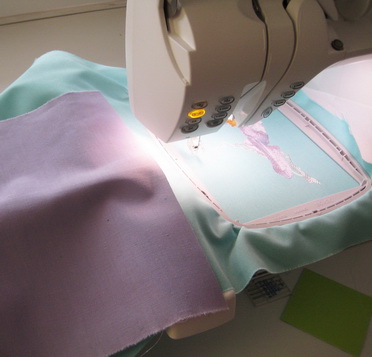
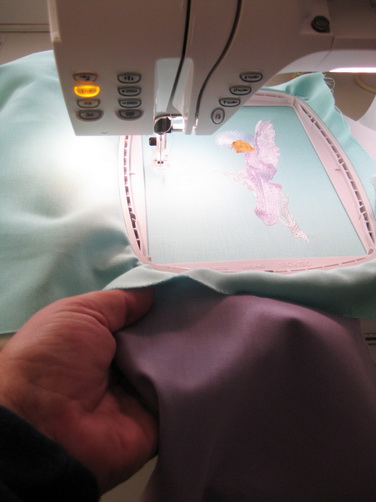
The machine is stitching out the border as you can see the contrasting mauve fabric is underneath the two layers of thick cut away stabilizer
![Christmas 2009 Machine Embroidery Design Instructions](https://stitchingart.com/wp-content/uploads/2024/07/christmas2009inst20.jpg)
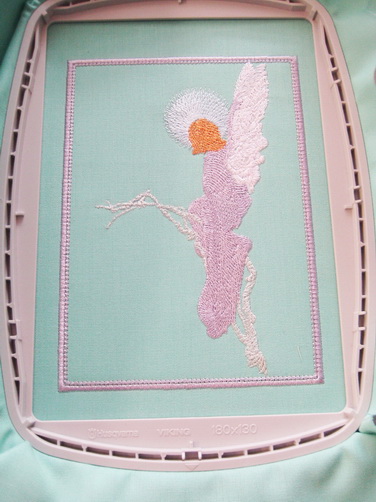
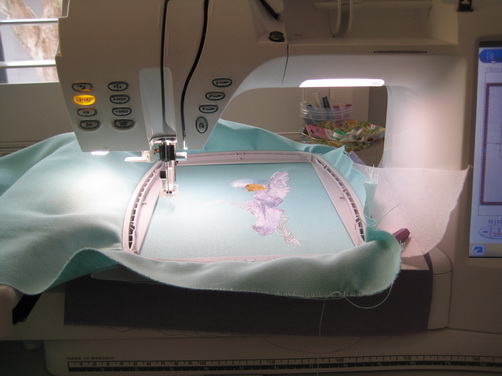
“Angel of the moon_02” all stitched out
![Christmas 2009 Machine Embroidery Design Instructions](https://stitchingart.com/wp-content/uploads/2024/07/christmas2009inst21.jpg)
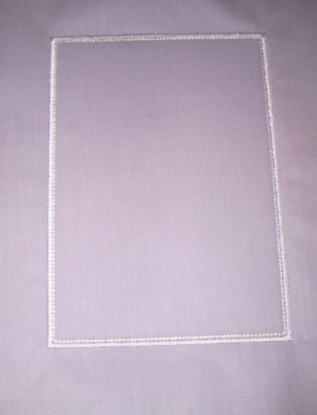
The underside of the card using a contrasting mauve fabric
![Christmas 2009 Machine Embroidery Design Instructions](https://stitchingart.com/wp-content/uploads/2024/07/christmas2009inst22.jpg)
I repeated the same for the rest of the card, once again using the same aqua and mauve fabrics
Cut away any excess fabric from the border using your scissors
![Christmas 2009 Machine Embroidery Design Instructions](https://stitchingart.com/wp-content/uploads/2024/07/christmas2009inst23.jpg)
The front of the card
![Christmas 2009 Machine Embroidery Design Instructions](https://stitchingart.com/wp-content/uploads/2024/07/christmas2009inst24.jpg)
The centre of the card
![Christmas 2009 Machine Embroidery Design Instructions](https://stitchingart.com/wp-content/uploads/2024/07/christmas2009inst25.jpg)
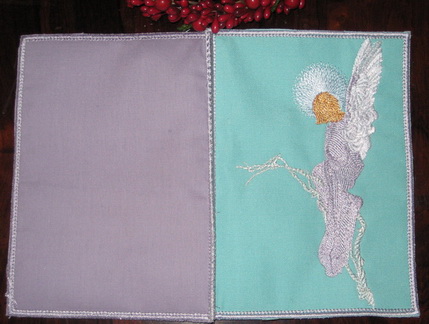
Front and back of the card
Polka Dot Christmas Card
![Christmas 2009 Machine Embroidery Design Instructions](https://stitchingart.com/wp-content/uploads/2024/07/christmas2009inst26.jpg)
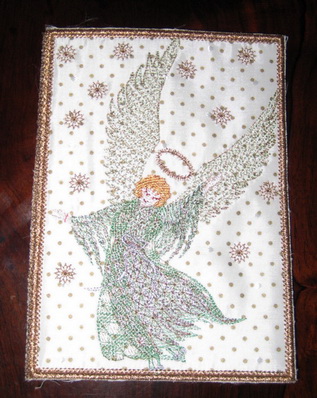
I stitched out “Blessed Angel_05” for the front of the card
![Christmas 2009 Machine Embroidery Design Instructions](https://stitchingart.com/wp-content/uploads/2024/07/christmas2009inst27.jpg)
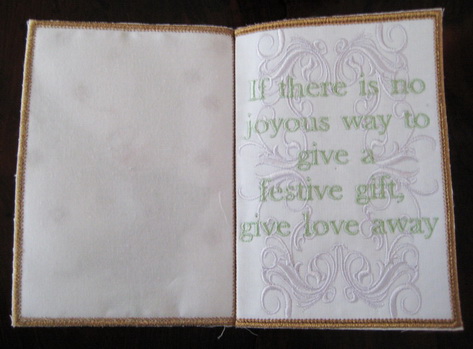
I stitched out “To give_01” for the centre of the card
![Christmas 2009 Machine Embroidery Design Instructions](https://stitchingart.com/wp-content/uploads/2024/07/christmas2009inst28.jpg)
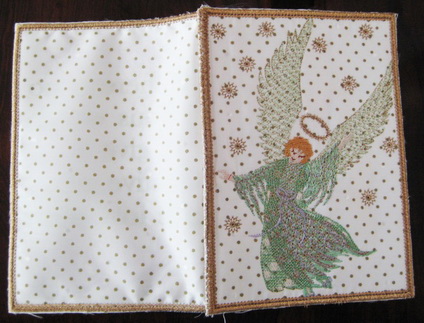
Front and back of card
Christmas 2009 Red Christmas Card
![Christmas 2009 Machine Embroidery Design Instructions](https://stitchingart.com/wp-content/uploads/2024/07/christmas2009inst29.jpg)
I stitched on the front of this card “Joy and happiness_02”
![christmas2009inst230](https://stitchingart.com/wp-content/uploads/2024/07/christmas2009inst230.jpg)
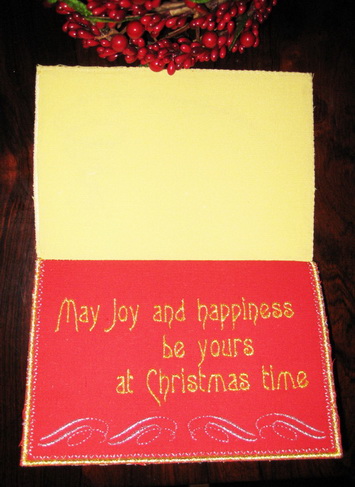
I stitched in the centre “Joy and happiness_03”
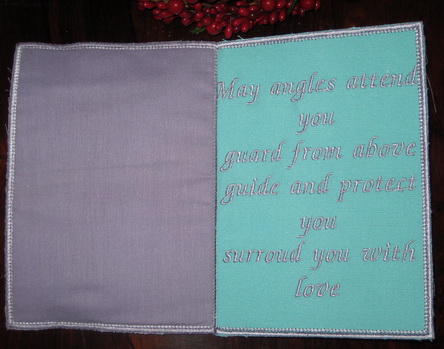
Christmas 2009 Pink Card
![Christmas 2009 Machine Embroidery Design Instructions](https://stitchingart.com/wp-content/uploads/2024/07/christmas2009inst31.jpg)
![Christmas 2009 Machine Embroidery Design Instructions](https://stitchingart.com/wp-content/uploads/2024/07/christmas2009inst32.jpg)
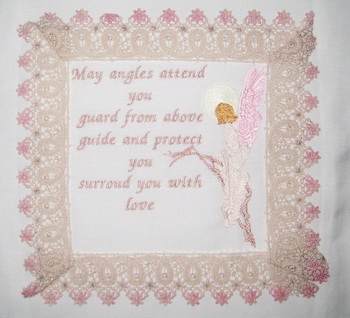
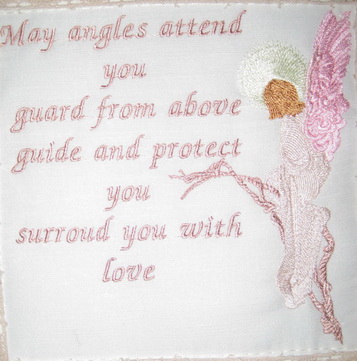
I am in the process of stitching this cushion together for a friend for her first Grandchild hope to have the cushion finished by next week that is why the lace looks a bit odd at the ends. I stitched the face of the cushion using the design “Angel of the moon_05” if you do not have a large enough hoop you can stitch out “Angel of the Moon_04” then beside the words you can place the “Angel of the Moon_01” or vice versa which ever you would find easier