 |
|
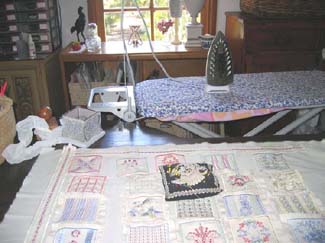 |
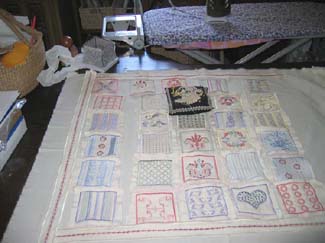
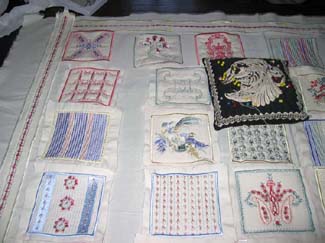
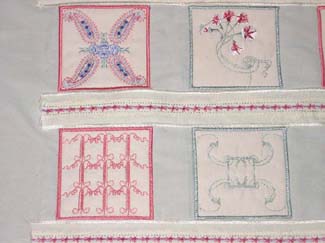
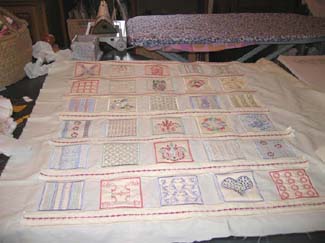
Select and stitch out the designs from each of the sets I selected 30 designs to make this quilt Once you have stitched all the designs out arrange how you would like the designs as seen in the photo above and below |
|
|
|
| |
|
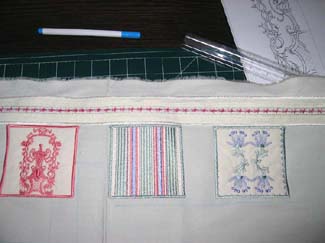 |
Cut away excess fabric around the satin stitch border of each square, as shown in the photo to the left |
| |
|
 |
On the back of each design square I would spray glue so as to keep the designs in place. This I would do one line at a time. |
| |
|
 |
Stitch each square down onto the backing fabric using your zig zag stitch, as shown to the left. |
| |
|
 |
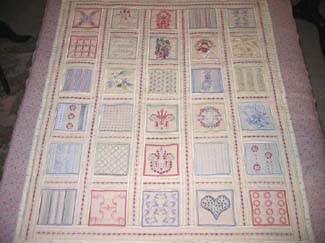
Then once I had finished stitching the row onto the backing fabric, I would then stitch the decorative stitch border track down, as seen in the photos above, below and to the left. |
| |
|
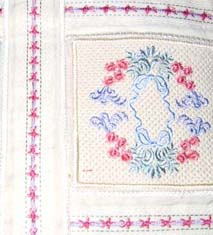
| On the vertical I stitched the decorative stitched border. As seen in the photo below | |
| |
|
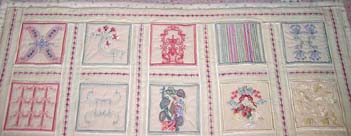 |
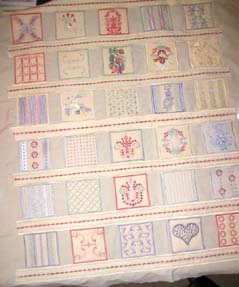
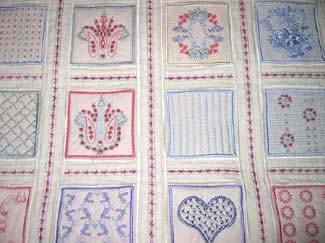
1st and 2nd rows of the Tiny Treasures Quilt |
| |
|
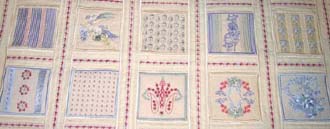 |
3rd and 4th rows of the Tiny Treasures Quilt |
| |
|
 |
3rd and 4th rows of the Tiny Treasures Quilt |
| |
|
| Instructions for the Decorative Stitch Border If you do not want to do the decorative stitch border you could use fabric for the tracks on the quilt |
|
| |
|
 |
|
| |
|
| Cut out a length of fabric longer than the quilt 5.5cm in or 2.5 inches in width Iron a crease vertical down the centre of the fabric, this give you a clean line to stitch |
|
| |
|
 |
Using the crease you just ironed down the centre of the fabric, stich a satin stitch Length .35 Width 3.0 I used a mauve thread |
| |
|
 |
On both sides of the satin stitch (mauve thread) stich a triple straight stitch in a green thread |
|
|
|
 |
On both sides of the triple straight stitch in a cream thread a type of zig zag stitch Lenth .60 Width .45 |
| |
|
 |
On both sides of the above stitch. Stich a satin stitch in a cream thread, Length .35 Width 4.5 |
| |
|
 |
Over the top of the mauve satin stitch. Stitch the flower in a medium pink colour Lenth 10 Width 6.0 In the centre of the flower stitch the round satin stitch in a darker pink Lenth 3.0 Width .30 |
| |
|
 |
|