Elizabethan World Machine Embroidery Instructions
Elizabethan World Midas Touch Cover
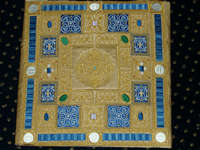
The finished size of the album cover is 13.0 x 13.0 inches (33.0 x 33.0 cms).
Notions
“book_centre” and “book01” to “book10” designs (11 designs).
Pale, soft gold coloured satin fabric for the Midas Touch panel – 17.0 x 17.0 inches (44.0 x 44.0 cms). (This is normally available at the bridal section in your fabric shop).
Royal blue coloured satin fabric.
Thin sheet of pellum (wadding) – same size as satin fabric.
Old scrap fabric to be used as a layer under the pellum.
Light quality stabilizer.
Closely examine the photos and diagrams of the Midas Touch
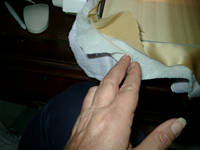
Pin the scrap fabric backing and the pellum onto the fabric.
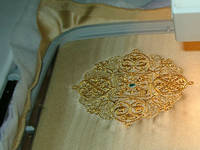
Commence stitching the designs on the fabrics, using the marked centre points on the fabric as your references. Start with the “book_centre” design. Stitch this design on the pale soft gold satin fabric, using bright gold coloured thread. pale soft gold satin fabric, using bright gold coloured thread. Please look closely at the photo provided.
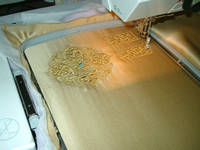
Next, stitch out the “book02” design. Once again, stitch this design on the pale soft gold satin fabric, using bright gold coloured thread, as shown below. It will be necessary to stitch this design eight times.
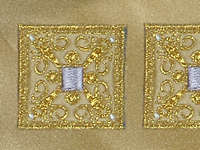
Continue by stitching out the “book03” design. Stitch this design on the pale soft gold satin fabric, using bright gold coloured thread, as shown below. It will be necessary to stitch this design twice.
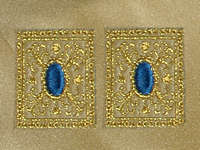
Next, stitch out the “book05” design. Once again, stitch this design on the pale soft gold satin fabric, using bright gold coloured thread, as shown below. It will be necessary to stitch this design four times.
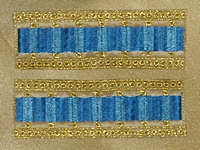
Follow this by stitching out the “book06” design. Once again, stitch this design on the pale soft gold satin fabric, using bright gold coloured thread, as shown below It will be necessary to stitch this design eight times.
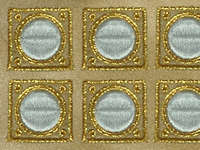
It will be necessary to stitch this design eight times. design on the pale soft gold satin fabric, using bright gold coloured thread, as shown below. It will be necessary to stitch this design eight times.
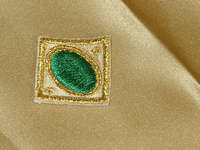
Next, stitch out the “book09” design. Once again, stitch this design on the pale soft gold satin fabric, using bright gold coloured thread, as shown below. It will be necessary to stitch this design four times.
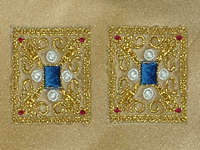
Follow this by stitching out the “book10” design. Once again, stitch this design on the pale soft gold satin fabric, using bright gold coloured thread, as shown below. It will be necessary to stitch this design twice.
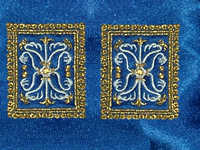
Continue by stitching out the “book01” design. Stitch this design on the royal blue satin fabric, using bright gold coloured thread, as shown below. It will be necessary to stitch this design four times.
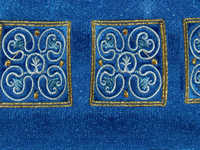
Last, stitch out the “book04” design. Once again, stitch this design on the royal blue satin fabric, using bright gold coloured thread, as shown below. It will be necessary to stitch this design four times.
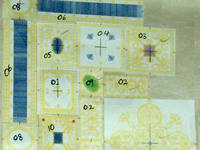
Print each of the Midas Touch designs, as required. I used the Buzz Tools™ program. Select the “Actual Size” setting under the “Printing” setting in your digitizing software. Using a ruler, mark the centre of each printed design. Designs printed using Buzz Tools™ have four points which may be used to assist in locating the centre of each design.
Mark the centre of each of the Midas Touch designs.
Cut out the shape of all the designs.
Lay the large sheet of paper on a flat surface.
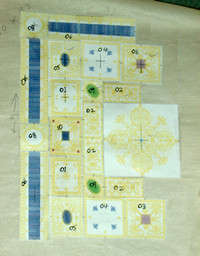
Arrange each of the designs on the large piece of paper, as shown to the left, or as you would prefer. Always remember that the positioning of the designs is most important, as the final effects and the quality of the finished scene you are creating relies on your design placement.
When you are satisfied with the positioning of all the designs on the large sheet of paper, lay it on top of the fabric, face upwards.
Locate the marked centre of each printed design. Select the first design. Insert a pin where you have marked the centre. Hold the pin firmly and lift the sheet with the printed design. Carefully mark the centre point of the printed design on the fabric with either a soft pencil or chalk. Repeat this process, marking the centre of all the printed designs on the fabric.
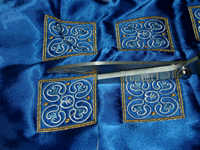
Carefully cut out each of the individual embroidered designs.
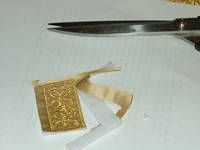
Ensure that you cut very close to the edges of the designs. Most of the designs have a satin stitch or a star edge, which should hide the stitches used to applique them onto the Midas Touch Panel
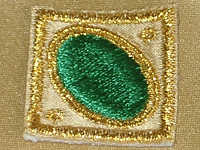
Commence attaching the designs on the Midas Touch panel. This is an orderly process. Each of the designs should be aligned to the centre points marked on the panel. Please refer to the layout sheet to position each design. Unless indicated otherwise, each design should be lightly stitched onto the panel using a small zig zag stitch (lenght 1.0 width 2.0) in a bright gold coloured thread, as each design has its own satin stitch embroidered border.
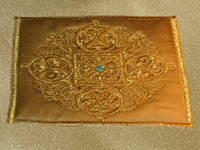
Each design has its own satin stitch embroidered border. Carefully position it in the centre of the pale, soft gold coloured satin fabric of the Midas Touch panel. Use the marked centre point as a guide. Applique the outer edges of the “book_centre” design onto the Midas Touch panel. Use a narow satin stitch in a bright gold coloured thread.
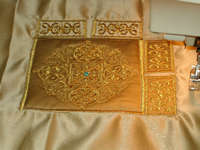
Proceed with attaching the remaining Midas Touch designs. Shown to the right are the “book02” designs being attached adjacent to the borders of the “book_centre” design.
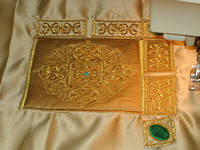
Working outwards from the centre, continue aligning and attaching the designs onto the Midas Touch panel.The addition of the “book09” design is shown to the right.
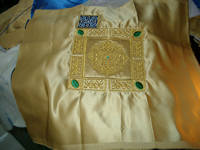
Continue positioning and attaching all the remaining Midas Touch designs onto the panel. Shown below is the addition of the first of four “book04” designs.
Elizabethan World Silk Purse


Notions
“stitch” and “purse” designs.
Charcoal coloured silk fabric – 20.0 inches (0.5 metre).
Thin sheet of pellum. (Wadding).
Backing fabric – 50.0 inches (128.0 cms).
Light coloured lining fabric.
Small clasp mechanism for purse.
Strip of small black beads – 1.2 metres in length.
Black coloured braiding.
Instructions
Print each of the Purse designs. I used the Buzz Tools™ program. Select the “Actual Size” setting under the “Printing” setting in your digitizing software. Using a ruler, mark the centre of each printed design. Designs printed using Buzz Tools™ have four points which may be used to assist in locating the centre of each design.
Mark the centre of each of the 2 designs.
Using the printed designs, cut rectangular shaped templates for the front and rear panels of the purse.
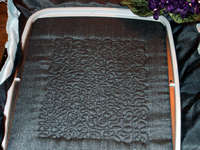
Stitch out the “stitch” design. This will form the rear panel of the purse. Remove this fabric panel from your hoop.
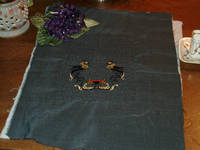
Stitch out the “purse” design using the actual coloured threads on the colour chart. This will form the front panel of the purse. Remove this fabric panel from your hoop.

Using the paper templates created in #3, above, cut the front and rear embroided rectangles to shape. These form both the front and rear panels of the purse.
Measure and cut the gusset for the purse. Cut identical strips of black silk, backing and pellum to size 17.5 x 1.5 inches (44.5 x 4.0 cms). The finished size of the gusset is 17.0 x 1.0 inches (43.0 x 2.5cms).
Pin the black silk fabric, the backing and the pellum together.
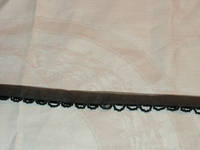
With the right sides of the fabric together, sew the beading or piping to the sides of the purse, matching the raw edges
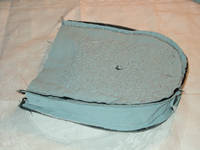
With the right sides of the fabric together, pin and sew the side gussets in place, easing the fabric around the curved edges.
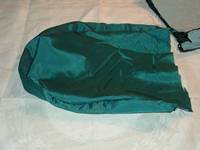
In the same manner as described in instruction #10, separately sew the lining.
Place the lining inside the purse and pin the fabric and lining together matching all the edges.
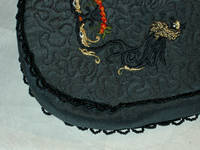
Sew around the top of the purse using a small zig zag stitch in black coloured thread, joining the lining and the embroided fabric together.
Sew two rows of gathering stitch around the top edge of the purse. Pull the gathering stitch to fit the opened purse clasp.
Follow instructions given with the clasp to attach the purse.
Trim the inner edge of the clasp with strips of black braiding.
Attach a long loop of the black braiding to the clasp to form a stylish handle for the purse.

The finished silk purse.
Elizabethan World Garden Cushion
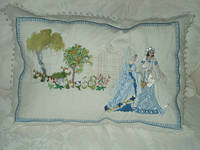
The finished size of the cushion is 20.5 x 14.5 inches (52.0 x 37.0 cms).
Notions
“old tree01”, “trellis”, “the garden” and “maiden” designs.
Fine white linen fabric – 20.0 inches (0.5 metres).
Pellum.
Backing fabric.
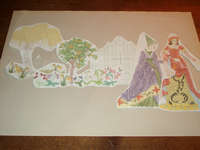
Print each of the Garden designs. I used the Buzz Tools™ program. Select the “Actual Size” setting under the “Printing” setting in your digitizing software. Using a ruler, mark the centre of each printed design. Designs printed using Buzz Tools™ have four points which may be used to assist in locating the centre of each design
Mark the centre of each of the 4 designs.
Cut out the shape of all the designs.
Lay the large sheet of paper on a flat surface.
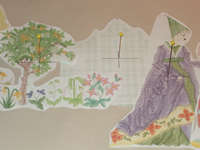
Arrange each of the designs on the large piece of paper, as shown to the left.
Attach each of the designs onto the large piece of backing paper.
When you are satisfied with the positioning of all the designs on the large sheet of paper, lay it on top of the fabric, face upwards.

Locate the marked centre of each printed design. Select the first design. Insert a pin where you have marked the centre. Hold the pin firmly and lift the sheet with the printed design.
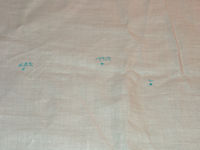
Carefully mark the centre point of the printed design on the fabric with either chalk or soft pencil. Repeat this process, marking the centre of all the printed designs on the fabric.
Pin the pellum and the backing material onto the fabric
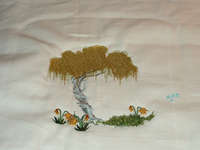
Commence stitching the designs on the fabric, using the marked centre points on the fabric as your references. Start with the “old treeo1” design using the same colours as in the colour chart. It should be positioned to the far left, towards the top. The positioning of this design provides the scope of distance to this scene. Please look closely at the photos provided.
NOTE: Ensure that you stitch the overlayed designs first, folowed by those designs which overlay them. Here, the “garden” design overlays the “old tree01” design and the “trellis” design. In addition, the “maid gwen” design overlays the “trellis” and the “maiden” designs.
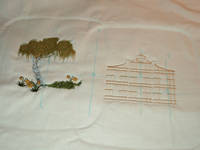
Continue by stitching the “trellis” design using an eggshell coloured thread. It should be positioned to the right of the “old tree01” design, in the centre of the garden panel.
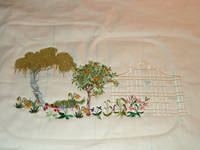
Follow this with the “garden” design, using the same threads as in the colour chart. It should be positioned between and slightly below the “old tree01” and “trellis” designs.
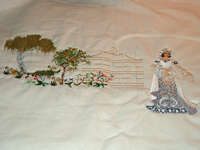
Next, stitch out the “maiden” design to the right of the “trellis” design, as shown to the left.
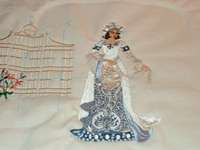
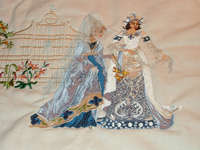
Continue by stitching out the “maid gwen” It should be positioned to the right hand side of the Garden panel, between the “trellis” and “maiden” designs. It should overlay both these designs. refer to the photos to the left. The “maid gwen” design overlays the “trellis” design on the right. The extended arm of the maid gwen en overlays the “maiden” design on the left hand side.
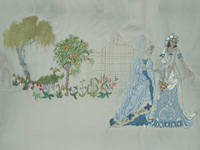
Decorating the Border of the Embroidered Panel.
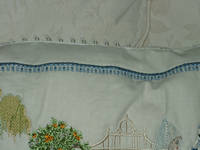
Sew an attractive frame comprised of parallel rows of decorative stitches, as shown below.
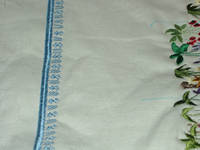
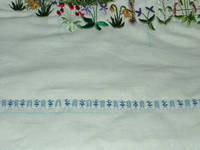
Decorating the Garden panel can either be simple, as shown here stitched in a delightful blue coloured thread, or you can go overboard, using many decorative stitches from your machine with very spectacular results. The decorative stitches are so beautiful and more importantly, they are most often overlooked as being an integral part of the decorative process.
Elizabethan World Tapestry Cushion
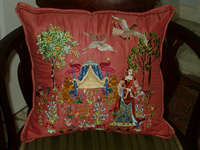
The finished size of the cushion is 17.0 x 17.0 inches (43.0 x 43.0 cms).
What you need:
“orange tree”, “oak tree”, “tent”, “rabbit”, “flowers”, “flowers_mirr”, “flowers01″, maiden”, “flight” and “hawk” designs. (10 designs).
Burnt orange coloured, very fine linen fabric – 31.0 x 35.0 inches (50.0 x 60.0 cms).
Thin sheet of pellum (wadding) – same size as linen fabric.
Backing fabric – same size as linen fabric.
Print each of the Tapestry designs.
I used the Buzz Tools™ program. Select the “Actual Size” setting under the “Printing” setting in your digitizing software. Using a ruler, mark the centre of each printed design. Designs printed using Buzz Tools™ have four points which may be used to assist in locating the centre of each design.
Mark the centre of each of the 10 designs.
Cut out the shape of all the designs.
Lay the large sheet of paper on a flat surface.
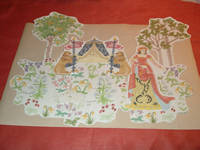
Arrange each of the designs on the large piece of paper, as shown to the left, or as you would prefer.
Attach each of the designs onto the large piece of backing paper. I use and recommend sticky tape
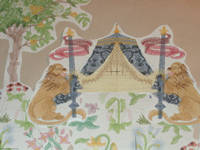
When you are satisfied with the positioning of all the designs on the large sheet of paper, lay it on top of the fabric, face upwards.
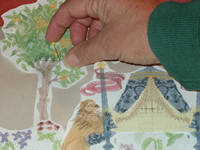
Locate the marked centre of each printed design. Select the first design. Insert a pin where you have marked the centre. Hold the pin firmly and lift the sheet with the printed design.
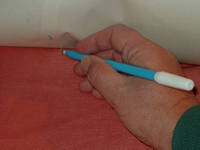
Hold the pin firmly and lift the sheet with the printed design. the fabric with either chalk or soft pencil. Repeat this process, marking the centre of all the printed designs on the fabric.
Pin the pellum and the backing material onto the fabric.
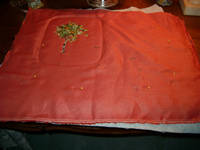
Commence stitching the designs on the fabric, using the marked centre points on the fabric as your references. Start with the “orange tree” design using the same colours as in the colour chart. It should be positioned to the far left, towards the top. The positioning of this design provides the scope of distance to this scene. Please look closely at the photos provided.
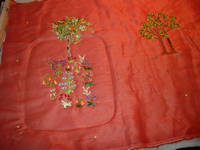
Ensure that you stitch the overlayed designs first, folowed by those designs which overlay them. Here, the “flowers” design overlays the base of the “orange tree” design. The “tent” design overlays the “flowers” and flowers01 designs. Furthermore, the “maiden” design overlays the “tent”, “flowers_mirr” and the “oak tree” designs. At the top, the “hawk” design also overlaps the the “oak tree” design.
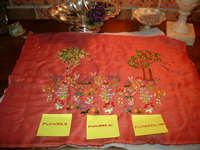
Continue by stitching the “oak tree” design using the same threads as in the colour chart. It should be positioned to the far right, towards the top.
Follow this with the “flowers” design, using the same threads as in the colour chart. It should be positioned to the far left and below the “orange tree” design. Next, stitch out the “flowers01” design to the right of the “flowers” design. It should be positioned in the centre, in line with the “flowers” design. Then stitch out the “flowers_mirr” design. It should be positioned to the right of the “flowers01” design, below the “oak tree” design. It should be in line with the two other flower designs at the bottom of the tapestry panel.
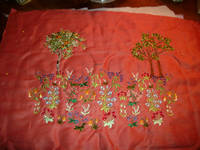
The Tapestry panel displayed below shows the three flower designs. Please note the use of the coloured threads as in the colour chart.
Proceed by stitching out the “tent” design. Use the same colours as in the colour chart. It should be positioned in the centre of the
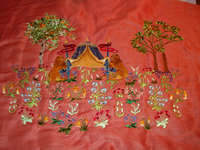
Proceed by stitching out the “tent” design. Use the same colours as in the colour chart. It should be positioned in the centre of the Tapestry panel, above the “flowers01” design. The “tent” design overlays the top of the “flowers” design on the bottom, left. It also overlaps the top of the ” flowers01″ design at the bottom. Please refer to the photos shown below.


Continue by stitching out the “maiden” design using the same colours as in the colour chart. It should be positioned to the right hand side of the Tapestry panel and overlays several other designs. Please refer to the photos shown below. The “maiden” design overlays the “flowers_mirr” design on the bottom and right. It overlays the “tent” design on the left. The head and the extended arm of the maiden overlays the “oak tree” design on the top right hand side.
Please note carefully the positioning and overlays of the “maiden” design. In particular, note the relative sizes of the surrounding designs. These are the factors which provide the spatial orientation and sense of depth to the Tapestry scene.

The “flight” design should be stitched out next, using the same colours as in the colour chart. It should be positioned to the top centre of the Tapestry panel, above the “tent” design and immediately adjacent to the right of the “orange tree” design. The “flight” design does not overlay any other design.

The “hawk” design is the next design to be added. It should be positioned to the left of and slightly above the “oak tree” design. In that position, it should be to the right of and above the “flight” design. Stitch it out using the same colours as in the colour chart.


The “rabbit” design is the last design to be applied to the Tapestry panel. The “rabbit” design was used twice here, the first design was positioned to overlay the “flowers01” design, towards the bottom of that design Stitch out the “rabbit” design, using the same colours as in the colour chart. I changed the colours here. I made him darker, but please do you own thing.
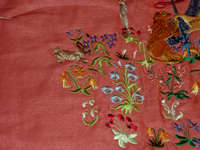
The second of the “rabbit” designs was positioned to the far eft of the “flowers” design and overlays that design on the left hand side. Do your own thing with this design. Try changing the colours in this design. I used darker colours for this second “rabbit” design. Stitch out the second “rabbit” design in your chosen colours.
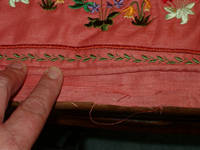
Decorating the Border of the Embroidered Panel. 20. * One row consisting of a decorative stitch (in the form of a leaf) from the machine using leaf green coloured thread – 0.5 inches (1.5 cms) inside the outer edge. * One row consisting of a narrow satin stitch using a colour just slightly darker than the colour of the panel. This should sewn parallel to and inside the leaf green coloured leaf border, approximately 1.0 inches (2.5 cms) from the outer edge.
Elizabethan World Beautiful Cushion
What you need:
“fair maiden”, “trellis” and “the garden” designs.
White coloured linen fabric for the View panel – 15.0 x 15.0 inches (38.0 x 38.0 cms).
Cushion material – white coloured linen fabric.
Thin sheet of pellum. (Wadding).
Old scrap fabric to be used as a layer under the pellum.
Print each of the View designs in “Actual Size”.
Mark the centre of each of the 3 designs.
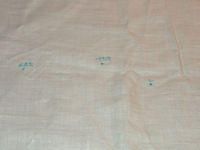
Cut out the shape of all the designs.
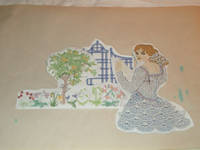
Lay the large sheet of paper on a flat surface. Arrange each of the designs on the large piece of paper, as shown to the left, or as you would prefer.
Attach each of the designs onto the large piece of backing paper.
When you are satisfied with the positioning of all the designs on the large sheet of paper, lay it on top of the fabric, face upwards.
Locate the marked centre of each printed design. Select the first design. Insert a pin where you have marked the centre. Hold the pin firmly and lift the sheet with the printed design.
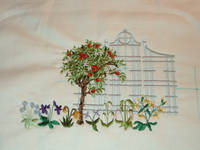
Carefully mark the centre point of the printed design on the fabric with either chalk or soft pencil. Repeat this process, marking the centre of all the printed designs on the fabric.
Pin the pellum and the backing material onto the fabric.
Commence stitching the designs on the fabric, using the marked centre points on the fabric as your references. Start with the “trellis” design.
It should be positioned in the centre of the View panel.
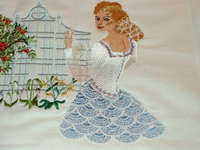
Next, stitch the “garden” design. It should be positioned to the left of and at the bottom of the “trellis” design and overlap it on the left hand side.
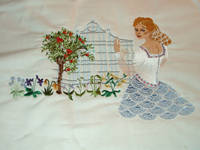
Follow this design with the “fair maiden” design. It should be positioned to the right of and below of the “trellis” design and overlap it on the right hand side.
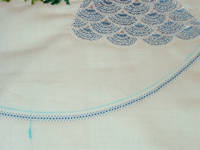
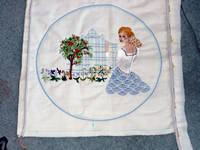
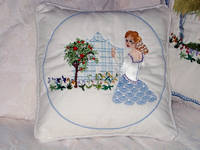
Having stitched out and combined the three View designs, the View panel is now complete, as shown to the left.
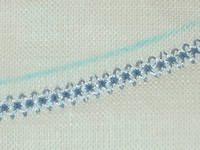
Decorating the Border of the Embroidered Panel.
Using a soft pencil or chalk, draw a large circle on the View panel, (I used a dinner plate) centred on the group of three embroidered designs.
Sew an attractive circular frame comprised of decorative stitches, as shown to the left.
