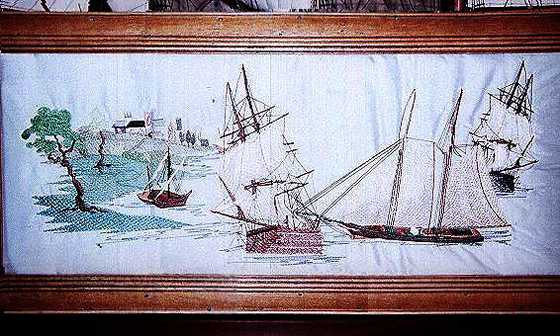
Maritime Machine Embroidery Design Instructions

Four Maritime designs, “victory_01”, “victory_01sm”, “skiff_01” and “background” were combined. Stitched on a pale blue silk.
Print out the four designs. Ensure that all the prints are actual size. I use the Buzz Tools™ program for printing my designs.
Determine and mark the centre of each of the four print-outs.
Carefully cut around each of the four printed designs, so that each of the designs can be positioned on your fabric in the selected positions.
Lay out and position each of the four designs on a large piece of paper in the positions which you finally desire to stitch out on your fabric.
The four designs look better and will have more spatial orientation when combined if you do not have them positioned directly under one another.
Glue or tape each of the four printed designs onto your large piece of paper.
Overelay, position and pin your large sheet of paper over your fabric.
Carefully, using a very soft pencil, mark the centre points for each of the four designs on your fabric, through your printed designs.
Commence by stitching out the “background” design on the left hand side.
Remove hoop and reposition it to the right hand side of your fabric.
Next, stitch out the “victory_01sm” design in the selected position.
Remove hoop and reposition it below and slightly to the left hand side of the the “background” design.
Stitch out the “skiff_01” design in the selected position.
Remove hoop and reposition it below and slightly to the right hand side of the “background” design.
Stitch out the “victory_01” design in the selected position.
