Panache Machine Embroidery Design Instructions
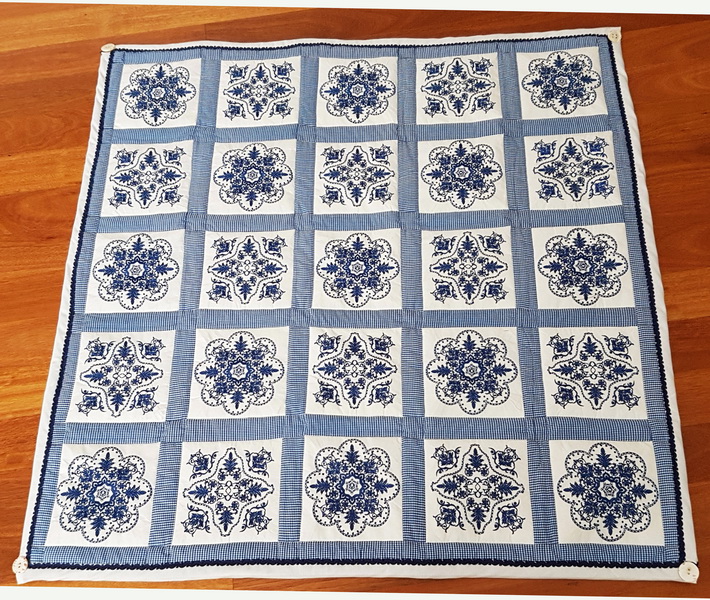
Panache Quilt
What you need:
- 3 Meters or 3.2 yards of white fabric
- 2 Meters or 2 yards of blue and white gingham fabric
- 5 Meters or 5.5 yards of navy blue braid
- 5 Meters or 5.5 yards of white 5cm or 2 inches wide bias binding
- 5 Meters or 2 yards of fabric for the backing
- 5 Meters or 2 yards of wadding double sided glued
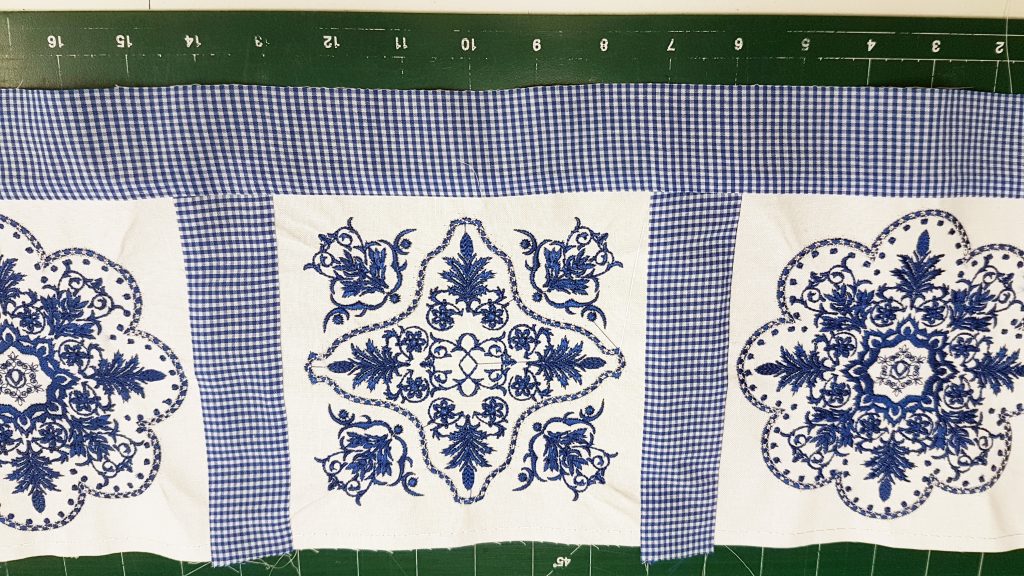
Stitch out 13 panels of Panache_01
Stitch out 12 panels of Panache_02
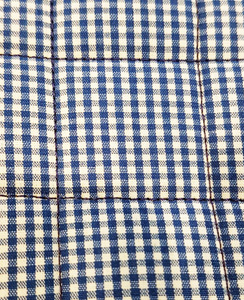
Cut out 4.5 cm or 2 inches wide blue and white gingham bands for each embroidery panel
Stitch each blue and white gingham band to the embroidery panel

Once you have stitched all 5 embroidery panels to the blue and white gingham band. Stitch the horizontal band to all the panels

Cut your backing fabric slightly larger than the quilt, why I say this, once you start stitching everything together the wadding sinks the fabrics
Cut wadding slightly larger than the quilt, I used a wadding that is glued both sides, in that way you can iron the front and the backing fabric of the quilt onto the wadding
Stitch the quilt together with the wadding and backing fabric, I will leave how you would like to stitch this yourself
Stitch the white bias binding along the edge of the quilt
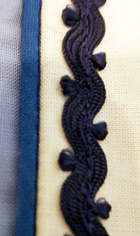
Over the top of the white bias binding along the inside edge, stitch down the navy blue braid
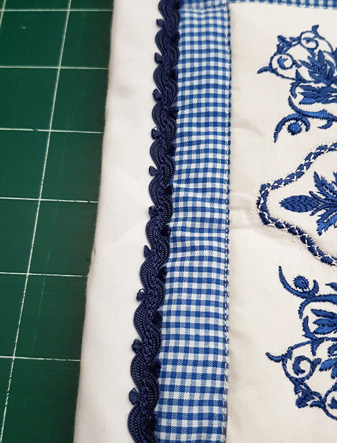
On the back of the quilt hand stitch the white bias binding
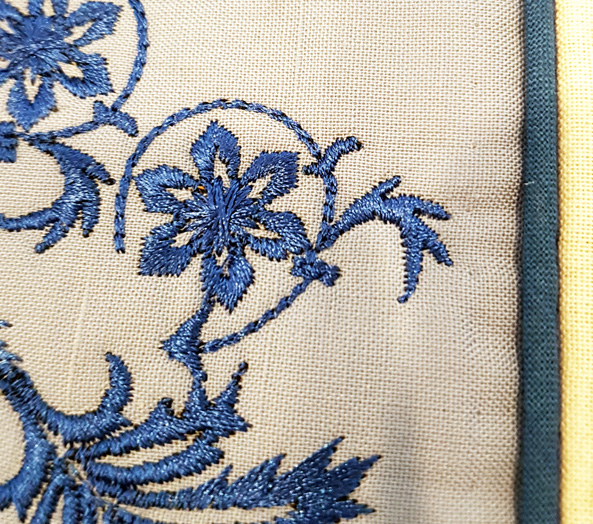
Panache Blue Cushion
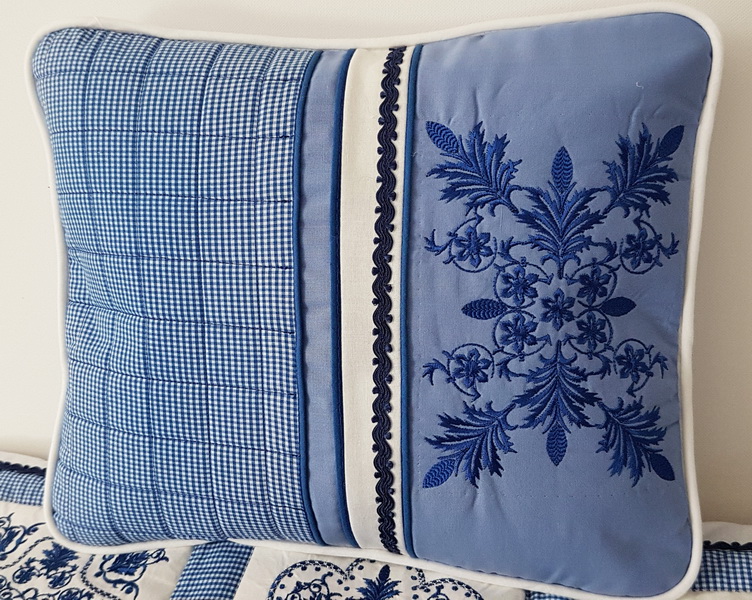
Cushion size 35 x 35 cm or 13.5 x 13.5 inches approximately
I lost my camera which had all the step by step photos for the instructions to make this cushion, hopefully you are able to understand my written instructions 🙂
What you need:
- Half a meter or half yard of blue and white gingham fabric
- Quarter of a Meter or quarter of a yard of plain blue fabric
- Half a Meter or half a yard of wadding
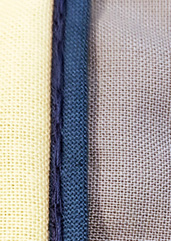
- 2 meters of white bias piping
- 1 meter of royal blue bias piping
- Navy blue braid
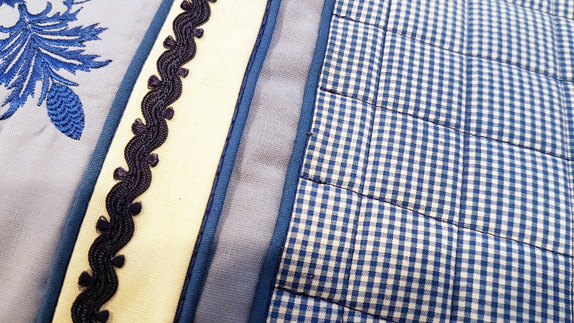
Cut a strip of white fabric 5 cm or 1.9 inches this allows for 7/8 inch seam allowance
Stitch the white fabric to the bias piping on the pale blue fabric
Stitch to one side of the white fabric the navy blue braiding
Stitch the royal blue piping to the white fabric
Stitch a slimmer piece of blue fabric to the bias piping on the white fabric
Under the blue and white gingham side panel I put thick piece of wadding
Stitch the wadding and blue and white gingham together to give a nice quilted area
Stitch the bias piping onto the blue fabric
Stitch the padded blue and white gingham to the piping on the blue fabric
Stitch the white bias piping around the cushion
Panache Bag
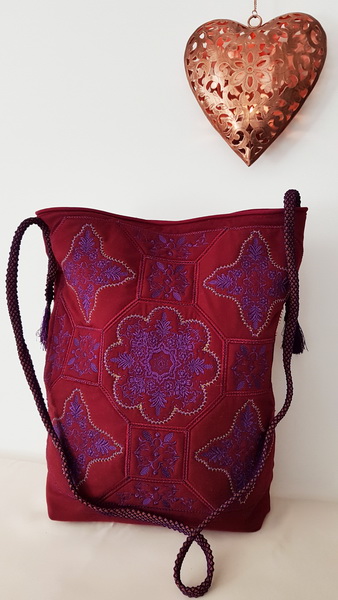
Bag size 37 x 37 cm or 14.5 x 14.5 inches approximately
What you need:
- 5 Meters or 1.5 yards of maroon fabric
- 5 Meters or 2 yards of fabric for the lining
- 1 Meter or 1 yard of wadding double sided glued
- 1 magnetic clamp
- Stitch out 1 panel of Panache_10
- Stitch out 4 panels of Panache_09
- Stitch out 4 panels of Panache_11
Layout of the Panache Bag
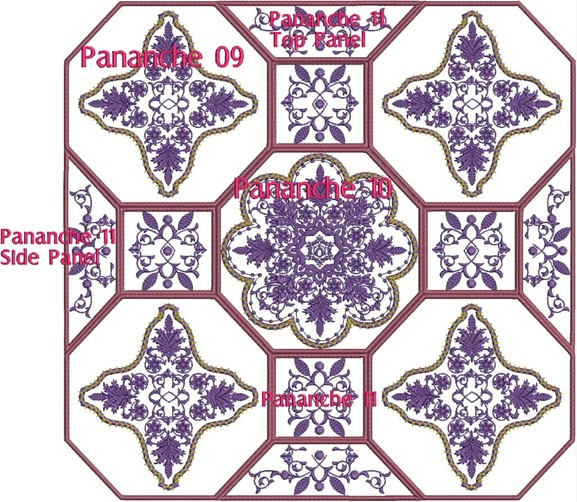
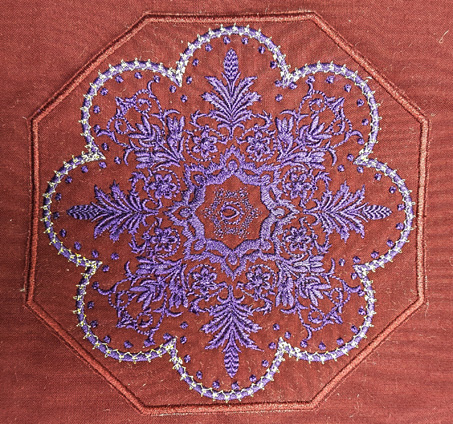
In the centre of the fabric for your bag lightly glue the panel “Panache_10”
Stitch the panel down to the background fabric using a zig zag stitch
Position and lightly glue “Panache_09” then zig zag stitch to the background fabric
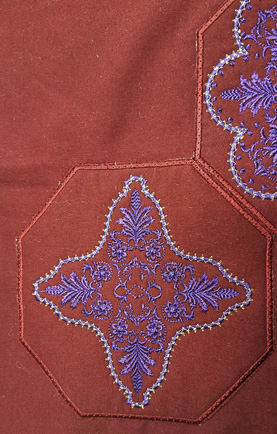
Position and lightly glue “Panache_11” then zig zag stitch to the background fabric
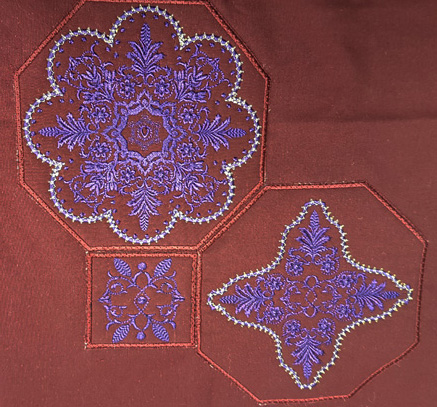
Position and lightly glue “Panache_12_side panel” then zig zag stitch

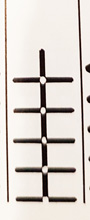
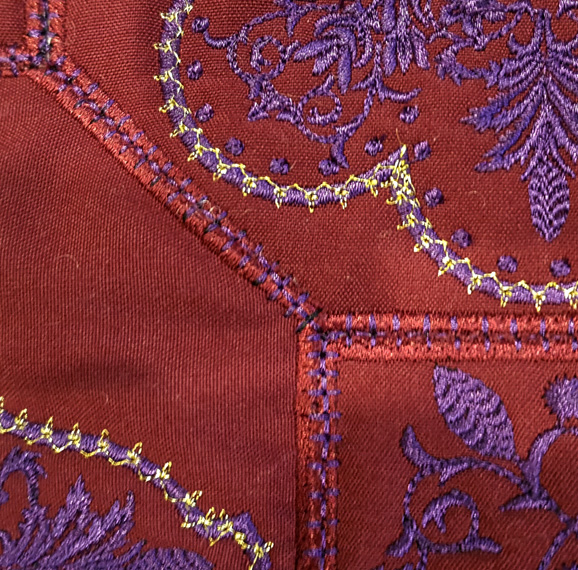
Once you have finished stitching all the panels together I then used a decorative stitch from my sewing machine and stitched over the where you zig zagged your panels
This diagram is the type of decorative I used to sew over the zig zag stitch of each panel from my sewing machine
A close up photo below showing you the stitch I stitched over the zig zag stitch in the same colour thread as the purple thread in the designs, doing this helps bring the work together
Cut the lining, front and back of the bag to the size you would like, not forgetting to leave at the base of the lining and bag enough fabric to make your box corner, I usually add about 10cm or 4 inches depending on how big you would like the box corners
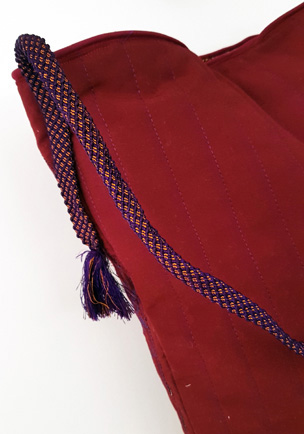
Attach the wadding to the front and back of the bag fabric
To make the bag look nice on the back I straight stitched the wadding to the bag fabric. The photo below gives you some idea as to what I am writing about
This URL has a video of how to make 3 different ways to make a box corners. http://so-sew-easy.com/3-methods-boxing-corners-bag/
Attach the magnetic clamps to the lining
Attach your lining to the bag
Attach the handle; I made the length of the handle so it would fit over my shoulder. When in Japan I purchased many obijime cords, since realized you can purchase these on line, they make great handles for bags. I found obijime cords on Etsy, this is the URL if you are interested https://www.etsy.com/market/obijime_cord