Textured Pyramid Machine Embroidery Design Instructions
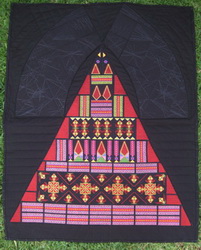
Textured Pyramid Wall Hanging
What you need for the Pyramid Wall Hanging:
6 meters of black fabric
6 meters of tear away medium weight
2 meters Floriani Stitch N Shape (I would not recommend the Stitch N shape with the glue on the back as I had problems with my machine from the glue from a previous design set that I had stitched out)
1.5 meters of thin wadding or Pellon
Pyramid Design Instructions
Stitch out 22 of “Design_04”
Stitch out 2 of “P_03” (mirror one of the “P_03” in your machine or in your software)
Stitch “P_01” (mirror one of the “P_01” in your machine or in your software)
Stitch “Design_03” 4 times
Stitch “Design_01” 4 times
Stitch “Design_02” 6 times
Stitch out 2 of “P_04” (mirror one of the “P_04” in your machine or in your software)
Stitch “Design_05” 3 times
Stitch out 2 of “P_06” (mirror one of the “P_06” in your machine or in your software)
Stitch 3 of “Design_06”
Stitch 2 of “P_07” (mirror one of the “P_07” in your machine or in your software)
Stitch 3 of “Design_10”
Stitch 1 of “Design_07”
Stitch 2 of “P_08” (mirror one of the “P_08” in your machine or in your software)
Stitch 2 of “Design_08” (mirror one of the “Design_08” in your machine or in your software
Stitch 2 of “Design_09” (mirror one of the “Design_09” in your machine or in your software
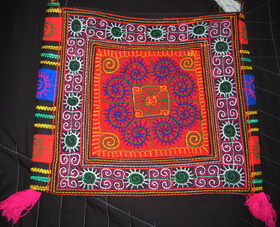
Ethnic_01
This bag is from Vietnam made by a tribe up in the Hinterlands
Where ever I go in the world I collect embroideries, some of the most beautiful are the very colourful embroideries mainly from India, China, Vietnam, Thailand and many of the South American countries to name a few. A fine example is the bag above, take note of the colours, many of which you would never put together, but it works!!!!!!!!!!!
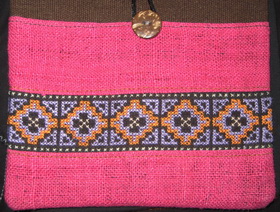
This work is from China
Curved Designs part of the Pyramid wall hanging
Stitch out all the “Circ_01 to Circ_18” then you must mirror all of the designs either in your machine or in your software and then stitch the mirror pieces
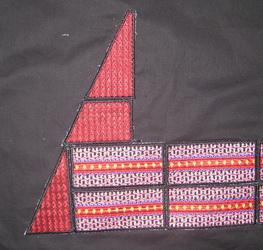
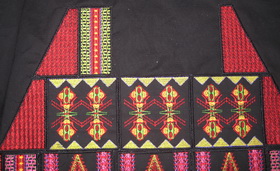
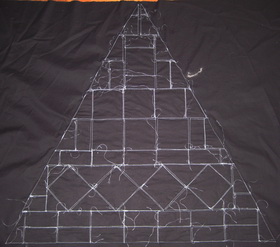
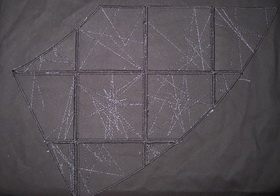
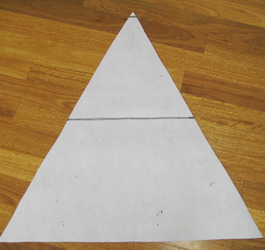
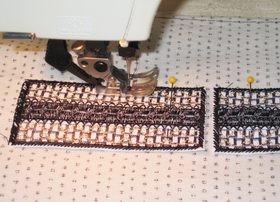
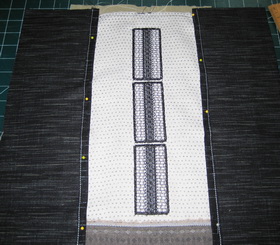
Draw a line with chalk horizontally across the backing fabric, this line you will use to position and then stitch using a zigzag stitch the design, “design_04”
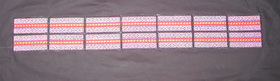
Stitch down another 7 of “Design_04” above the previous “Design_04”
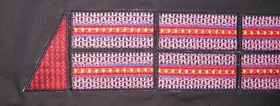
Stitch down on both sides “P_03”
Mirrored “P_03”

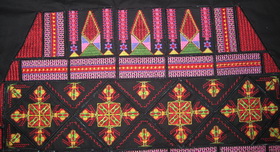
Showing you 14 of “Design_04” stitched and 2 of “P_03” mirrored at one end
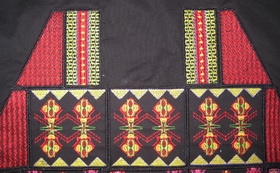
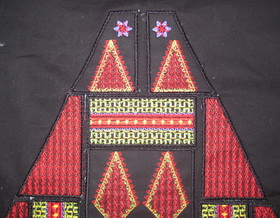
Stitch “P_01” above “Design_04” and “P_03”
Stitch “P_02” above “P_01”
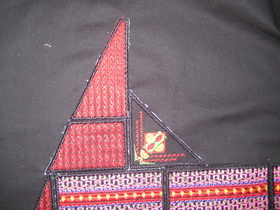
Stitch “Design_03” up against “P_02 and P_01”

Stitch”Design_03” against “P_02”
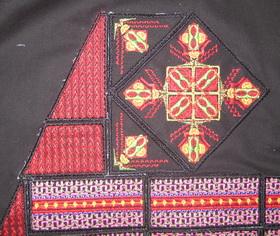
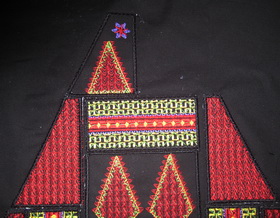
Stitch “Design_01” in between “Design_03”
Stitch “Design_02” to fit between “Design_01”
Stitch “Design_01” to fit between “Design_02”
Stitch again “Design_02” to fit between “Design_01”Repeat till you have stitched all 4 of “Design_01”
Stitch “P_01” and “P_02”
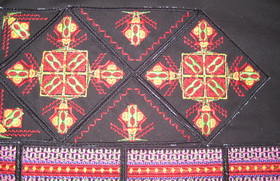
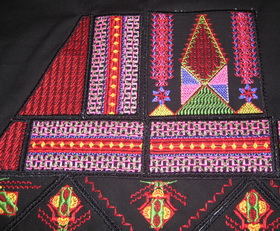
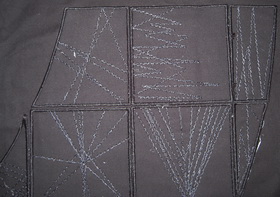
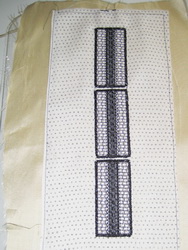
Showing you all the designs stitched at this stage
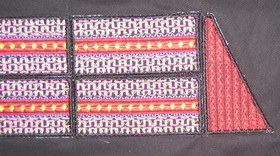
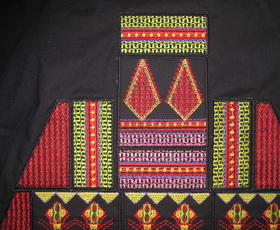
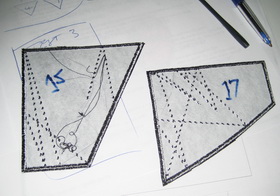
Stitch “P_04”
Stitch 5 of “Design_04” then stitch at the end the mirrored piece of “Design_04”
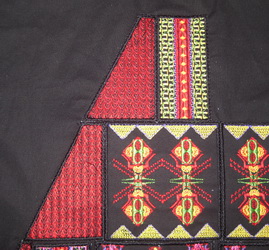
Stitch “P_05” above “P_04 and Design_04”
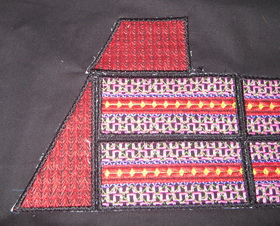
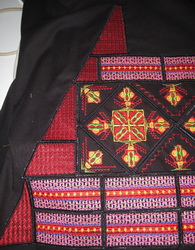
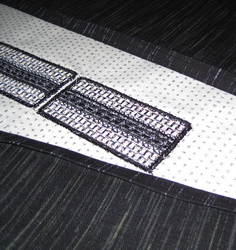
Stitch “Design_04” diagonally
Stitch “Design_05” up against “Design_04”
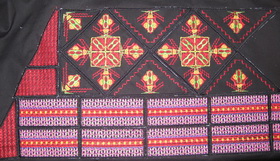
Stitch 3 of “Design_05” then stitch “Design_04” diagonally then stitch “P_05”
Stitch “P_06” then stitch 3 times “Design_06”

Stitch “P_06”
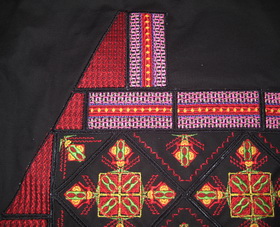
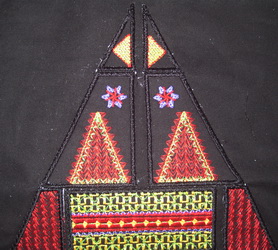
Stitch “P_07” above “P_06” and “Design_06” then stitch diagonally “Design_10”
Stitch “P_07” the reason for doing this at this stage is sometimes the fabric tends to move and you may not be able to centre the following designs and in that way you can space any gaps you may have.
Stitch “Design_10”
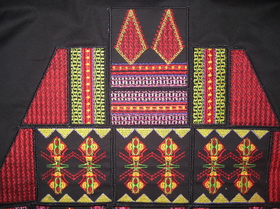
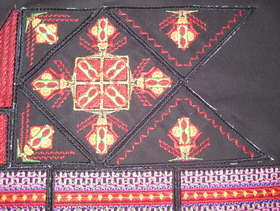
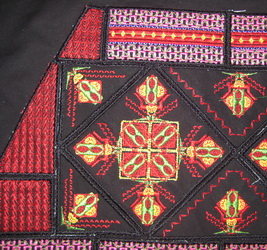
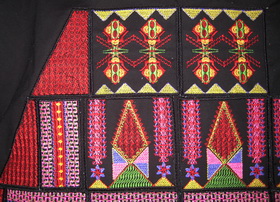
Stitch in the centre “Design_04” then above stitch “Design_07” You will notice due to movement of fabric that I have a slight gap between “Design_10”on both sides
Stitch “Design_10” above “Design_07”
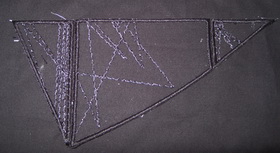
Stitch on either side “P_08” then stitch “Design_08”
Stitch the other “Design_08” on the other side
Stitch “Design_09” then the other “Design_09”
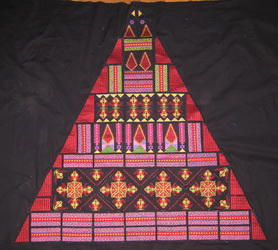
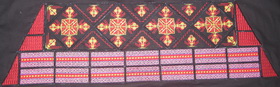
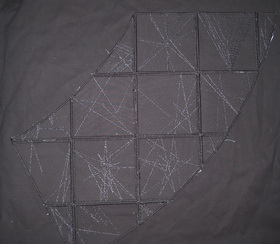
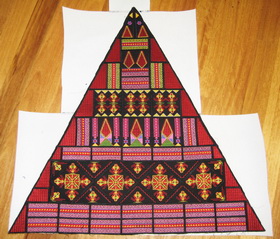
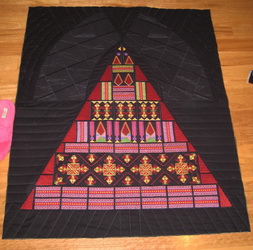
Finished zigzagging all the pieces together for the Pyramid
Back of Pyramid, showing you all the pieces zigzagged onto the backing fabric
Instructions for the Curved Design
My advice is to number on the back of all the “Circ” designs as you finish, makes life a lot easier
Stitch “Circ_18” down using a zigzag stitch on backing fabric then stitch “Circ_15 and Circ_11”
Stitch “Circ_15, Circ_14, Circ_13, and Circ_12”
Stitch “Circ_11, Circ_10, Circ_09, Circ_08”
Stitch “Circ_07, Circ_06, Circ_05, Circ_04”
Stitch “Circ_03, Circ_02, Circ_01”
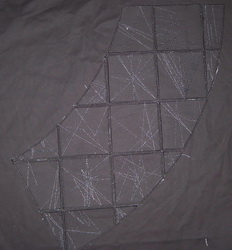
All the “Circ” designs stitched on the backing fabric
Stitch all the other “Circ” designs for the other side of the pyramid

Both side of “Circ” designs zigzagged stitched to the backing fabric
Back of the backing fabric showing you all the “Circ” designs zigzagged stitched
Close up of the back of “Circ” designs zigzagged stitched to the backing fabric
Cut away any excess fabric with your scissors try to get as close as you can to the zigzagged edges of the pyramid
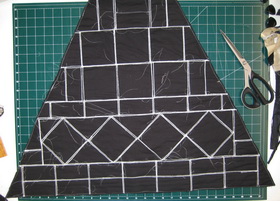
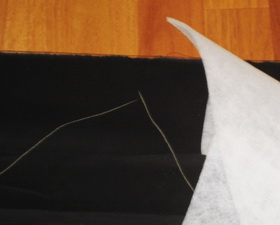
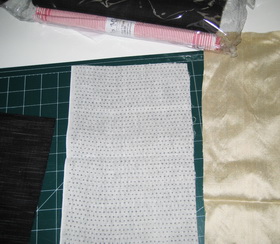
Cut Floriani Stitch N Shape to the measurements of the Pyramid as the Stitch N Shape is not large enough for the area I stitched the Stitch N Shape together as shown in the photograph
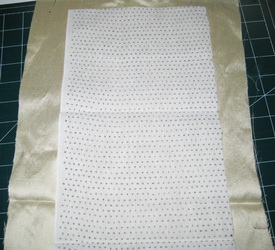
Lay the Pyramid over the Stitch N Shape and cut using your scissors the Stitch N Shape to the shape of the pyramid
Stitch N Shape cut to the shape of the pyramid

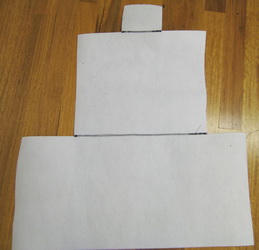
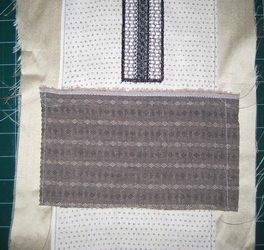
Using the fabric you wish to attach the pyramid and circular designs lay the pyramid and circular designs on and marking with chalk the three pieces
Measure your pellon to the size of the wall hanging you wish to have or bedspread
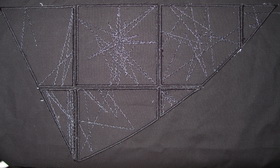
If you wish to quilt around the Pyramid, this is a nice way to give the wall hanging a polished finish, the quilting takes such a little time to using your straight stitch from your sewing machine
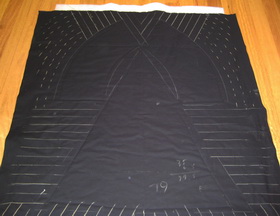
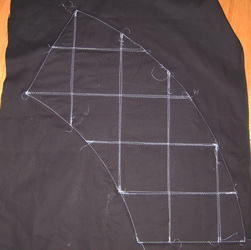
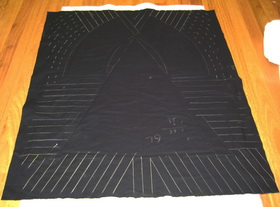
Closer look at how I designed in chalk the quilting lines
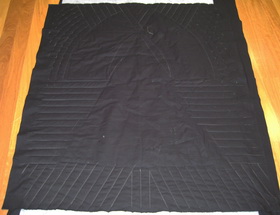
Quilting stitched using a straight stitch
Once you have stitched the quilting then cut away any excess fabric, so you have 4 nice, neat edges
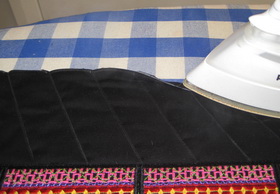
Iron the bottom and top of the wall hanging a thin hem, I suggest you use the steam on your iron.

Once you have finished ironing both the top and bottom of the wall hanging, overlap the hem you just ironed to make another hem and stitch the top and bottom of the wall hanging.
Repeat doing the sides of the wall hanging
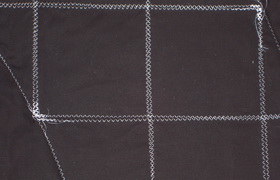
This is a close up of the finished hem on the correct side of the wall hanging; this gives the wall hanging a nice edge
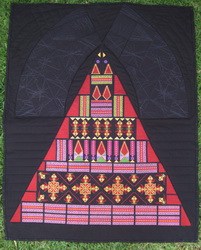
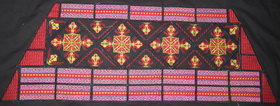
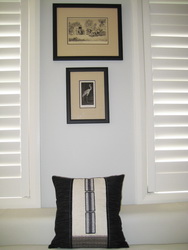
Finished wall hanging
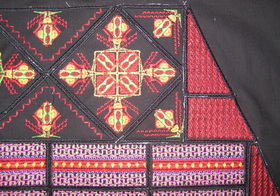
Close up of the finished wall hanging
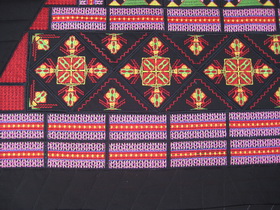
Close up

Close up

Close up
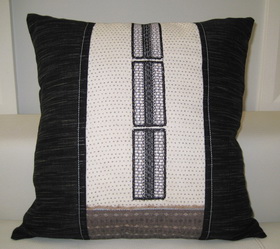
Textured Pyramid Cushion
What you need:
¼ meter of fabric for the centre panel
1 meter of the two side panels
¼ meter of the bottom panel
Silk for backing centre panel only if your fabric is also very fine
Stitch out 3 of “Cush_01”
The dark grey and white fabric is a very fine Japanese cotton, as this fabric is so fine I will back the fabric using a cream fine silk
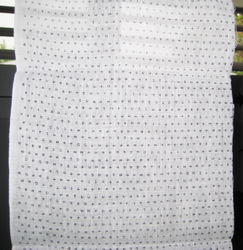
Showing you how fine the cotton is
Laying the cotton fabric over the fine silk fabric, this gives the cotton fabric depth
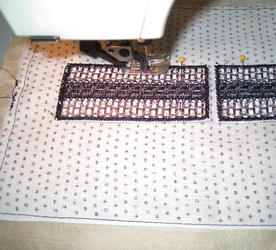
Stitch out 3 of “Cush_01” Set the 3 designs in a row and then appliqué the designs using a similar stitch as I used on the border.The border stitch is a common stitch in your Decorative Stitches from your sewing machine
All 3 “Cush_01” stitched down to the centre panel
Using another fabric that matches but not similar to the fine cotton centre panel, this cotton fabric is also Japanese, make a hem using your iron then turning the hem you just ironed over to give a lovely finish
Stitch a contrasting fabric at the bottom panel, I also used the selvage which was slightly frayed, this gives the work another dimension, once again this piece of fabric is Japanese
Close up of the frayed selvage on the bottom panel

Place the two fabrics which you had ironed on either side of the fine cotton centre panel, using your sewing machine and stitching a triple stitch on the hem that you ironed on both fabrics, this also stitches all the fabrics together, and then stitch the cushion together
I used 3 black glass buttons from the 1950’s on the reverse side of the cushion, they came from a coat my Mother had apparently, as you can see in the photograph due to the buttons being made of glass they have small chips out of them, but the cushion from the back still looks great, a nice way of using old buttons
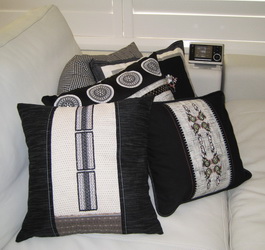
I am building up a combination of cushions using similar colours but totally different design sets, by keeping the colours similar you can make a lovely group of cushions
Makes a beautiful cushion on its own or as a grouping

Close up of the finished cushion
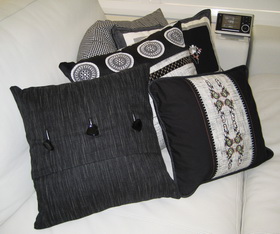
Reverse the cushion and you have another way of displaying your cushion