|
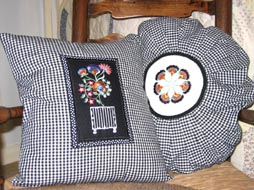
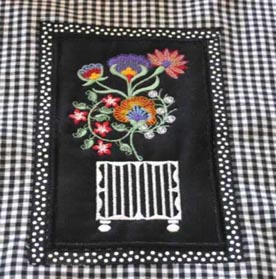
Black and White Gingham Cushion
|
|
 |
The black and white gingham rectangle cushion I made the centre panel puffy by adding wadding. Have a larger piece of fabric than the black fabric to sandwich the two fabrics together |
| |
|
 |
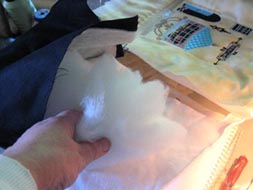
Once you have the amount of wadding to give the puffy look, pin the black fabric and backing fabric together with the wadding sandwiched between the two |
| |
|
 |
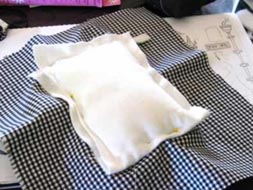
Photograph of the wadding sandwiched together |
| |
|
 |
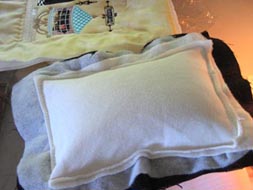
Stitch all around the centre panel using your machine with a straight stitch |
| |
|
 |
Photograph of the front puffy centre panel |
| |
|
 |
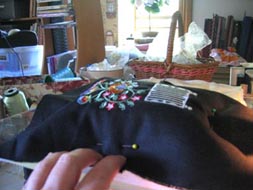
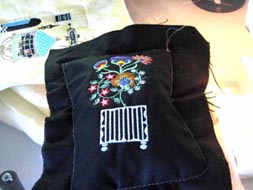
Cut from the centre of the black and white gingham a rectangle. Pin the puffy centre panel onto the black and white gingham as shown in the photograph |
| |
|
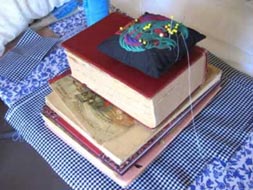 |
I left over night a number of books on top of the puffy centre. Do not worry it will be still puffy but not over the top |
| |
|
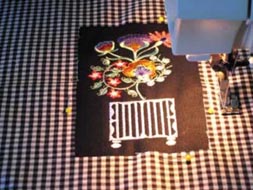 |
Stitch the puffy centre piece using your straight stitch. Stitch over the straight with a zigzag stitch and then stitch over the zigzag stitch using a satin stitch |
| |
|
 |
In the enlarged photograph you will see where I have used the satin stitch and then stitched on the black and white poker dot ribbon |
| |
|
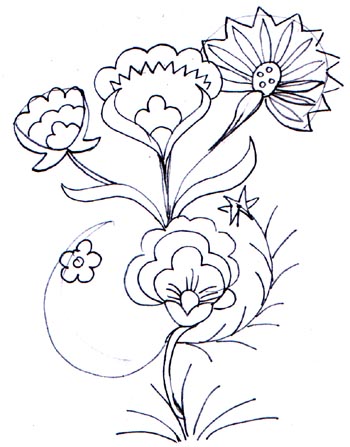 |
This is a scan of the actual drawing I did. As you can see it is a very rough drawing for the Charlotte design |
| Black and White Gingham Round Cushion | |
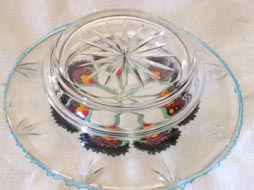 |
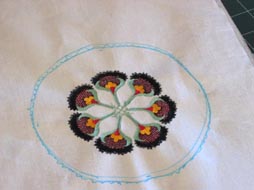
Stitch the design out on a nice linen. Using a saucer or something that is slightly larger than the design. |
| |
|
 |
Mark either using a blue pen or chalk. This will be where you will tack the the black and white gingham down |
| |
|
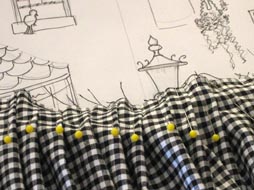 |
By using the gingham I was able to make evan pleats by pinning |
| |
|
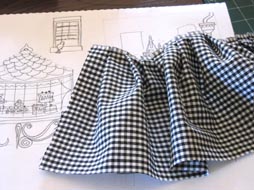 |
Stitched over the pleats I had made using the pins with a straight stitch |
| |
|
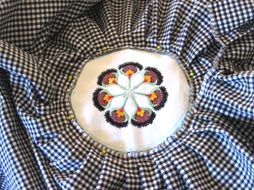 |
Using the blue pen marking I was able to make a nice circle surrounding the design |
| |
|
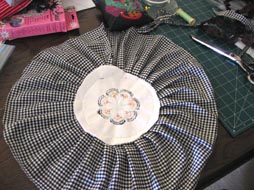 |
Stitched down the pleated section over the white linen. This is back of the design |
| |
|
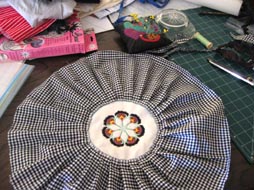 |
I added a panel for the sides once again using the black and white gingham |
| |
|
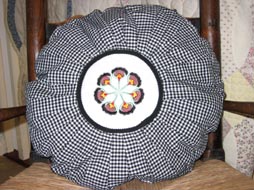 |
To hide the pleating I stitched on a simple black braid |