


Christmas 2009 Instructions
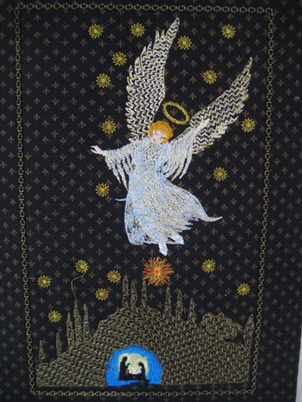
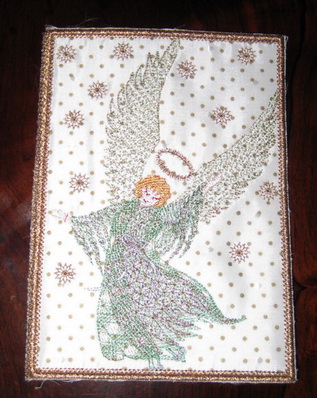
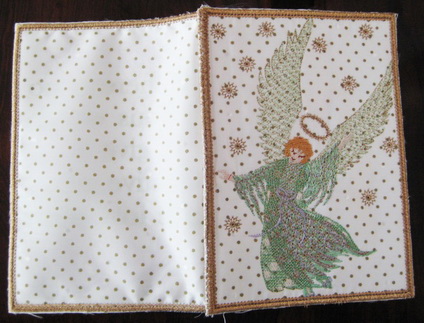
- Stitch out “Blessed angel_02” first
- Place “Blessed Angel_01” above the red and gold star, this is such a simple placement as you can place the “Blessed Angel_01” anywhere
- Stitch a satin stitch border and over the top of the satin stitch, stitch the chain stitch that is in most machines or use another stitch of your preference.
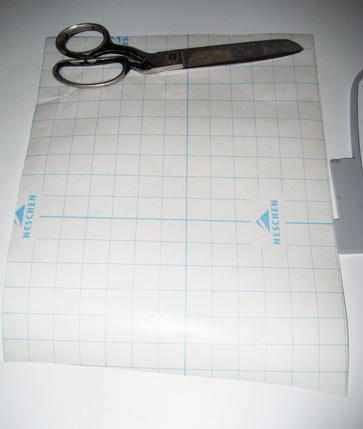
Cut out enough to cover your hoop (I have no idea what this paper is called) So I call it sticky paper!
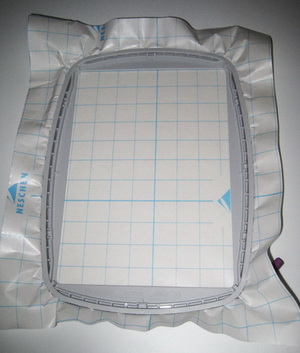
Hoop the sticky paper

Cut the centre out of the sticky paper, I try to keep enough for the fabric to stay glued to the sticky paper around the hoop.
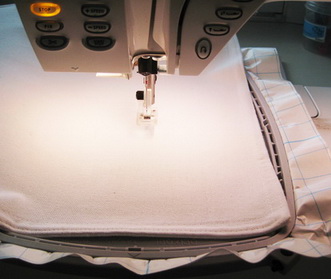
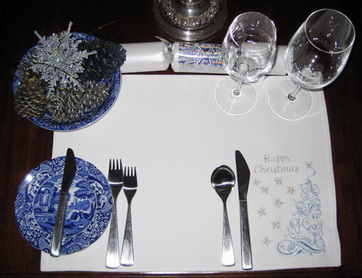
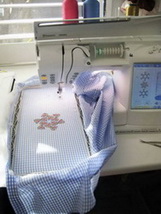
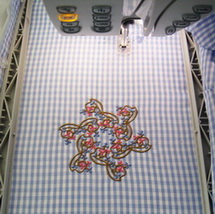
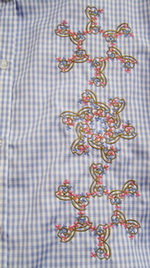
Lay the purchased mat over the sticky paper and then stitch out “Happy Christmas_01”
This design is just lovely for a mat, so very quick and easy to stitch out
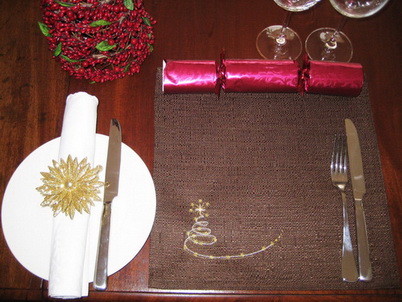
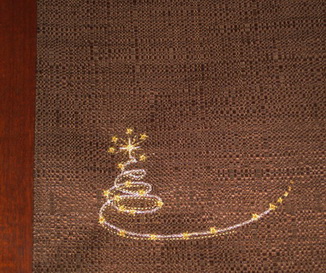
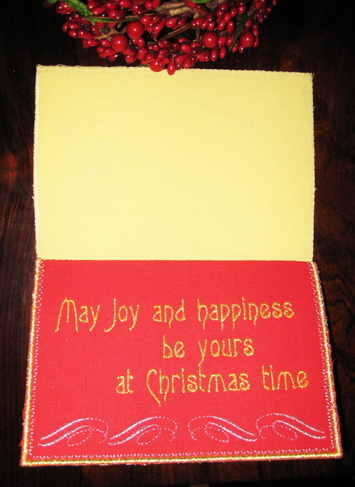
- I stitched “Joy and happiness_02” by following the instructions for the white mat
- I chose this brown mat as this coloured mat would appeal to young people and using a simple design “Joy and happiness_02”on the mat would go nicely with young people’s decor
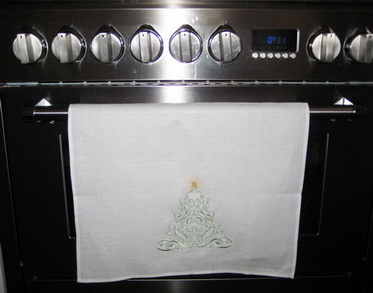
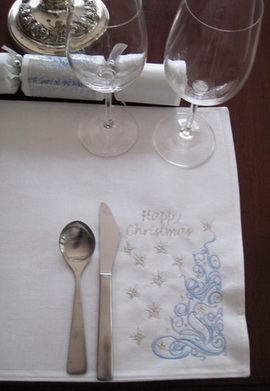
A purchased linen tea towel where I stitched “Happy Christmas_02”
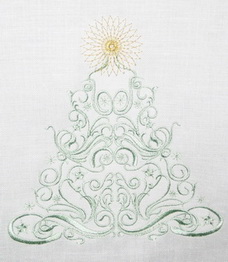
Close up
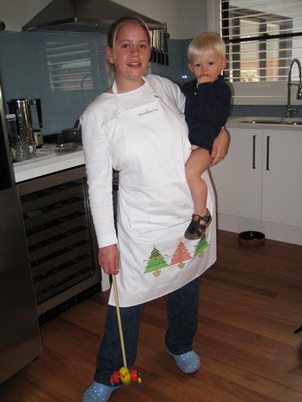
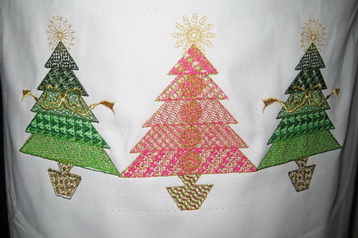
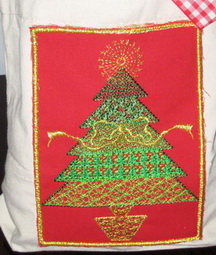
I stitched out first “Christmas tree_02” which is the centre tree
I then stitched out on either side of the pink tree “Christmas tree_01” (If you look closely at the green tree on the left you will see it did not stitch out very well, due to my Pfaff machine gave up on me and I had to race the machine to my dealer to be repaired, I kept my work in the hoop until my machine arrived back to my sewing room where upon I resumed stitching out that green tree)
Christmas Tree Bag
- I stitched out on red cotton fabric “Christmas tree_03”
- Cut away any excess red fabric from the gold border using scissors
- Glued the design using a hot glue gun on a calico bag I purchased so cheaply from a local craft shop
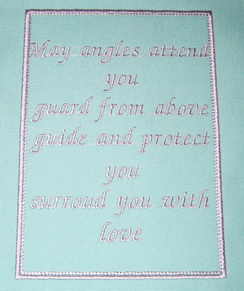
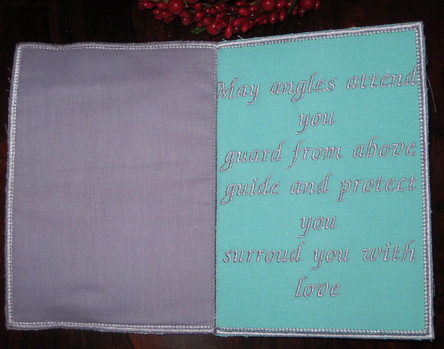
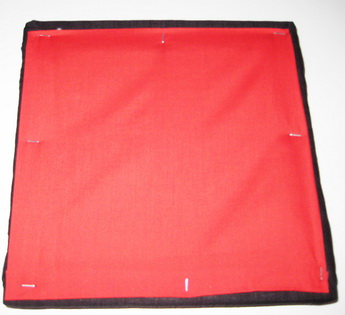
Aqua Christmas Card
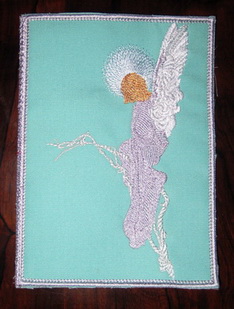
Stitch out “Angel of the moon_02”
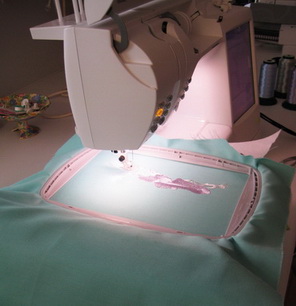
Have matching or contrasting fabric ironed and ready to lay under your work
Once you get to the colour change for the border thread
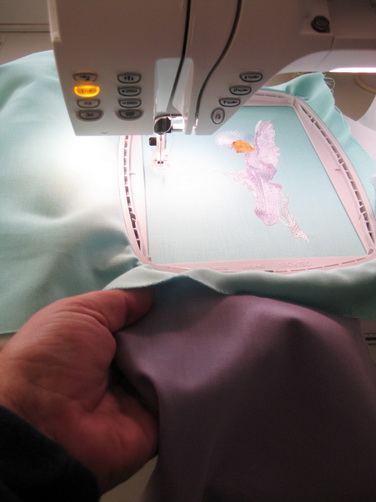
Slide under the hoop either your matching or contrasting fabric, making sure that the fabric is positioned correctly
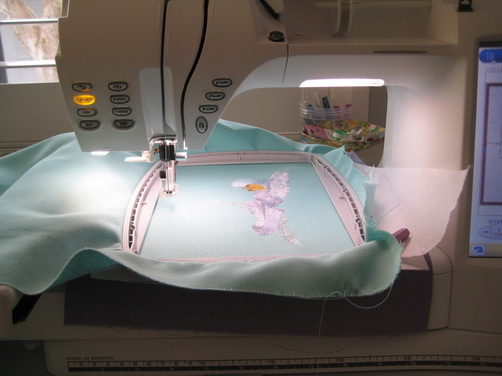
Start your machine at the border colour change
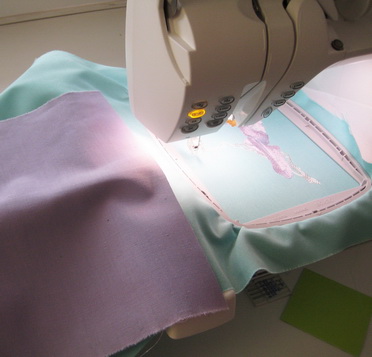
The machine is stitching out the border as you can see the contrasting mauve fabric is underneath the two layers of thick cut away stabilizer
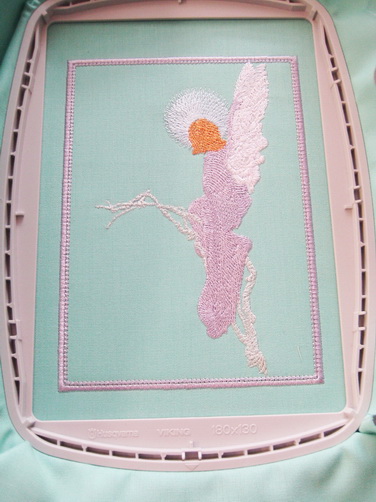
“Angel of the moon_02” all stitched out
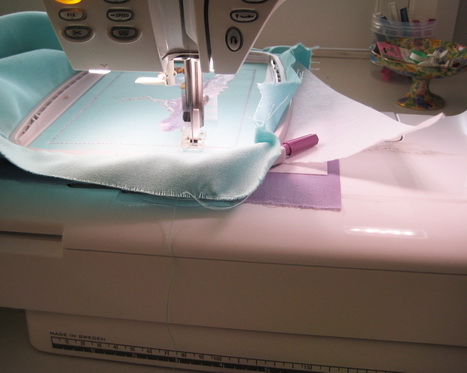
The underside of the card using a contrasting mauve fabric
I repeated the same for the rest of the card, once again using the same aqua and mauve fabrics
Cut away any excess fabric from the border using your scissors

The front of the card
The centre of the card
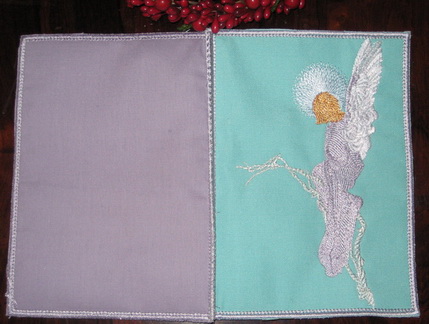
Front and back of the card
Polka Dot Christmas Card
I stitched out “Blessed Angel_05” for the front of the card
I stitched out “To give_01” for the centre of the card
Front and back of card
Red Christmas Card
I stitched on the front of this card “Joy and happiness_02”
I stitched in the centre “Joy and happiness_03”
Pink Card
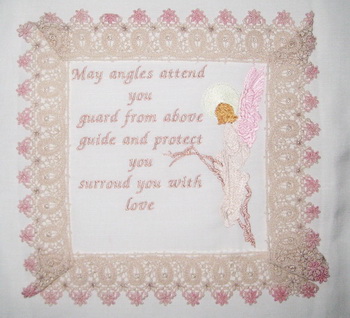
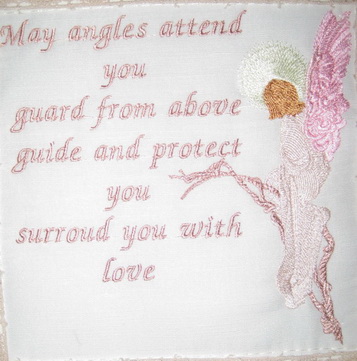
I am in the process of stitching this cushion together for a friend for her first Grandchild hope to have the cushion finished by next week that is why the lace looks a bit odd at the ends. I stitched the face of the cushion using the design “Angel of the moon_05” if you do not have a large enough hoop you can stitch out “Angel of the Moon_04” then beside the words you can place the “Angel of the Moon_01” or vice versa which ever you would find easier
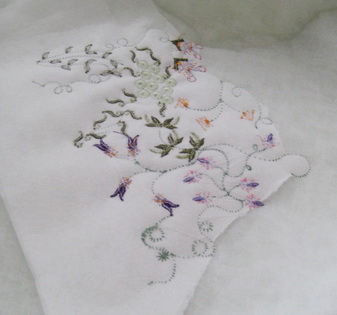
After the Rain Instructions
Hooping and Stitching the Flowers

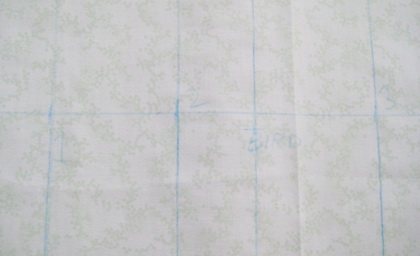
Mark across the fabric using either chalk or marking pen
Print out using “Actual size” for:
- Flowers_01
- Flowers_02
- Flowers_03
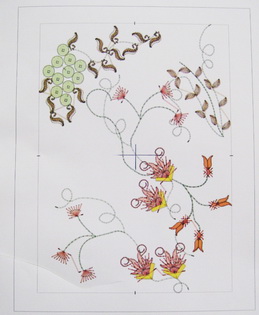
Then mark on the pint out the centre point as shown in the photo
Cut out all four print outs
Using the horizontal line that you had marked on the fabric pin
- Flowers_01
- Flowers_02
- Flowers_03
The same way I had done in the photo but you can vary it, just do what would suite you, there is no hard and fast rule
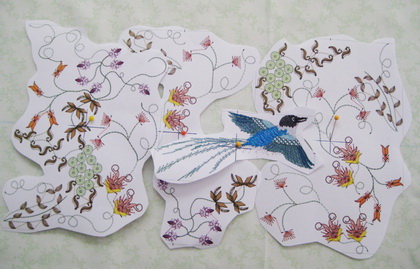
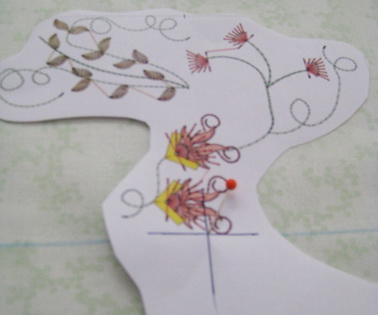
Pin the Flowers_04 (the bird) in between the flowers, it does not matter if you stitch over the flowers slightly as this will give the design depth
Once you are happy with the set up of your design, mark the centre of each design on the fabric using either your chalk or marking pen
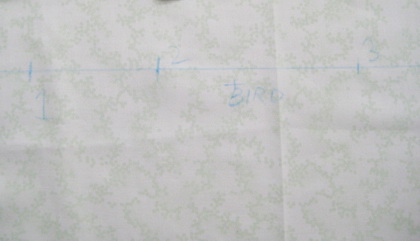
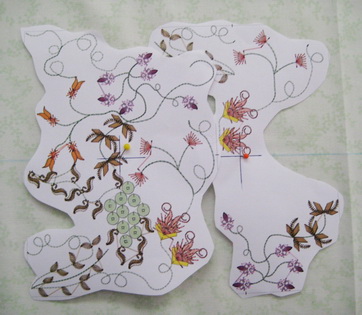
Each of the design centre’s are marked on the fabric. I did mark a cross and write “Bird” as you can get a bit confused as to what marking is what, I also marked each centre for each design (1, 2, 3)
I then put vertical lines down each design on the fabric, this helps with each of the hoopings
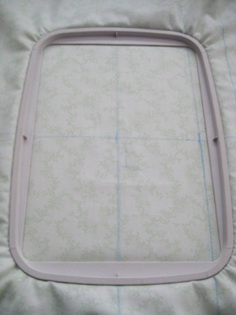
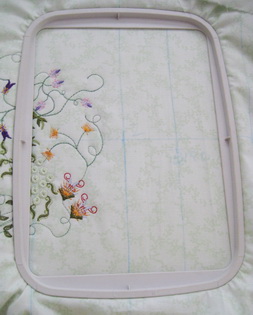
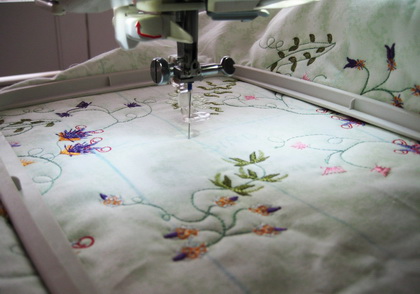
Hoop the fabric using the marked section for “Flowers_01”
(I often use a very thin pellon under the fabric, hoop both the pellon and fabric then slide under the hoop the stabilizer; I used a medium tear away for this project)
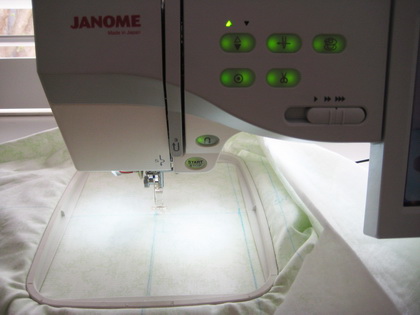
Move the needle position to the correct position on your fabric.

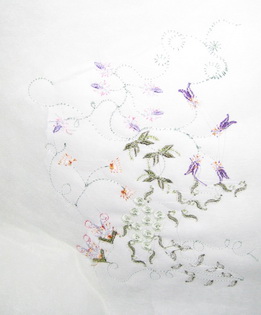
Flowers_01 stitched out
I always like to either tear or cut away the stabilizer before I start on the next design
Tearing away the stabilizer to make it easier to hoop the next design
Hooped and ready to stitch out “Flowers_02”
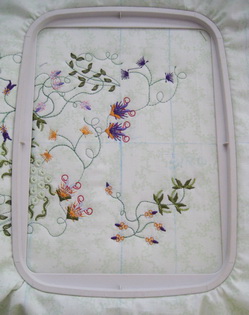
Flowers_02 all stitched out

Do not forget to tear away the stabilizer

Flowers_03 all ready to be stitched
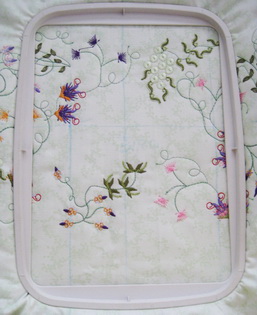
Flowers_03 all stitched out
At this point I was busy taking photos and forgot one important thing....I did not slide the stabilizer under the hoop.
Putting the machine needle in the exact position for the bird design.
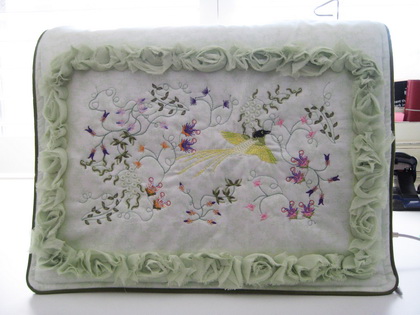
I made a beautiful sewing machine cover for my Janome 1100.
I did go overboard witht these georgeous flowers I purchased some months back, I had been dying to use these flowers. Finally I had the right project to use the flowers.
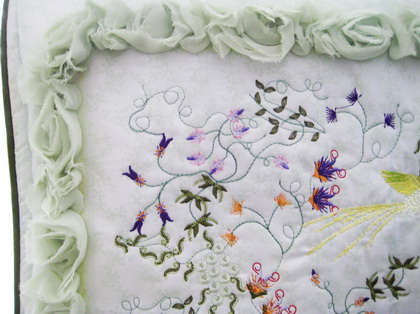
Close up of the sewing machine cover.
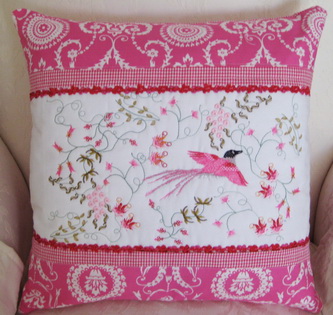
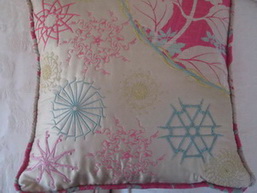
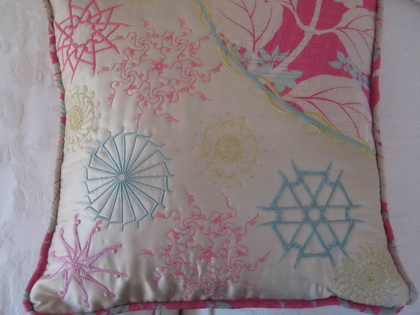
I made this lovely cushion using all the Flowers designs but in totally different colours
Close up
Close up.
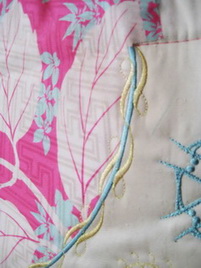
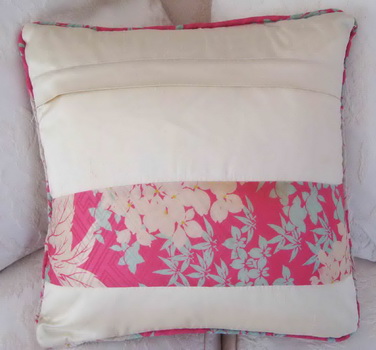
I purchased only a very small amount of each fabric so I made up the back of the cushion using all the left over fabric, which turned out quite well
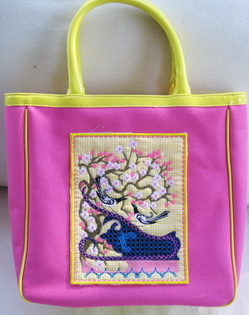
I purchased this bag from “K Mart” while I was in the States a couple of months ago while on sale. Keep an eye out for blank articles to put embroidery on, as they are great for presents.
I stitched out “Blos_01” and then stitched around a satin border and then stitched beside it a decorative stitch.
Close up
Close up.
Close up
Close up
I stitched out Blos_03 then mirrored Blos_03
I stitched both “Blos_03” on very fine antique cotton from Japan; I used similar colours in the design as the cushion I then used these stunning beads to finish the cushion.
Close up.
Close up of the intricate work in the design
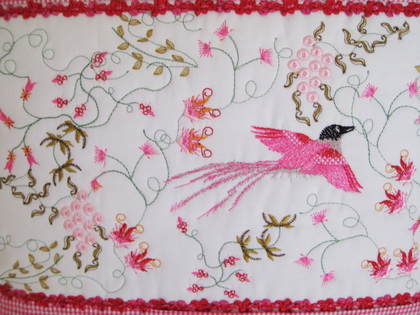
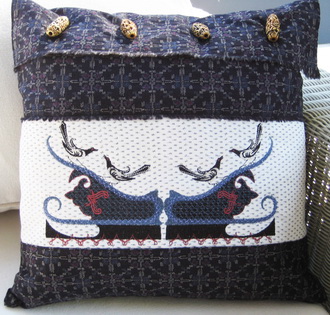
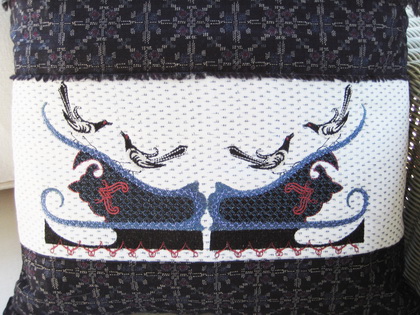
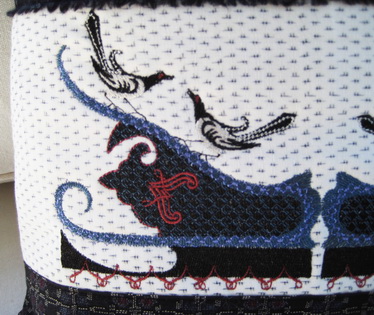
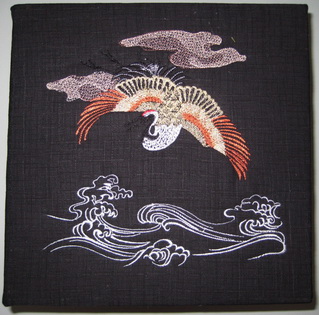
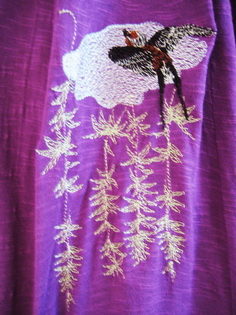
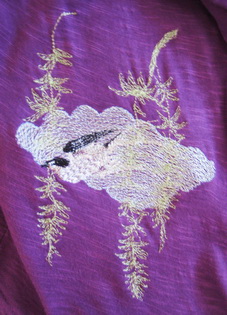
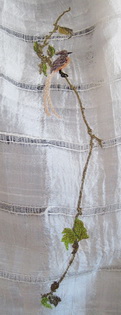
Stitch “Earth and sky_04” first then re-hoop and stitch “Earth and Sky_03” under the crane using similar coloured thread as the fabric for the side panels
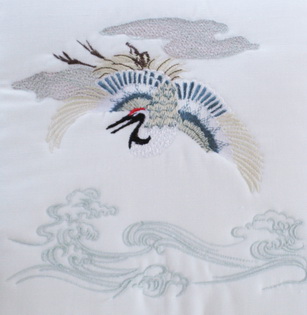
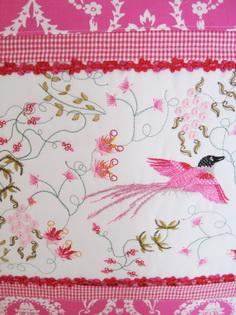
Showing the detail in the design
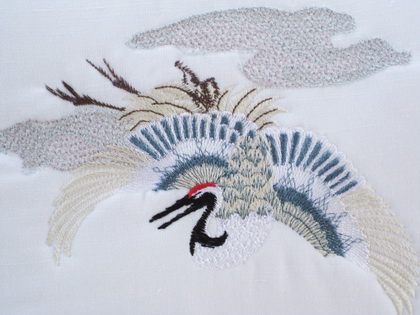
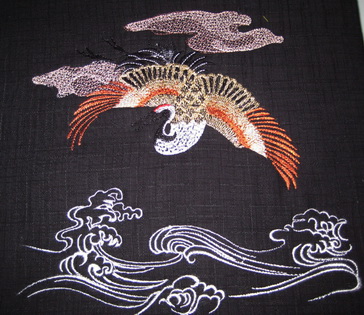
Close up of detail
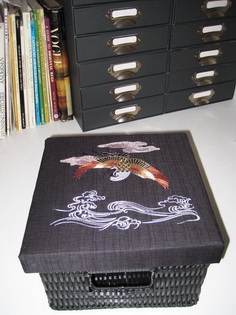
I stitched out “Earth and Sky_01” on a black fabric
I purchased a black cane basket from one of those cheap Chinese shops
At the same time while purchasing the black basket I also purchased the canvas board for artists, I stretched and covered the canvas board with the design
This is the other side of the canvas board after I stretched and stapled the design onto the canvas
Close up
Close up
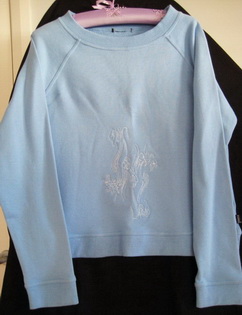
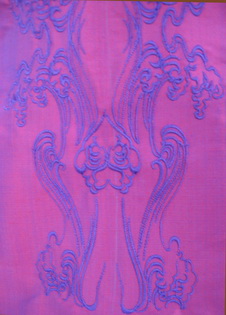
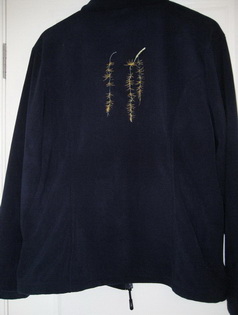
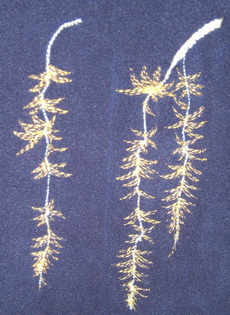
I stitched out “Earth and sky_03” then mirrored “Earth and Sky_03” and stitched the design again but dropping the hoop down a bit, this gave the jumper a lovely affect. As the jumper is a rather thick pile I thought the design might not work as the satin stitch for the waves is very narrow but it gave the jumper that quilted look, which worked really well
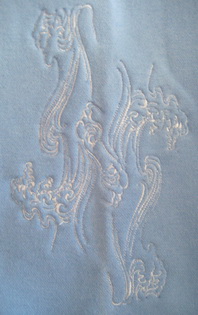
Close up of the design “Earth and sky_03”

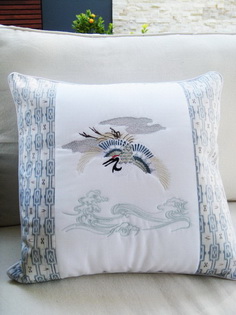
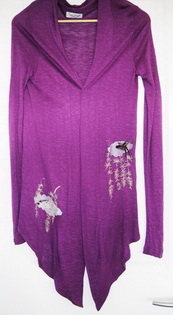
This is a beautiful silk dress and the dress lent itself to “Earth and Sky_05 or 07”
Close up of the design.
I stitched “Cloud_01” on one side of the very fine knit and on the side I stitched “Cloud_02” I used water soluble Vilene 2 sheets
“Cloud_02” stitched out
“Cloud_02” stitched out
I stitched on this very thick pile “Cloud_03” which gave a lovely effect on the back of the jacket
Close up of the design “Cloud_03”
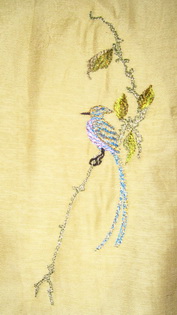
I stitched “Peace_01” onto this mustard coloured blouse
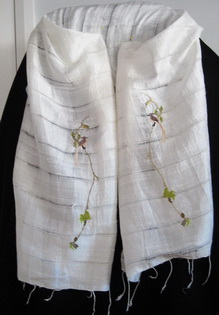
I stitched “Peace_01 “out first then re-hooped and stitched “Peace_02” very easy to match up. The scarf was stitched on the finest silk and I used for stabilizer 2 sheets of water solvable Vilene. After stitching the designs on the silk I then soaked the scarf over night in water and washed the scarf by hand.
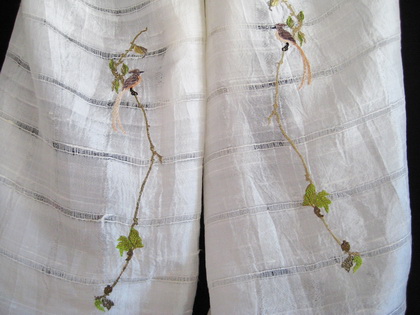
Close up
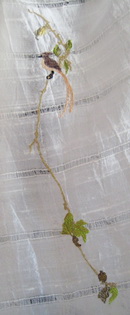
This is a very delicate design
Elegant Instructions
Elegant Tin
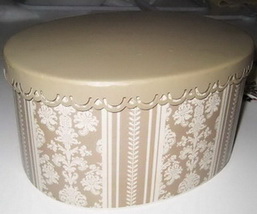
I purchased this tin.
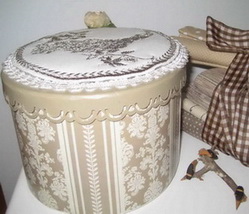
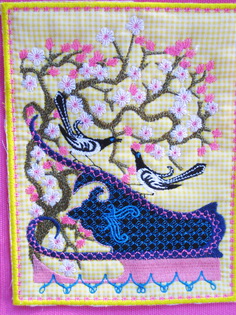
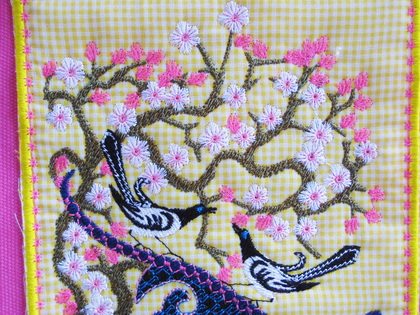
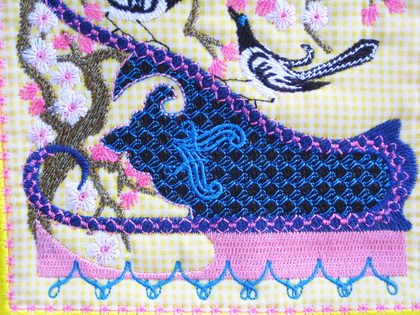
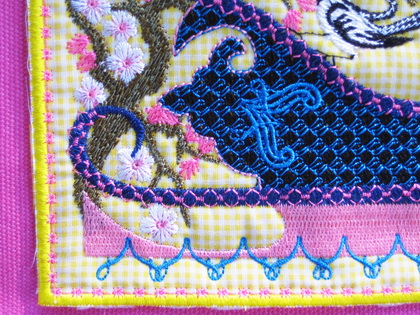
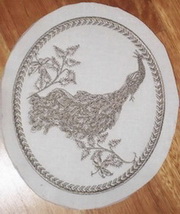
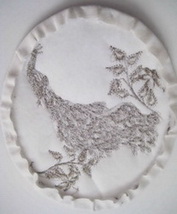
I stitched “Peacock_06” out and stitched a satin stitch and then stitched very close to the satin stitch a decorative stitch which give the design a nice border.
I glued the excess fabric down with my hot glue gun.
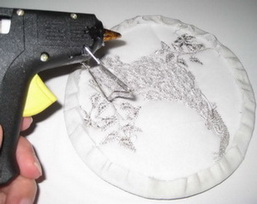
Excess fabric glued down.
I glue down a simple type of lace around the design and where the lace was joined glued down a fabric rose.
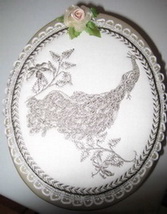
Finished tin.
Blue Blouse
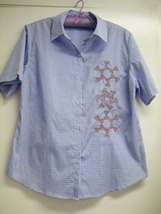
I purchased this blouse and stitched on the following designs
* Design_14
* Design_13
Stitching out Design_14.
Close up of the stitch out.
Close up the stitch out finished on the blouse.
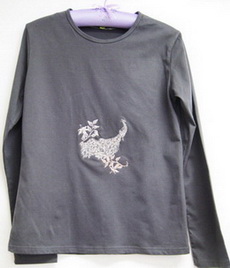
I stitched this "Peacock_06" design out using a variegated thread onto a stretched knitted T Shirt.
Elegant Instructions
I had purchased antique silk Kimono fabric, a very small portion , due to only having a very small portion of the silk, I decided to use it the following way.

* Design_16
* Design_12
* Design_09
* Design_18
* Design_10
* Design_20
* Design_17
I appliquéd the antique fabric over the cream silk fabric using a satin stitch then over the top of the satin stitch I stitched in gold metallic thread a decorative stitch, this give the work balance.
Close up of the cushion.
I used the remaining antique silk fabric for the cording around the cushion and then finished the back with the little bit left over....as I had paid so much for this antique Kimono fabric that I did not want to waste one little scrap of it.
Table Runner
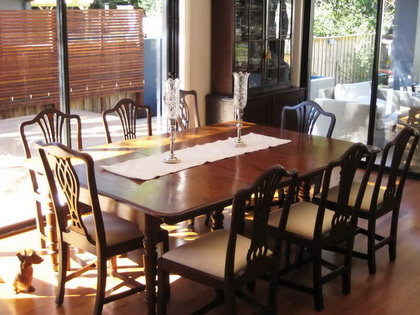
I purchased this table runner.
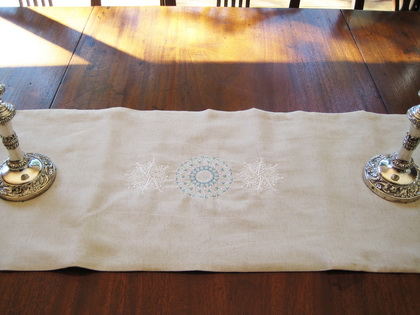
I stitched the following designs on the purchased table runner
* Design_15
* Design_19

Blue Cover Drawring Book
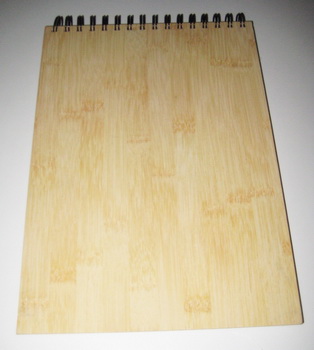
I purchased this drawing book which was made out of bamboo from “Borders Book Store”.

I covered the wooden side in a navy blue linen and using the design “Peacock_08”.
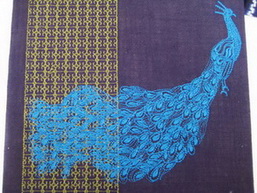
Close up of the design “Peacock_08”.
I purchased this tin.
I stitched “Peacock_06” out and stitched a satin stitch and then stitched very close to the satin stitch a decorative stitch which give the design a nice border.
I glued the excess fabric down with my hot glue gun.
Excess fabric glued down.
I glue down a simple type of lace around the design and where the lace was joined glued down a fabric rose.
Finished tin.
purchased this blouse and stitched on the following designs
* Design_14
* Design_13
Stitching out Design_14.
Close up of the stitch out.
Close up the stitch out finished on the blouse.
I stitched this "Peacock_06" design out using a variegated thread onto a stretched knitted T Shirt.
Machine Embroidery Designs
Latest Releases
Folklore Machine Embroidery Designs
Released on the 25th June 2019

6 designs included in the Folklore machine embroidery design set.
The Folklore design is suitable for a 6 x 10 inch or 240mm x 150mm hoop.
The Folklore design is available in DST, EMB, EXP, HUS, JEF, PES, VIP, VP3 and XXX.
The colour chart is included in the design set
As I am now digitizing with Wilcom embroidery software (which is a commercial software) we are unable to convert files to ART format. Bernina embroidery machines will now need to purchase designs in EMB or EXP format. Sorry for the inconvenience.


