


Ebony and Ivory Instructions
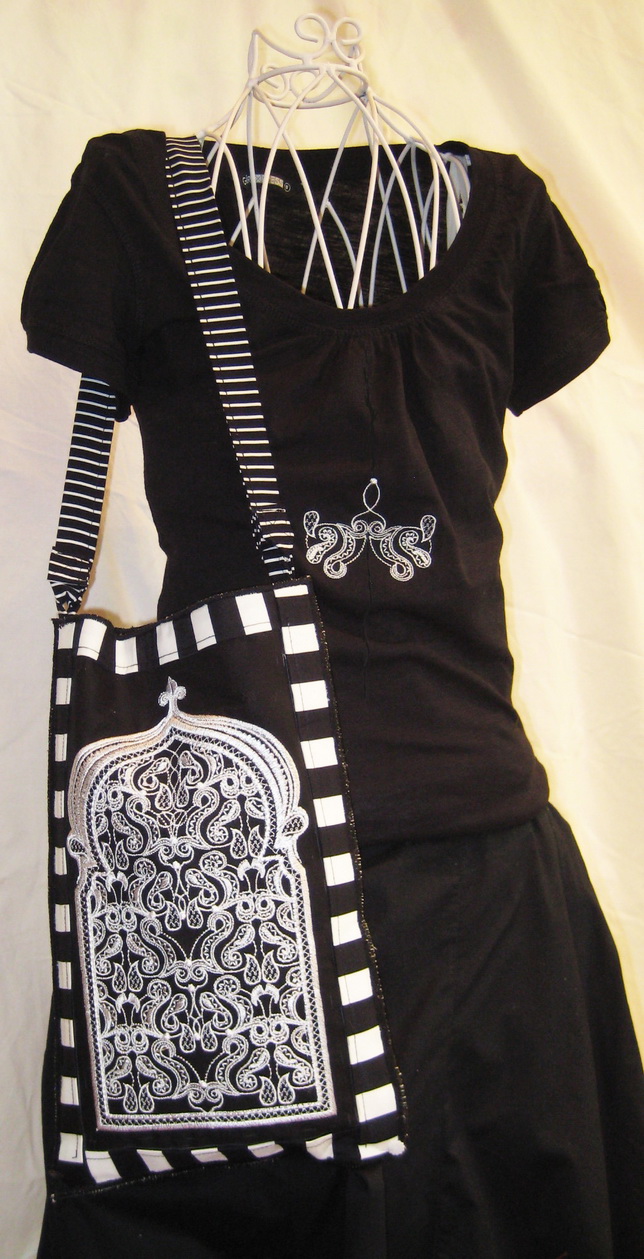
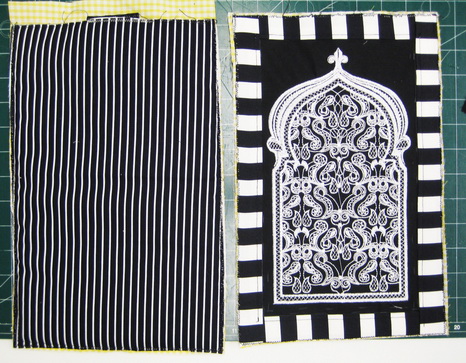
Ebony and Ivory Bag
Bag size is 13 x 8.5 inches or 32.5 x 21.5 cm
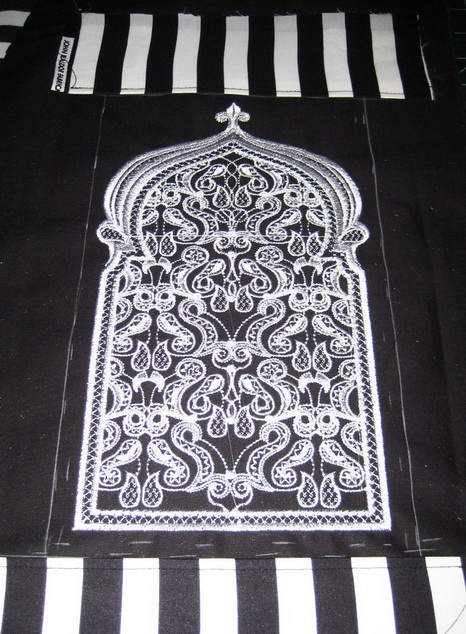
- Stitch out either “Ebony_01” or “Ebony_02” depending on which size hoop you have on black fabric choosing a white thread.
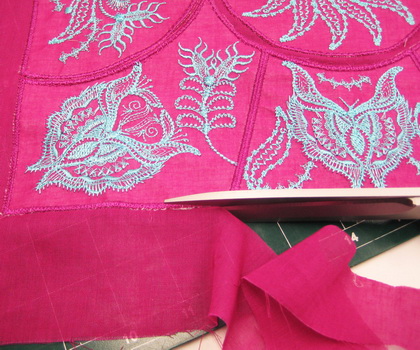
- Mark a rectangle border either 5 mm or .5 inch around the design; this will be for the black and white striped border fabric.
- Stitch the black and white stripped fabric onto the black background fabric on all four sides of the design.
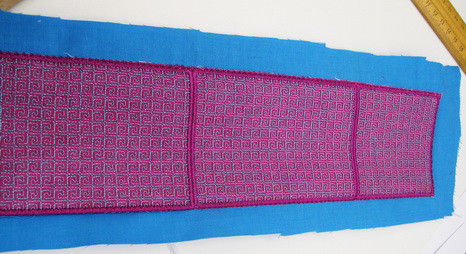
- Using a black and white striped fabric for the back of the bag the same width and length as the front of the bag.
- Place the magnetic clips inside the lining on both the front and back panels.
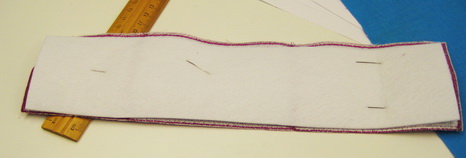
- Straight stitch the wadding and lining to the back of the bag.
- Straight stitch wadding and lining to the front of the bag.
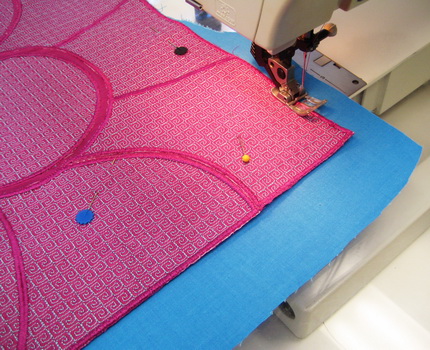
- Zigzag stitch the front panel, wadding and lining together, around the edge of the panel then closely cutting away any excess fabric from the zigzag stitch, repeat for the back panel.
- Make a striped strap for the bag or at a later stage put those clip on handles.
- If you make a striped strap for the bag as I have then at this stage I would stitch the strap onto the bag.
- Go around each of the panels at least twice using a zigzag stitch very close together then a satin stitch for the last, this gives each panel a lovely finish.
- Zigzag stitch the front and back panels together.
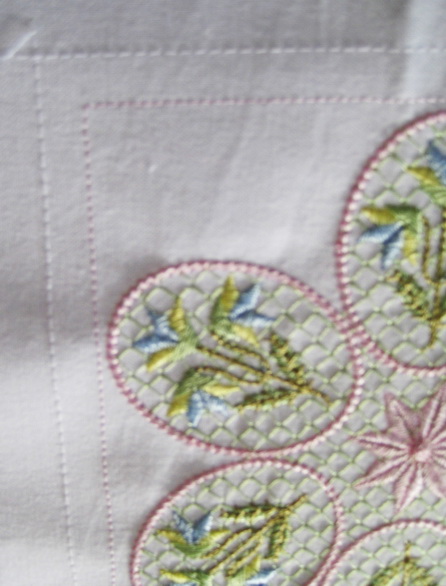
Showing you either 5 mm or .5 inch border mark around the design to place the black and white stripped fabric.
Magnetic clips for the front and back panels
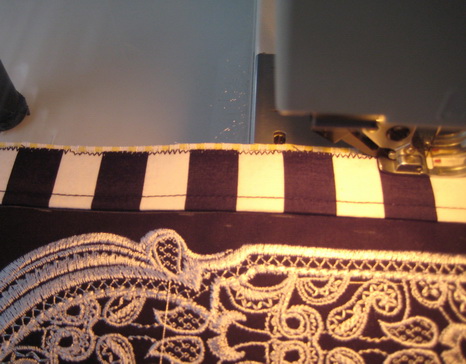
Zigzag stitching the front panel, wadding and lining together, around the edge of the panel.
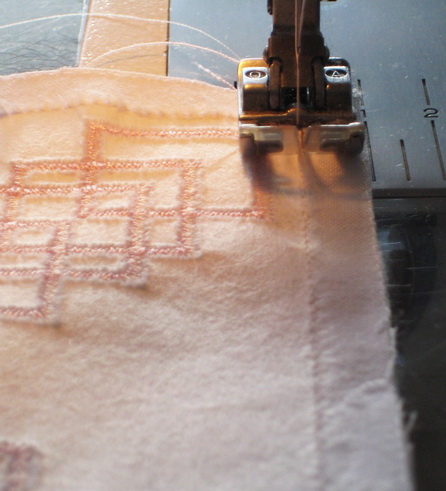
Rough zigzag stitch holding the striped fabric, wadding and lining together, about to cut away excess fabric from the zigzag stitch.
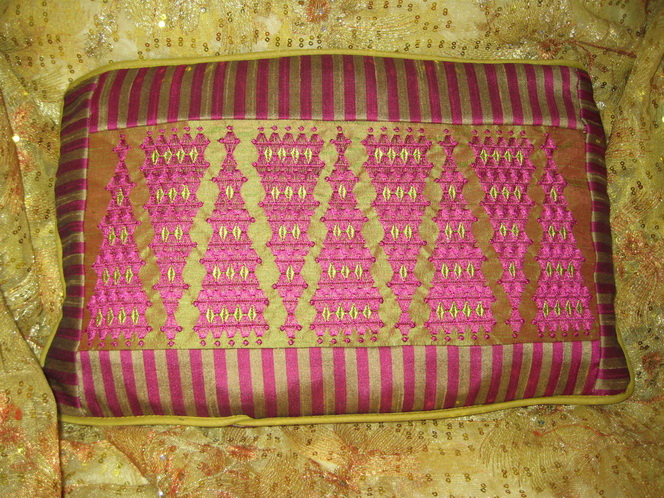
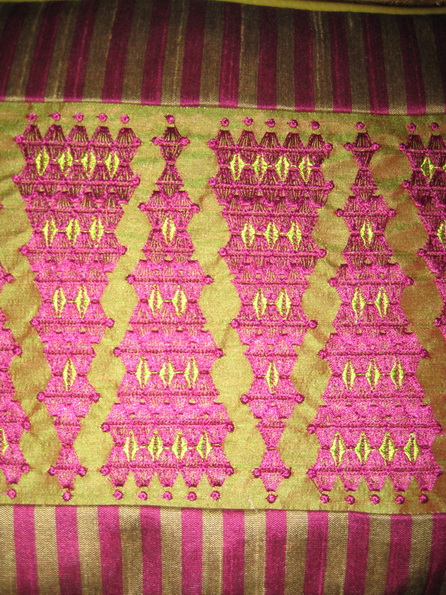
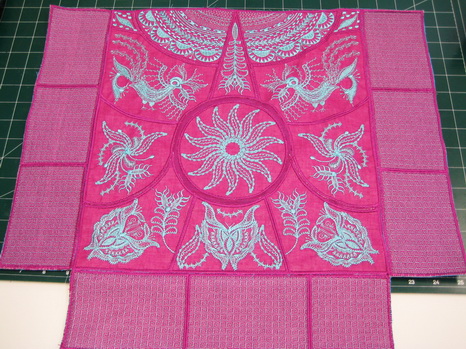
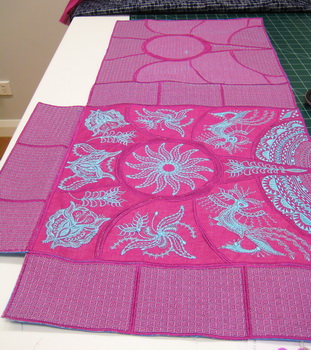
Ebony and Ivory Cushion
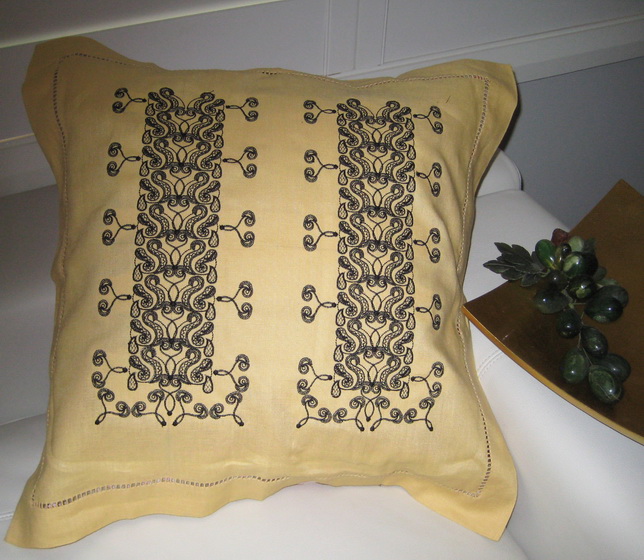
Ebony_13 stitched twice
Shades of Pale Instructions
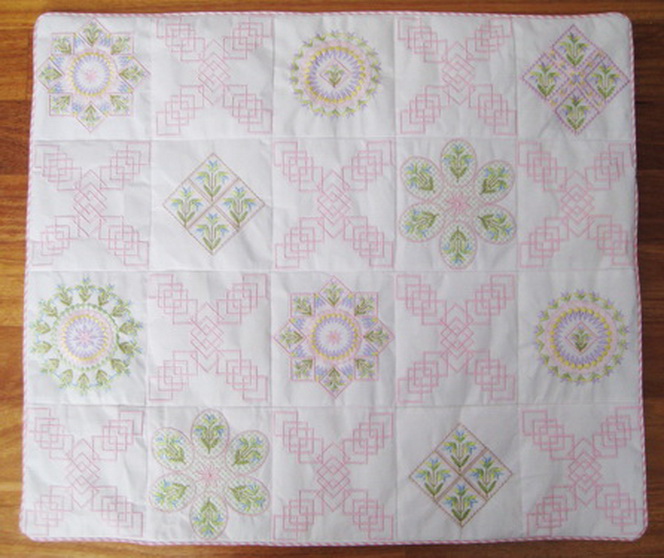
Shades of Pale Quilt
Stitch out the following designs to make quilt
- Shades_01
- Shades_02
- Shades_03
- Shades_04
- Shades_05
- Shades_06
- Shades_07
Repeat the designs to make the quilt as big or as small as you like.
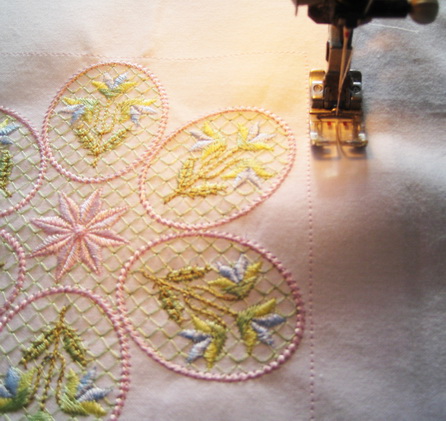
Put your machine foot up against the straight stitch and stitch all around the design, this makes a perfect way of cutting the exact seam.
Showing you the stitched out seam allowance. Using your scissors cut away on the straight stitch.
SStitching the seam.
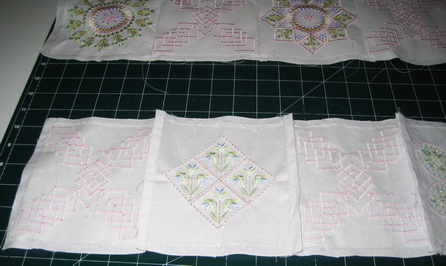
All stitched together to make the quilt.
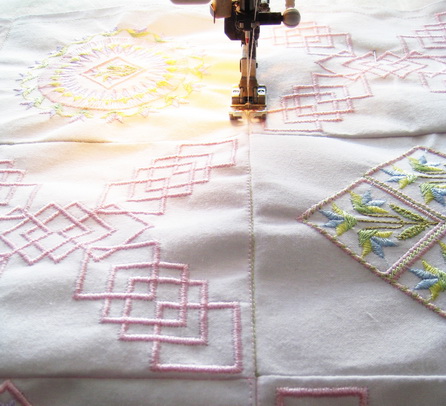
Once you have your wadding and backing fabric pinned together, dip stitch all the squares.
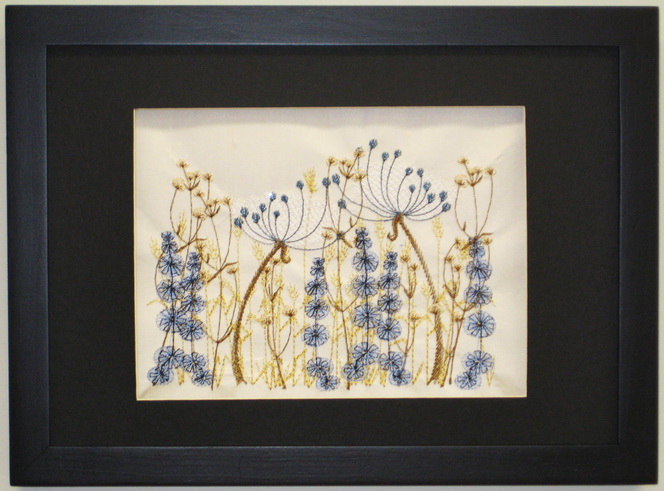
Shades of Gray Cushion
This design is using “Shades_08” to make a stunning cushion.
Close up of the cushion.
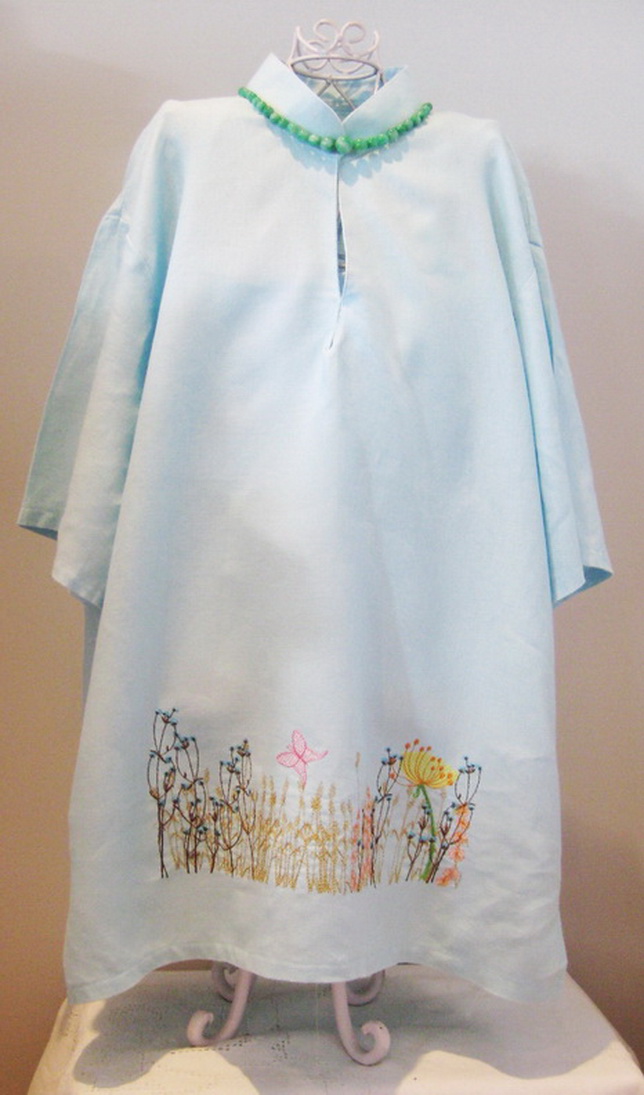
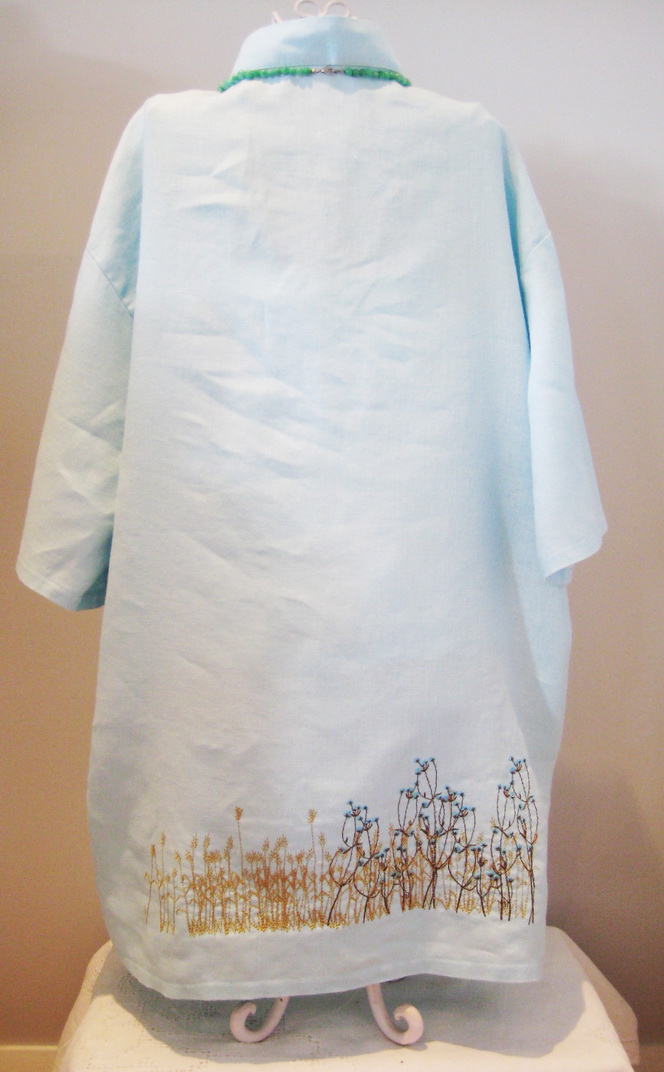
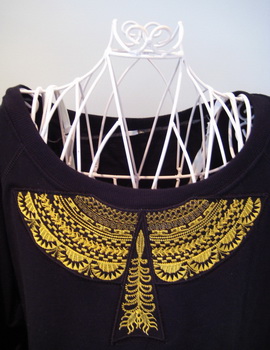
Shades of Pale T-Shirt
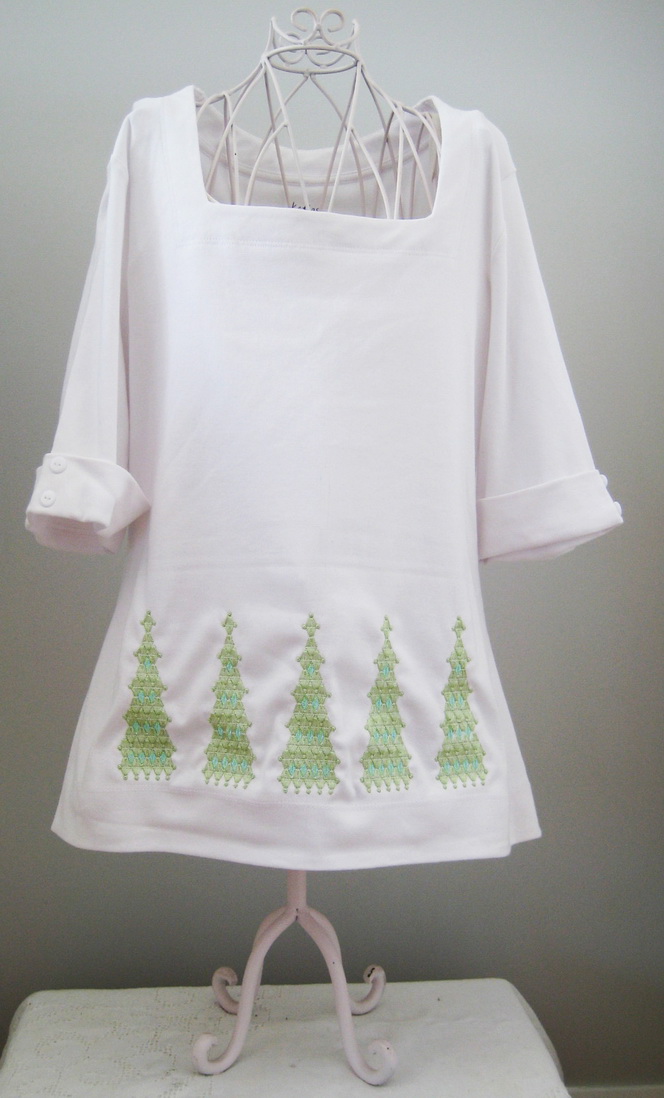
Using Shades_08 on a knitted top.
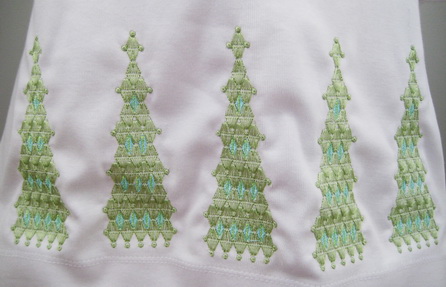
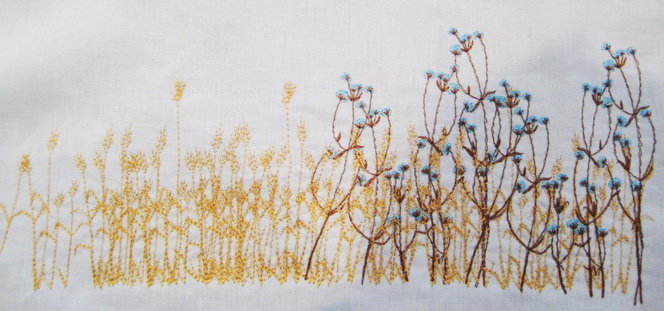
Close up of the T-shirt.
Country Charm Instructions
Front of Country Charm Shirt
Designs used for the front of the shirt (Left to right)
- Country charm_02
- Country charm_03 over lapping “Country charm_02”
- Country charm_12
- Country charm_08 I mirrored the design and overlapped “Country Charm_12”

Close up of the front of the Country Charm shirt
Back of Country Charm Shirt
Designs used for the back of the shirt (Left to right)
- Country Charm_02 3 times overlapping
- Over the top of Country Charm_02 on the right side Country Charm_04 twice overlapping
Close up of the back of the Country Charm shirt
Country Charm Framed Picture
Stitch Country charm_01
Malacca Instructions
Malacca Quilt Instructions
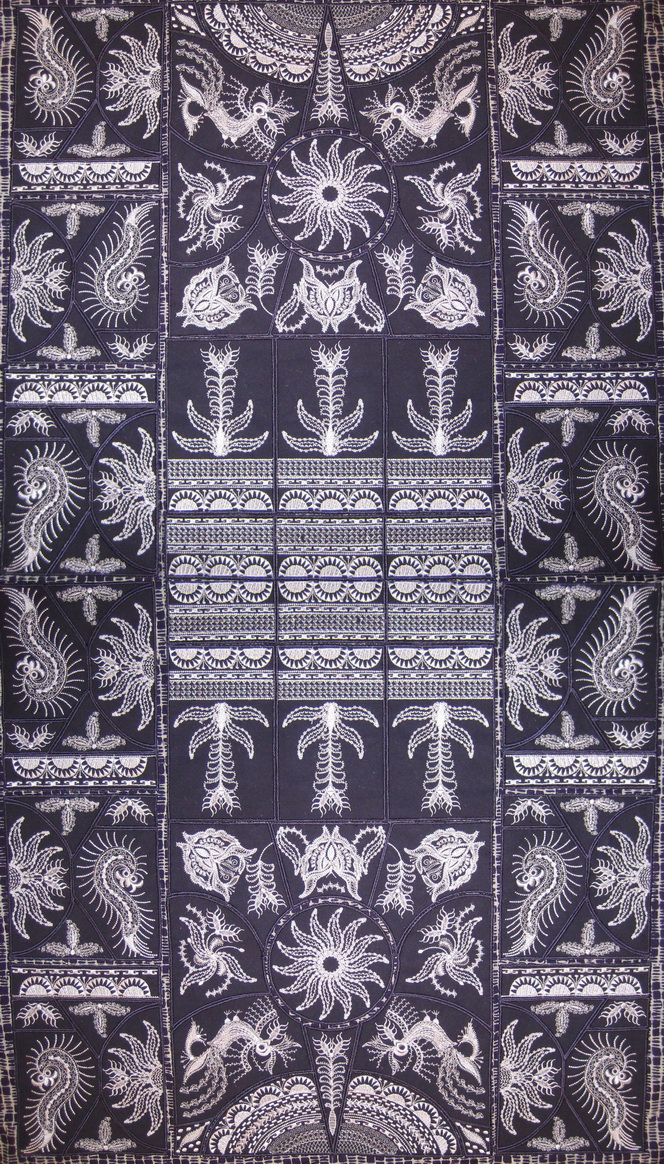
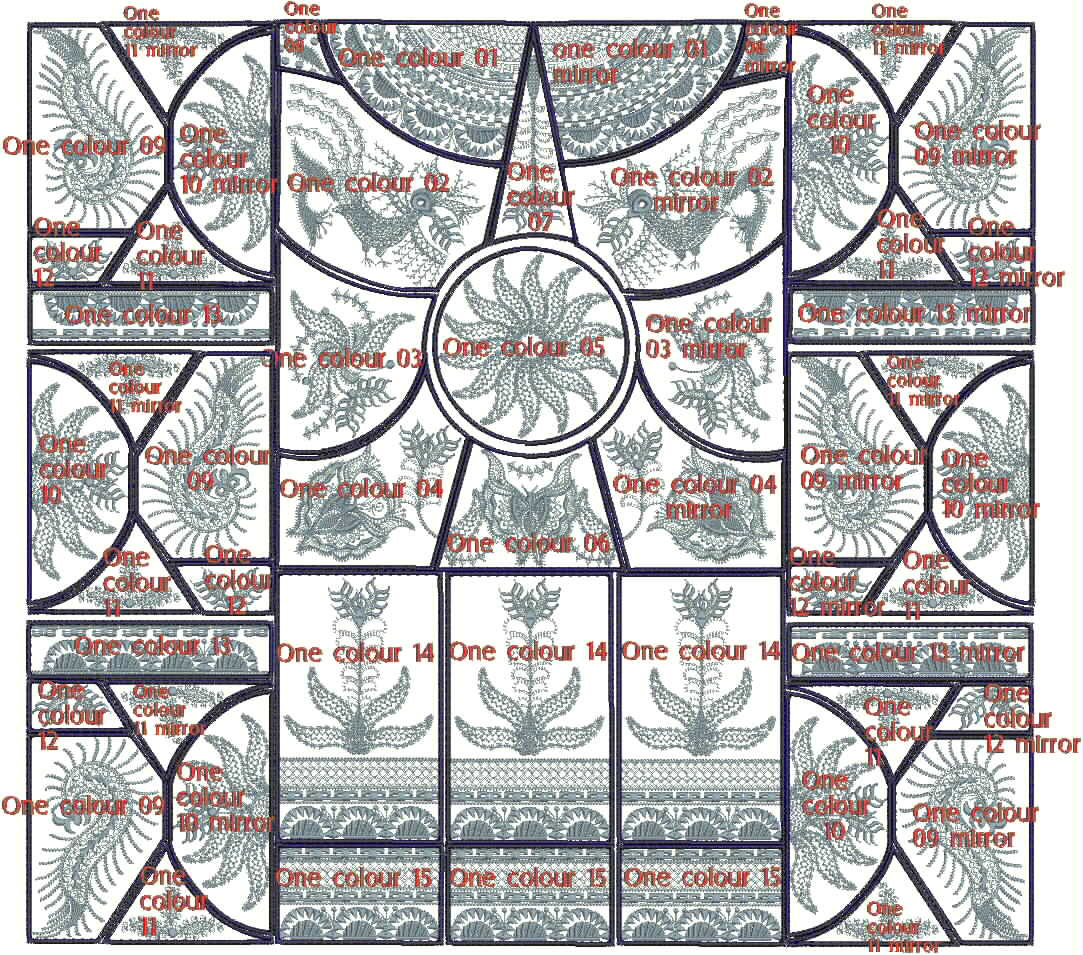
Size of quilt is 118cm x 65cm or 3.8 feet x 2.13 feet
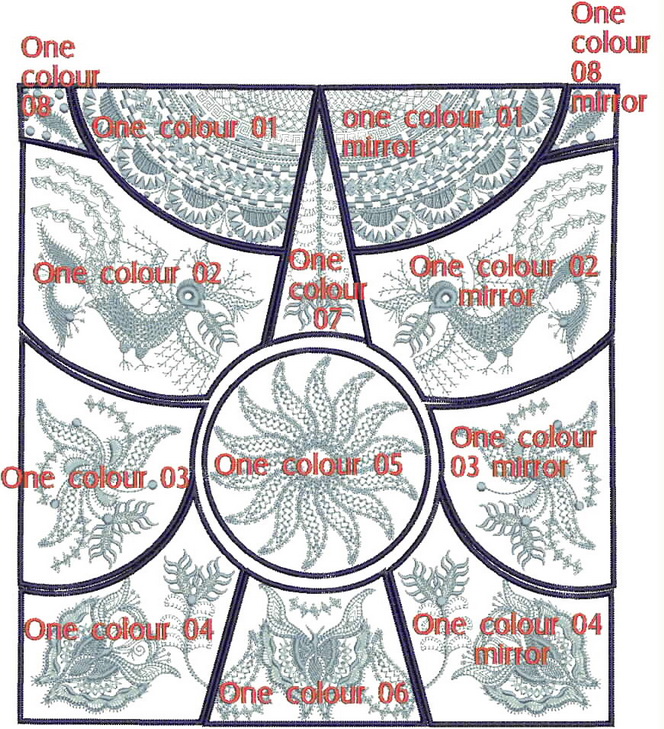
Stitch out the following designs
- 2 x One colour_01
- 2 x One colour_01_mirror
- 2 x One colour_02
- 2 x One colour_02_mirror
- 2 x One colour_03
- 2 x One colour_03_mirror
- 2 x One colour_04
- 2 x One colour_04 mirror 2
- 2 x One colour_05 2 times
- 2 x One colour_06
- 2 x One colour_07
- 2 x One colour_08
- 2 x One colour_08_mirror
- 6 x One colour_09
- 6 x One colour_09_
- 6 x One colour_10
- 6 x One colour_10_mirror
- 12 x One colour_11
- 12 x One colour_11_mirror
- 6 x One colour 12
- 6 x One colour 12_mirror
- 4 x One colour 13
- 4 x One colour 13_mirror
- 6 x One colour 14
- 6 x One colour 15
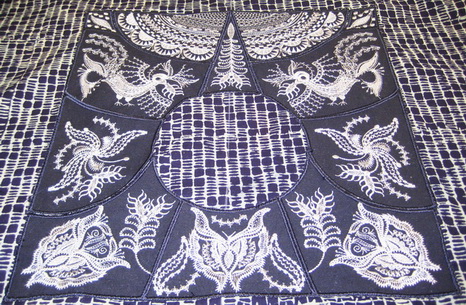
Stitch using a zigzag stitch on a piece of fabric as per the photo above
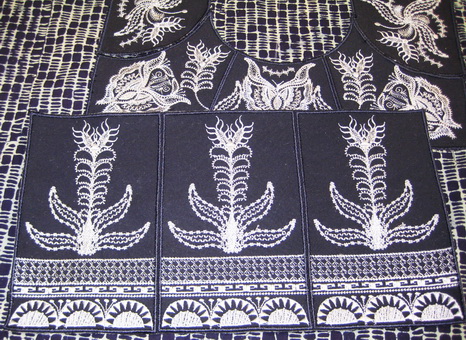
Zigzag stitch the three “one colour_14” designs together. Then zigzag stitch to the fabric.
Zigzag stitch the bottom panel. I left a small space between the large panel. This helps just break up the design.
Zigzag stitch the top panel, lining up with the bottom panel.
Zigzag stitch the middle panel to the fabric, leaving a small space between the top and bottom panel.
Repeat all that you have done to the opposite side of the quilt.
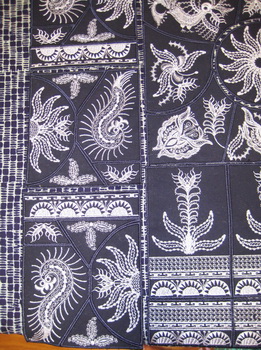
Malacca Bag Instructions
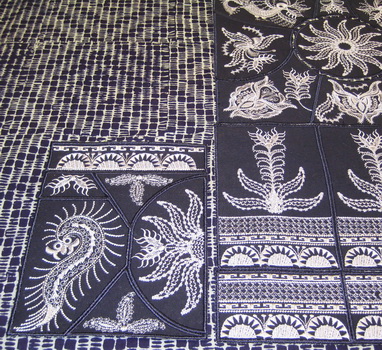
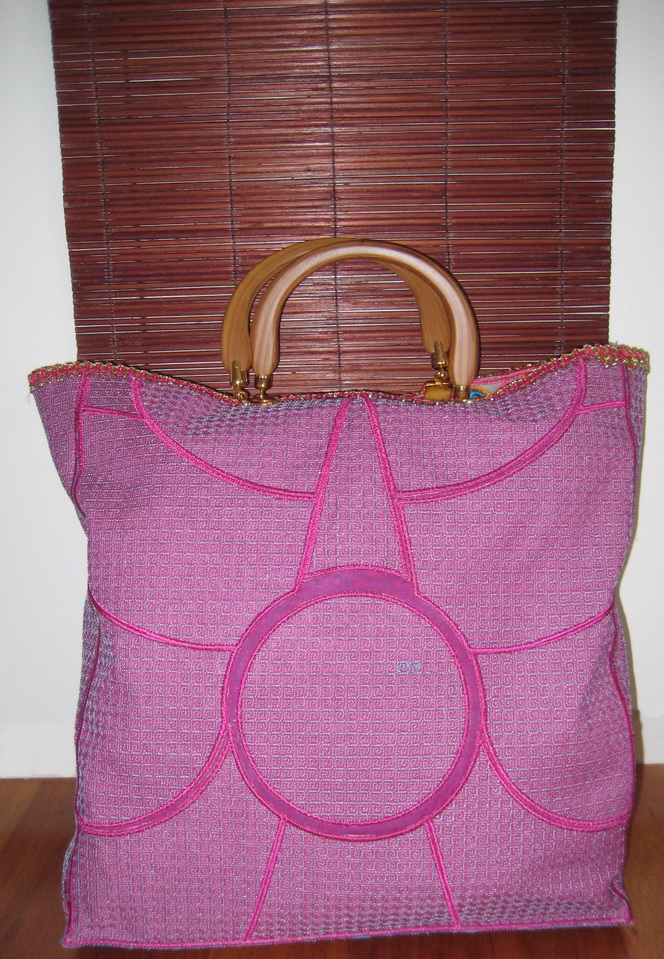
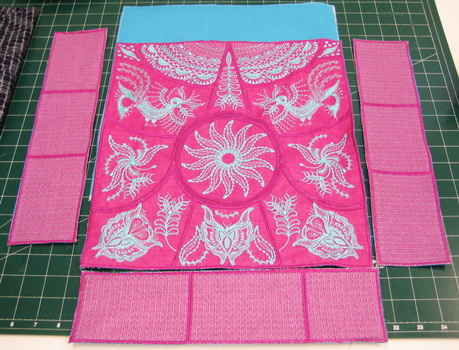
Front of Malacca Bag

Placement of designs for the front of Malacca Bag
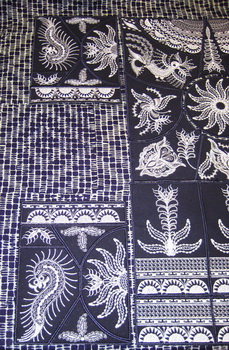
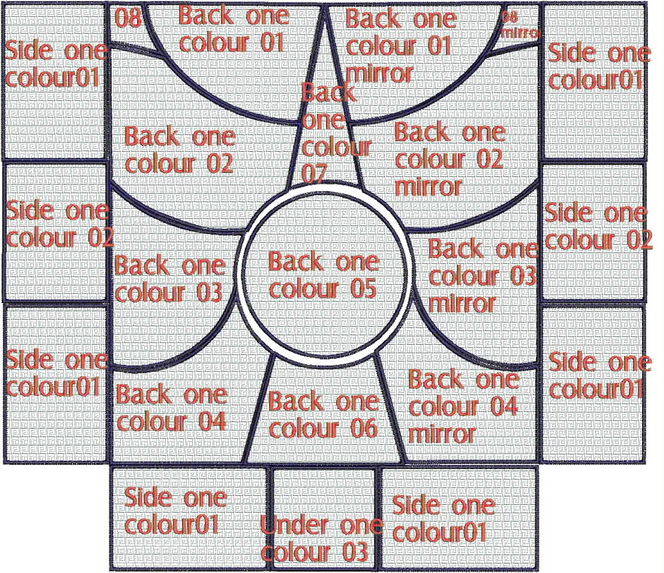
Back of Malacca Bag
Placement of designs for the back, side and bottom of Malacca Bag
Stitch out the following designs for the front facing bag:
- 1 x One colour_01
- 1 x One colour_01_mirror
- 1 x One colour_02
- 1 x One colour_02_mirror
- 1 x One colour_03
- 1 x One colour_03_mirror
- 1 x One colour_04
- 1 x One colour_04_mirror
- 1 x One colour_05
- 1 x One colour_06
- 1 x One colour_07
- 1 x One colour_08
- 1 x One colour_08_mirror
Stitch out the following designs for the back facing bag:
- 1 x Back one colour_01
- 1 x Back one colour_01_mirror
- 1 x Back one colour_02 1 time
- 1 x Back one colour_02_mirror
- 1 x Back one colour_03
- 1 x Back one colour_03_mirror
- 1 x Back one colour_04
- 1 x Back one colour_04_mirror
- 1 x Back one colour_05
- 1 x Back one colour_06
- 1 x Back one colour_07
- 1 x Back one colour_08
- 1 x Back one colour_08_mirror
Stitch out the following designs for side and bottom panels:
- 6 x Side one colour_01
- 2 x Side one colour_02
- 1 x Side one colour_03
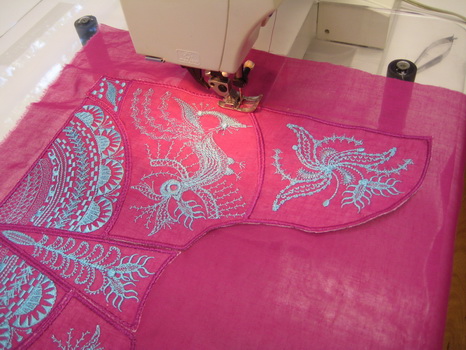
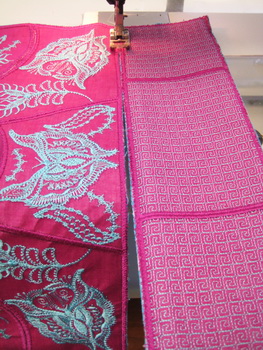
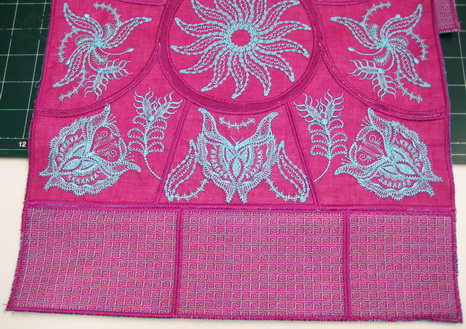
Zigzag stitch on fabric the front facing designs

Zigzag stitch on fabric the back facing designs
Back of bag placement of designs
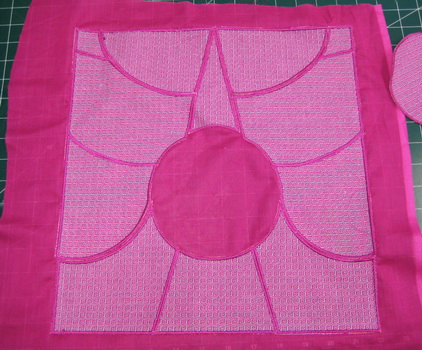
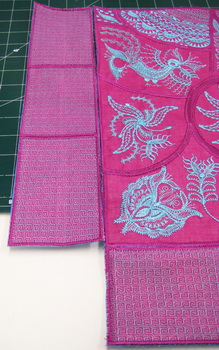
Once you have placed all the designs on the background fabric, cut excess fabric away
Zigzag stitch all three panels together that make up the bottom of the bag.
Stitch to the bottom panel a stiff backing
Zigzag stitch to the front, back, side and bottom panels a lining for the bag
Zigzag stitching the back panel of the bag to the lining
All panels for the bag with the lining stitched
Zigzag stitching the bottom panel to the front panel of the bag
Zigzag stitched bottom panel to the front panel of the bag
Side panel of bag
Both side panels stitched to the front panel of the bag
Zigzag stitching the back panel to the side panel of the bag
Showing you All the lined panels zigzag stitched to one another
Showing you all the front, back, side and bottom panels zigzag stitched together
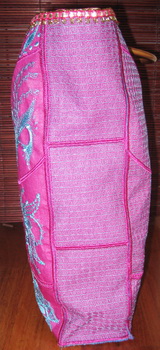
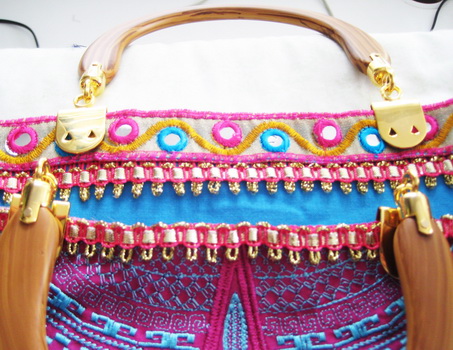
Photo showing you the detail of the bag side
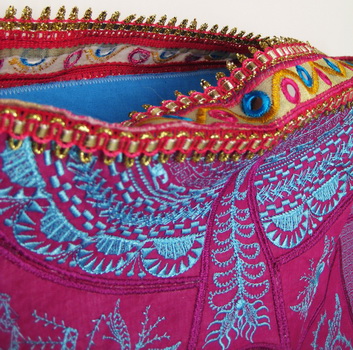
I had bought a length of Indian type ribbon last year and glued the ribbon to one side of the top edge of the bag then folded the ribbon over the top edge and glued the rest of the ribbon to the bag lining, this gives the bag a lovely finish
Malacca Jumper
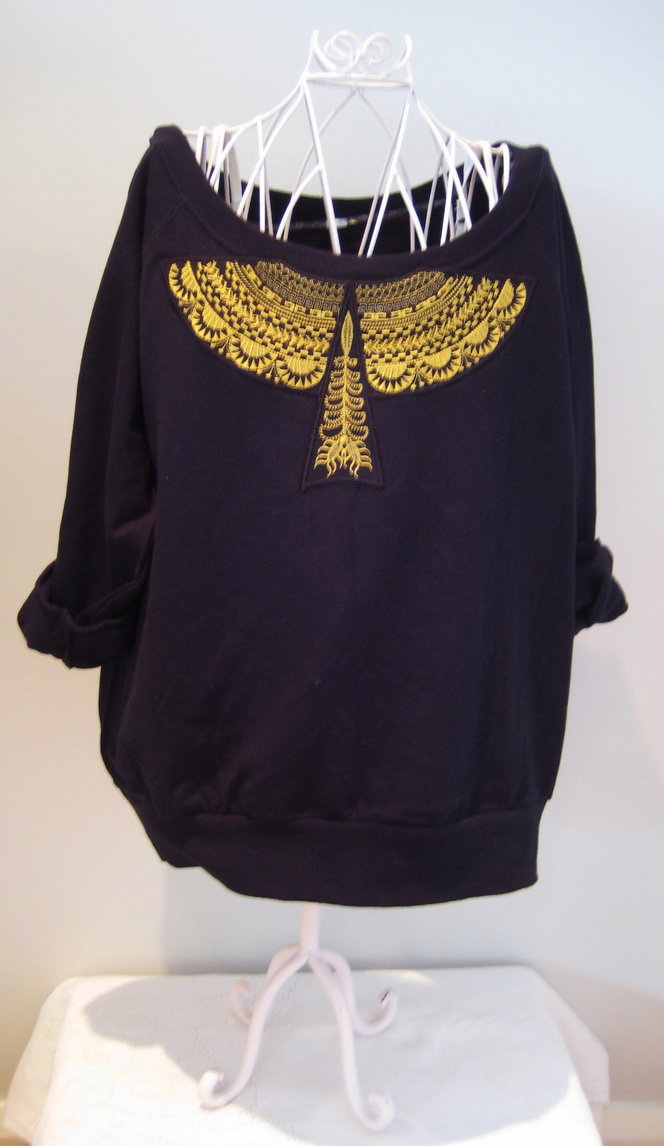
Stitch out the following designs:
- A design_01_mirror
- A design_01
- One colour_07
Machine Embroidery Designs
Latest Releases
Folklore Machine Embroidery Designs
Released on the 25th June 2019

6 designs included in the Folklore machine embroidery design set.
The Folklore design is suitable for a 6 x 10 inch or 240mm x 150mm hoop.
The Folklore design is available in DST, EMB, EXP, HUS, JEF, PES, VIP, VP3 and XXX.
The colour chart is included in the design set
As I am now digitizing with Wilcom embroidery software (which is a commercial software) we are unable to convert files to ART format. Bernina embroidery machines will now need to purchase designs in EMB or EXP format. Sorry for the inconvenience.


