


Christmas 2011 Intructions
Christmas 2011 Wall Hanging
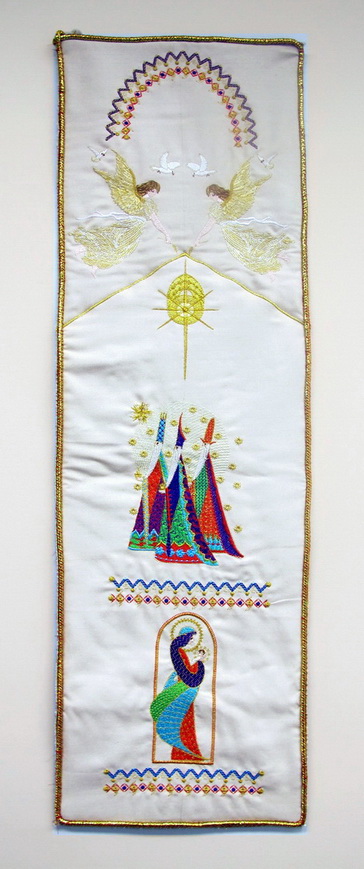
The size of the wall hanging is:
86 x 28cm Or 33.9 x 11 inches
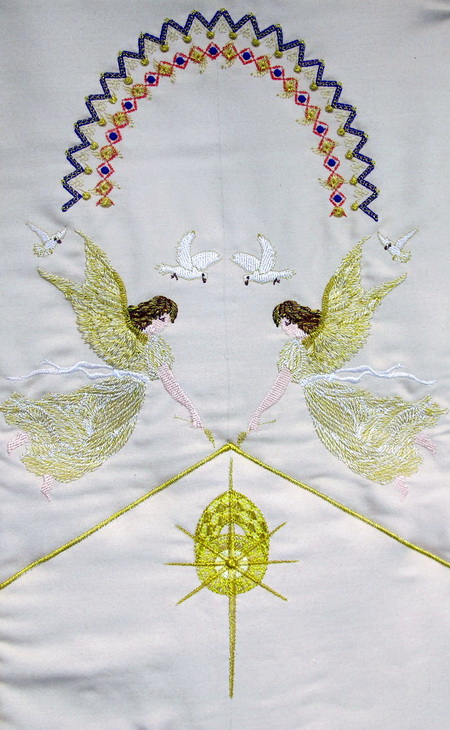
At the top of the wall hanging is
- Design_01
- Angel_01 I then mirrored the Angel_01
- Below the angels in the centre is Star_01
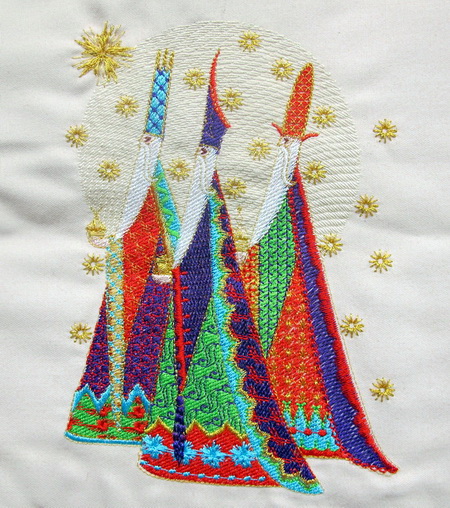
Below Star_01 is 3 Wise men_01 and below is design_02
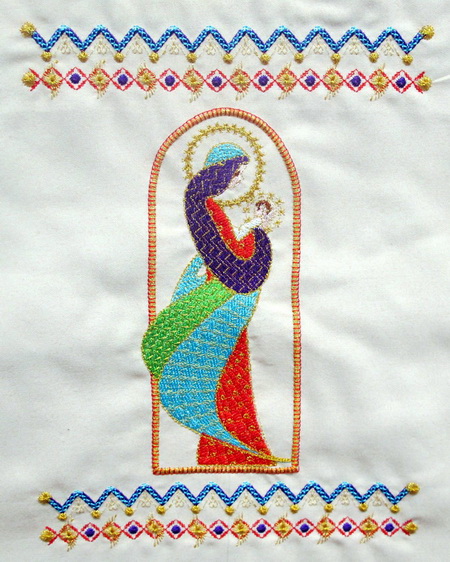
Below Design_02 is Mother and child_01 and below is Design_02
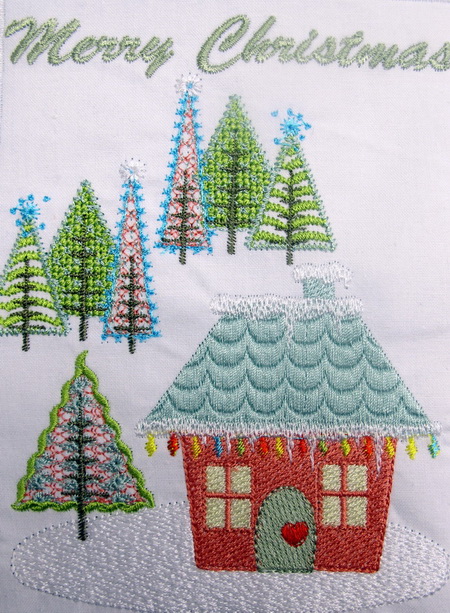
The design is Cottage in Forest_07 which I made into a lovely card
Rustic Charm Instructions
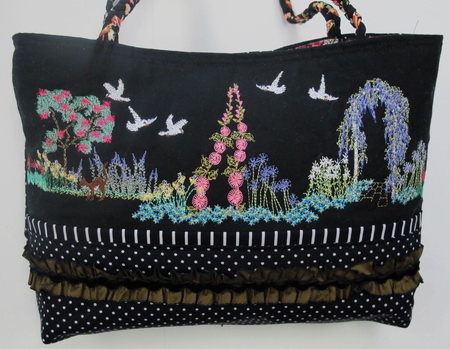
Rustic Charm Bag
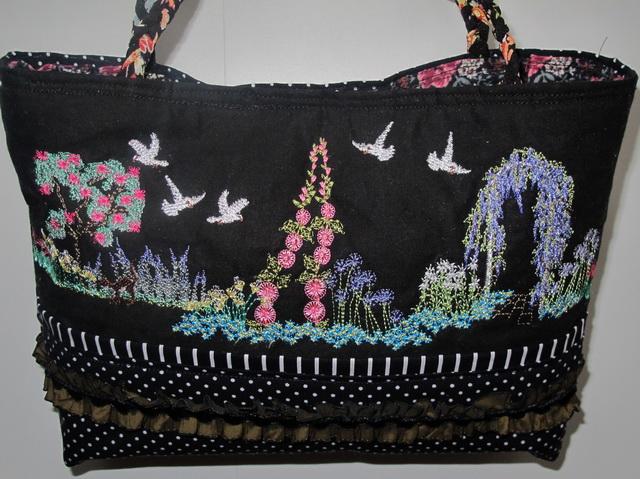
The bag dimensions are approx 30 x 19.5 cm or approx 12 x 7.5 inches.
You will need:
- ½ meter or ½ yard of black fabric
- 1 metre or 1 yard of lining fabric (I used a floral cotton fabric this gives the bag a lovely appeal)
- 1 metre of thin wadding
- A small amount of striped fabric
- 1 metre of black and white poker dot fabric
- 2 metre or 2 yards of Olive green taffeta ribbon pleated
- Handle (I bought from small floral print cording a few years back and plated the cording to make the handles)
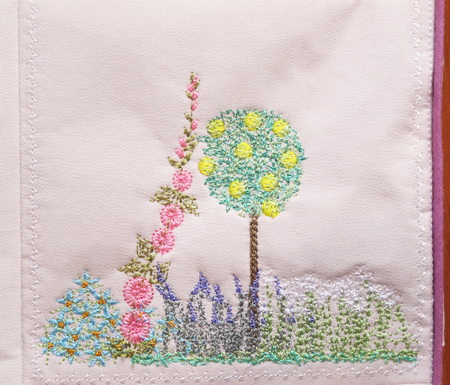
Stitch out the following designs
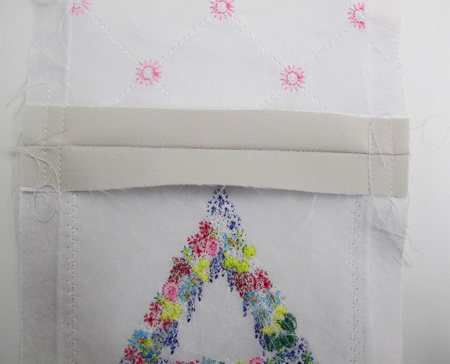
- First stitch out “Rustic Charm_22” to your left
- Second stitch out “Rustic Charm_23” to your right
- Lastly in the centre “Rustic Charm_24” bring this design slightly forward of the other two designs which gives the garden a bit of depth

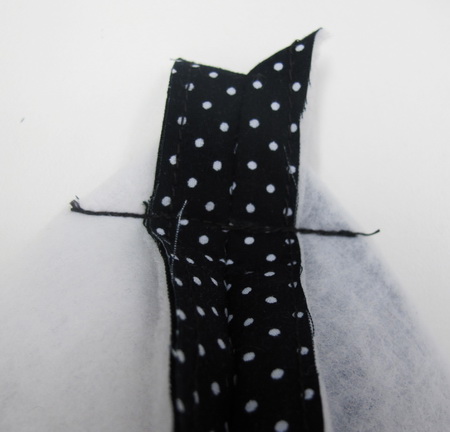
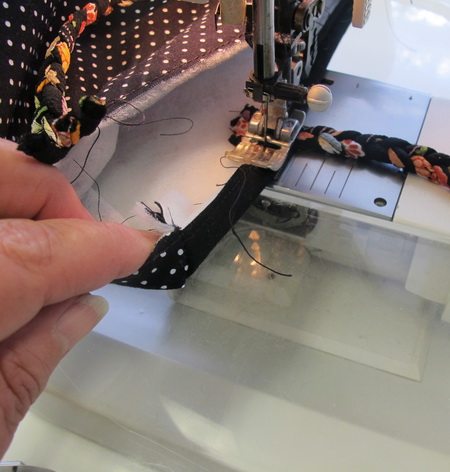
- Have a 5 cm or 2 inch in width and 40 cm or 16 inches in length of stripped fabric fold in half and press with your iron
- Cut 20 cm or 8 inches by 40 cm or 16 inches of black and white poker dotted fabric
- At one end of the poker dotted fabric press the hem using your iron and then stitch the fabric over part of the black and white stripped fabric. I left 5mm or 7/8 inch of the black and white stripped fabric showing
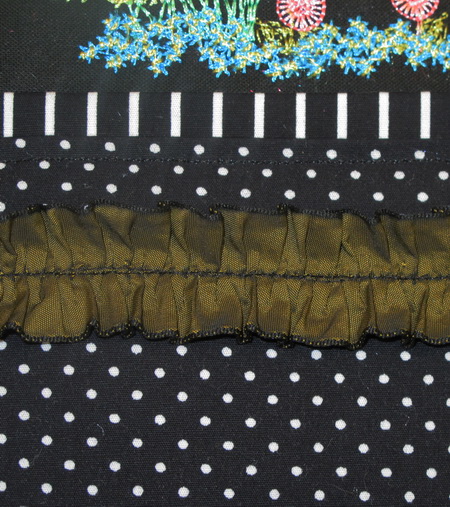
Stitch the pleated olive green taffeta ribbon or whatever you may have at hand
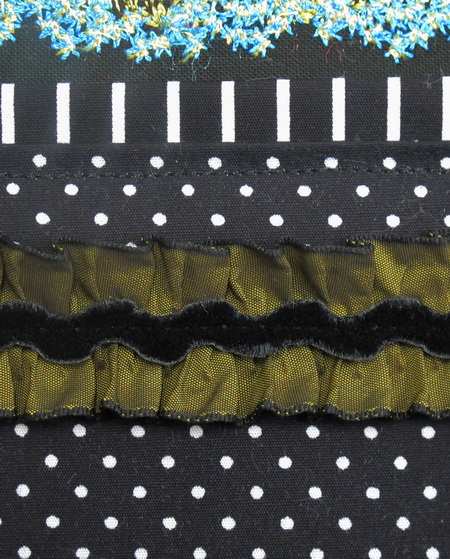
Stitch in the centre of the taffeta ribbon black velvet rickrack
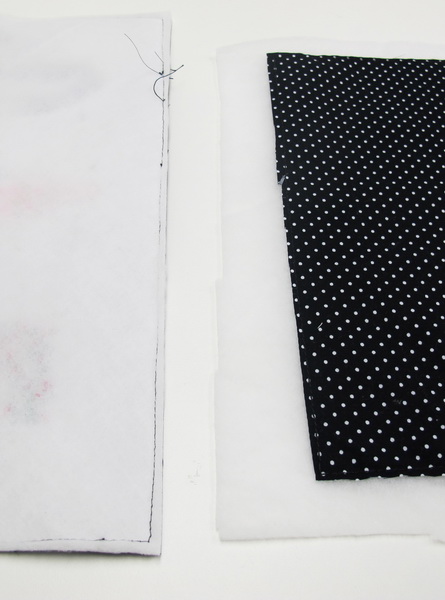
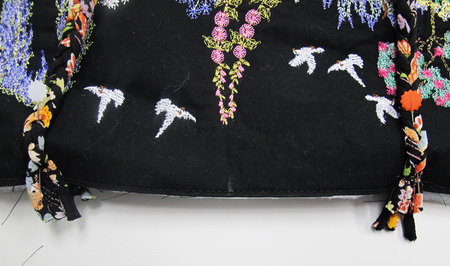
- Cut the back panel fabric the same size as the front panel I used the black and white poker dot fabric
- Stitch the thin wadding to the front and back panels of the bag.
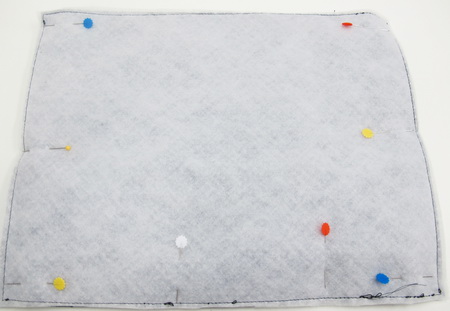
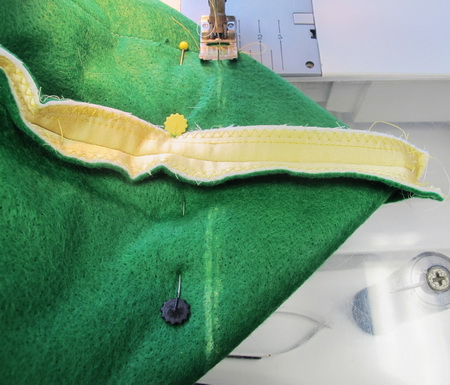
Pin all three sides of the bag together

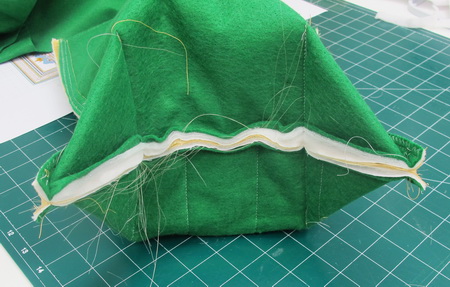
All three sides stitched together

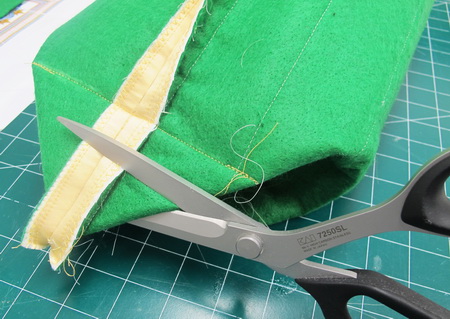
- Flatten the bottom corner to make your bag bottom flat, hold one of the bottom corner of the exterior and match the side seam line with the bottom seam line (have a good look into your bag to see if the side seam and the bottom seams meet and flow into one another) Completely flatten the bag corner to form a triangle and pin.
- Measure and mark your chosen flat bottom depth...I would for example, if you want your bag bottom to be 9 cm (3 ½ inches) in depth. To make your bag bottom 9cm (3 ½ inches) deep all you have to do is measure and mark a line that is 90 degrees to the side seam and is 9 cm (3 ½ inches) long across the width of the triangle
Stitch flat bottom along the bottom line mark you made. Be sure to sew securing stitches at both ends to finish, trim off any excess fabric from the triangle, please not too close to the seam
To make a flat bottom for the bag I stitched two layers 9 x 24 cm (3.5 x 9.5 inches)of thick “Floriani Stitch N Shape” together or whatever you have at hand, you can even use thick cardboard
- Insert the bottom panel into your bag
- Make your lining for the bag, I always like to make the lining slightly larger than the actual bag, this makes it easier when you stitch the lining to the bag as you can pleat the lining here and there
Mark the centre of the front and back panels of the bag then pin your handles to the bag. Once satisfied with your measurements stitch each of the handles to your bag
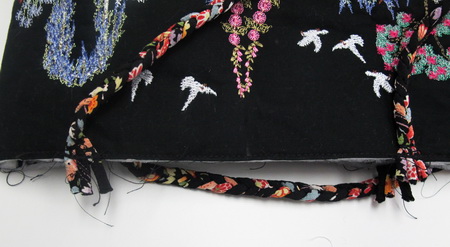
All the handles stitched to the bag
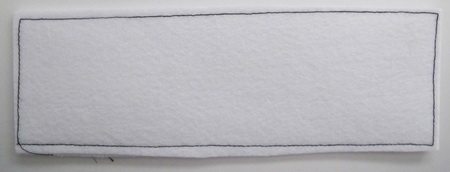
Stitch down the top to leave a nice clean edge to stitch your lining to the bag
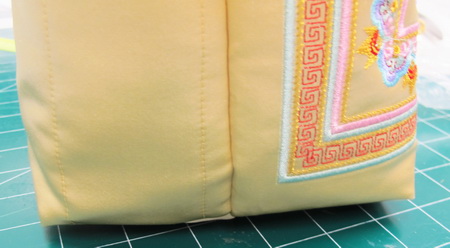
Lining stitched to the bag and all finished

Back of the Bag
Instructions for the Lavendar Cushion
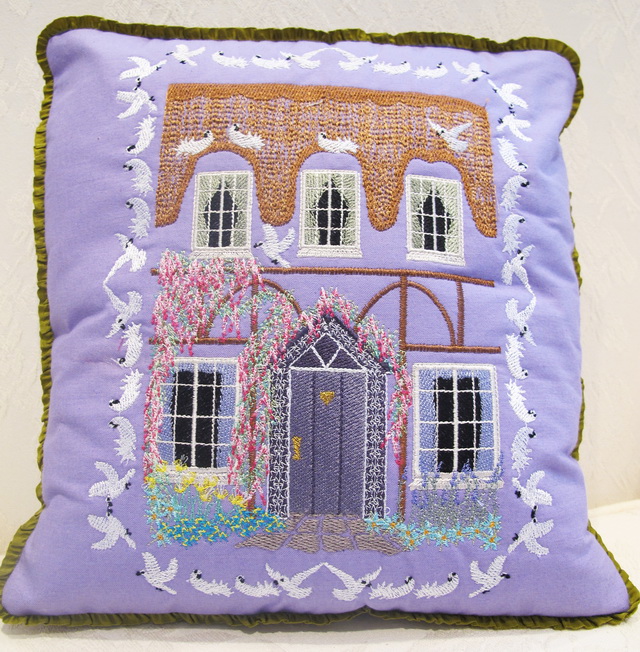
The dimensions of the cushion are 30 x 30 cm or 12x 12 inches
You will need:
- 1 metre or 1 yard of lavender fabric
- 4 metres or 4.5 yards of Olive green silk frill
- 1 metre or 1 yard of thin wadding
Stitch the following designs
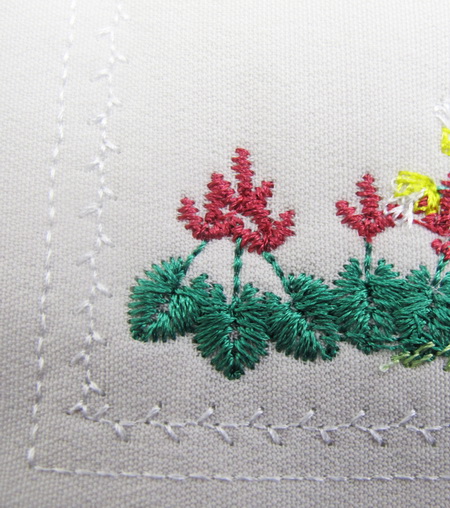
- Cottage_01_180x130 or Cottage_02_150x240
- Rustic charm_10_180x130 4 times
- Rustic charm_09_150x240 4 times
Stitch “cottage_01_180x130” or “Cottage_02_150x240” then stitch above and below “Rustic charm_10_180x130” or “Rustic Charm_09_150x240” then stitch to both sides
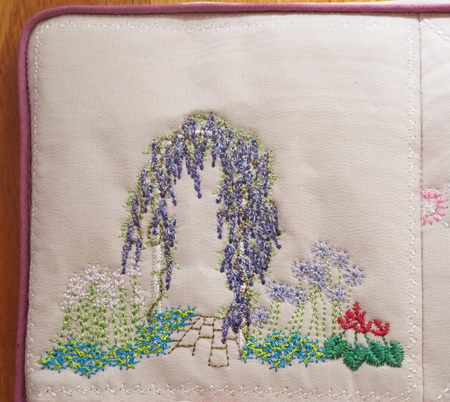
Instructions for the Rustic Charm Cushion
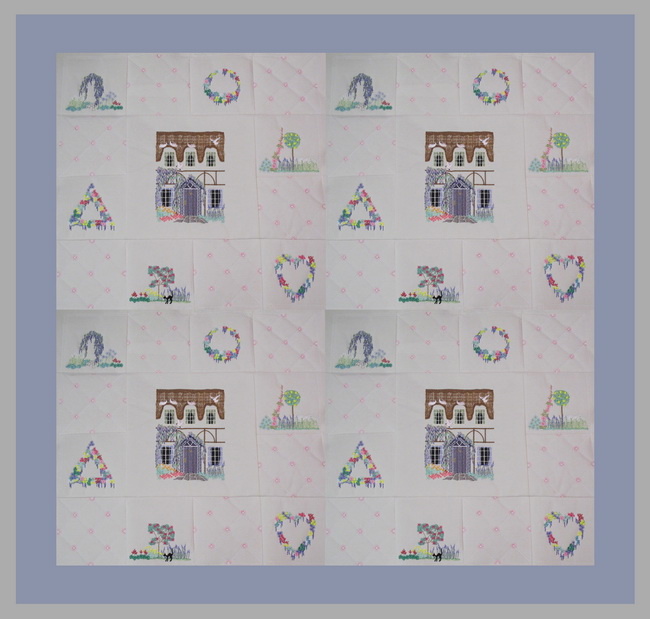
This photo is just a combination of the cushion that I Photo shopped to give you an idea of making a quilt with the designs
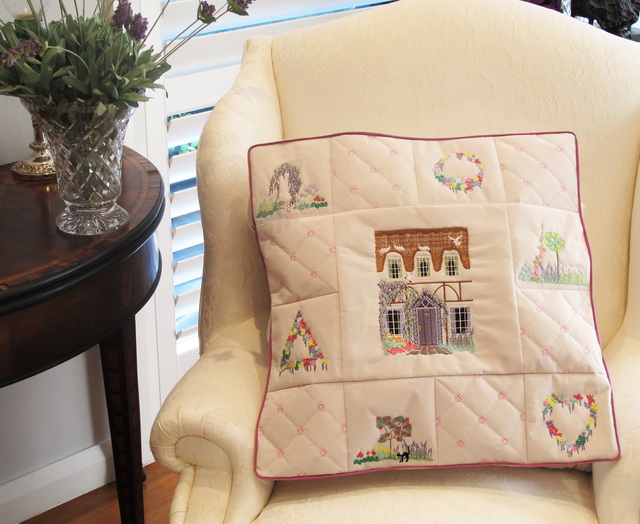
The dimensions of the cushion are 51 x 51 cm or 20x 20.5 inches
What you will need:
- 2.5 metres or 2.5 yards approx of the background fabric of your choice I used a light grey German crepe fabric (I always like to have far more than I need)
- Thin wadding 2.5 meter or 2.5 yards approx
- 4.5 meters or 5 yards of piping around the cushion
Stitch the following designs:
- Rustic Charm_12
- Rustic Charm_13
- Rustic Charm_14
- Rustic Charm_16
- Rustic Charm_17
- Rustic Charm_19
- Stitch 6 of Rustic Charm_20
- Stitch either Cottage_01_180x130 or Cottage_02_150x240 depending on what size hoop you have
- Hoop each design with a and thin wadding and your choice of stabilizer (I have been trying out for over a year now the “Floriani Stitch N Wash tearaway fusible” I have no affiliation with this company and pay full price for their products...I do like this product and have tried this stabilizer on silk and most fabrics)
- Once you have stitched all the designs out you will notice around each design there is a border of a feather stitch and on the outer boarder is a straight stitch
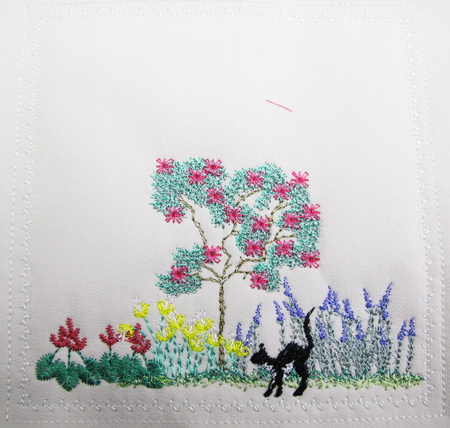
This is a close up of the border with the feather and straight stitches
Use this straight stitch border as a guide for your 5/8 inch seam as you can see in the photo (you can decide on what seam allowance suites you the 5/8 inch is just a guide) Once you have stitched around the straight stitch border cut away any excess fabric
Cut away the thin wadding from the straight stitch border as shown
Showing the back
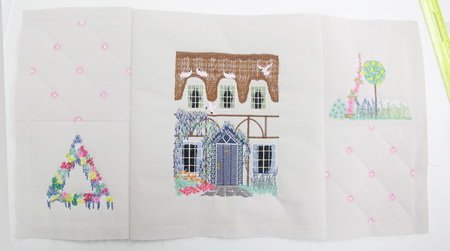
Start by sewing “Rustic Charm_19” and “Rustic Charm_20” as the first block followed by “Rustic Charm_12” and “Rustic Charm_20” as the second block then sew either “Cottage_01_180x130” or “Cottage_02_150x240” to the first block followed by the second block
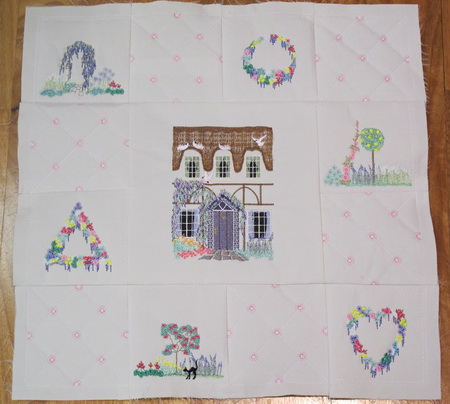
This is a photo of all the blocks stitched together if you wish to make the cushion then at this stage sew the piping around the cushion or if you wish to make a quilt the repeat the process as many times as you wish
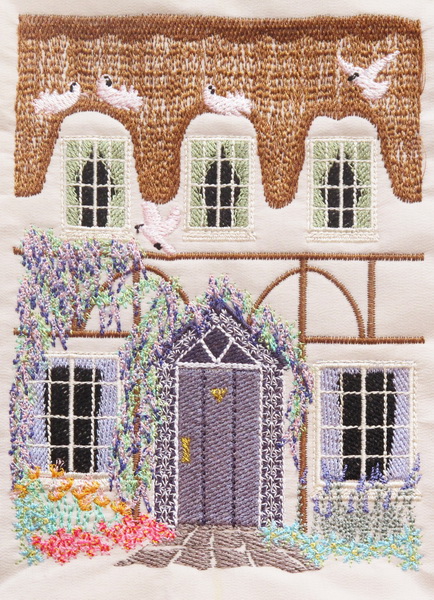
Close up of the centre design “Cottage_02_150x240
Close up of the centre design “Rustic Charm_14”
Close up of the centre design “Rustic Charm_12”
Close up of the centre design “Rustic Charm_17”

Close up of the centre design “Rustic Charm_13”
Close up of the centre design “Rustic Charm_16”
Close up of the centre design “Rustic Charm_20”
Close up of the centre design “Rustic Charm_19”
Black T-Shirt Instructions
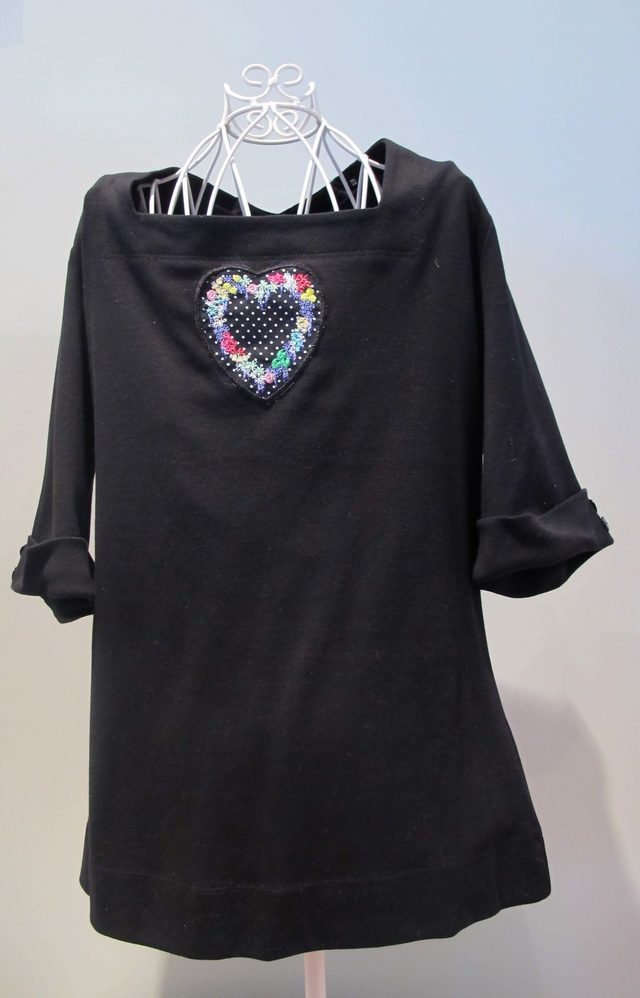
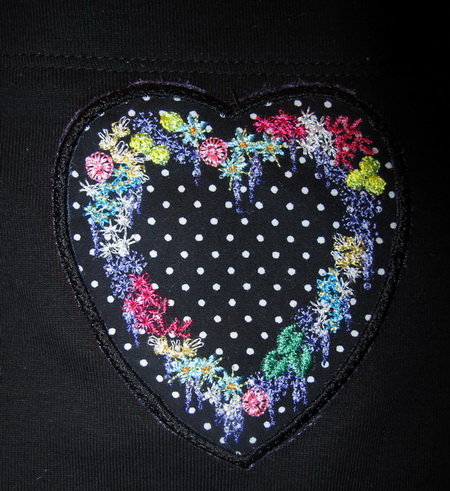
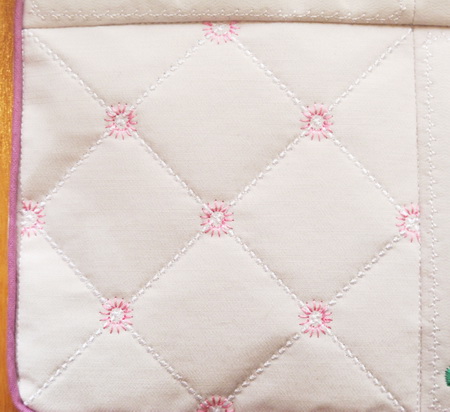
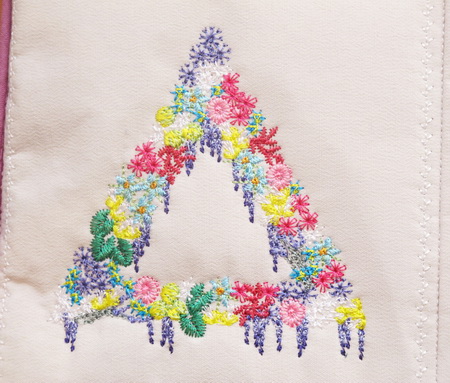
Close up of the design “Rustic Charm” stitch on a similar fabric that you used for the bag stitch a thin wadding under the design this just makes the design puff out slightly which gives it a dimension then cut around the satin stitch border and zigzag stitch the design onto the “T” Shirt
Manchu Instructions
Manchu Bag
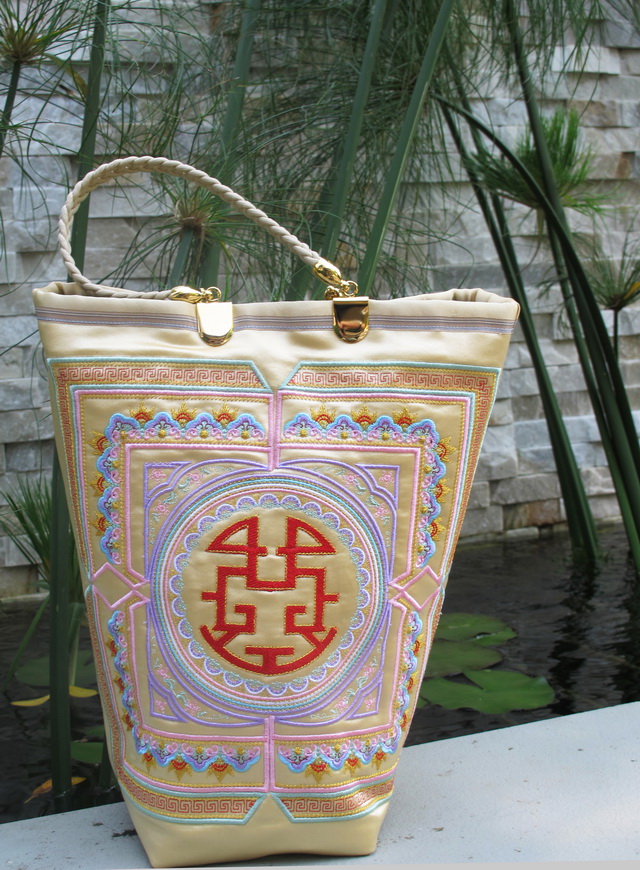
Bag dimension are
29.5 length x 28 wide cm approx
Or
12 length x 10.5 wide inches approx
NOTIONS
- 1 metre or 1 yard of fabric (I used pale gold Chinese silk which I purchased in China a couple of months ago wished I had bought meters of this silk ...The silk is so beautiful to work with)
- 1 metre or 1 yard of lining fabric
- ½ metre or 1/2 yard of thin wadding
- ½ metre or 1/2 yard of felt (I used the felt as it would give this bag a soft look)
- Handles for the bag
- Magnetic clip
- 1 Chinese knot
Stitch out the following designs:
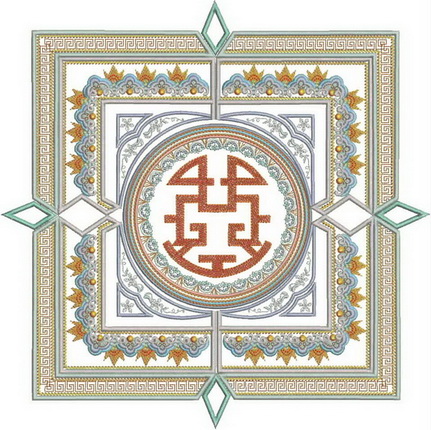
- “Manchu_01”
- “Manchu_02” 4 times
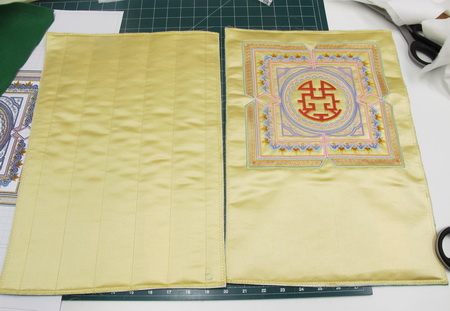
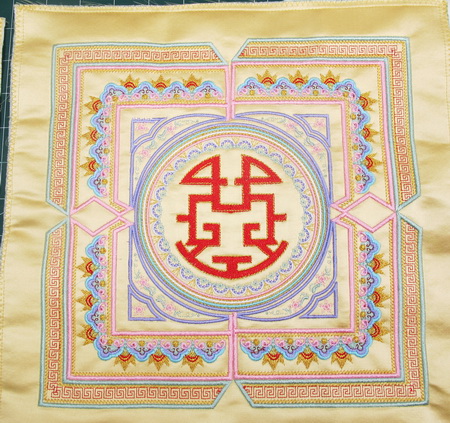
- On the background fabric you have chosen zigzag stitch Manchu_01 in the centre
- Zigzag stitch all four Manchu_02 as shown in the diagram
- I did not stitch the 4 Manchu_03 as I did not want the bag to be to big
Once you have finished zigzagging each of the designs onto the fabric cut the front and back panels for the bag 39cm length x 28cm wide or 15.4length x 11 inches wide
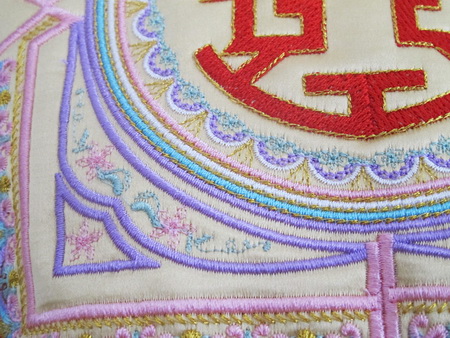
This is a close up of the detail in each embroidered panel
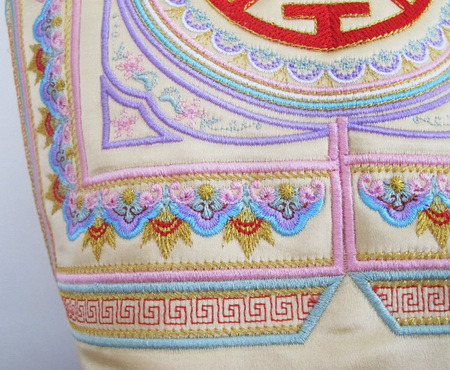
This is a close up of the detail in each embroidered panel
Use a straight stitch to make the lines for the back of the bag to give a soft quilted look each straight stitch line is 5cm apart or 2 inches
- Front panel of the bag all stitched out
- Zigzag stitch on all side of both the front and back panels
The following instructions will help show you how to make the base of the Manchu Bag

Pin all three sides of the bag together
All three sides stitched together
- Flatten the bottom corner to make your bag bottom flat, hold one of the bottom corner of the exterior and match the side seam line with the bottom seam line (have a good look into your bag to see if the side seam and the bottom seams meet and flow into one another) Completely flatten the bag corner to form a triangle and pin.
- Measure and mark your chosen flat bottom depth...I would for example, if you want your bag bottom to be 9 cm (3 ½ inches) in depth. To make your bag bottom 9cm (3 ½ inches) deep all you have to do is measure and mark a line that is 90 degrees to the side seam and is 9 cm (3 ½ inches) long across the width of the triangle
- You can make a mock up to see how you flat bottom will look on your bag, experiment with a piece of paper
Stitch flat bottom along the bottom line mark you made. Be sure to sew securing stitches at both ends to finish, trim off any excess fabric from the triangle, please not too close to the seam

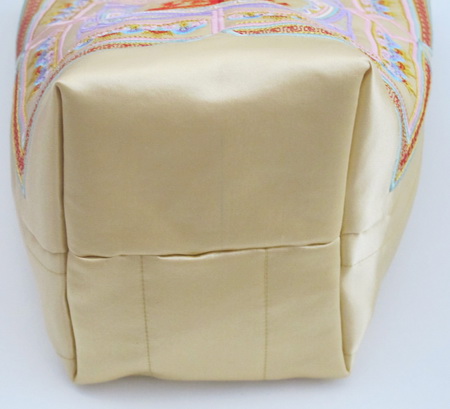
Showing you the base of the Manchu Bag
Press out all the seams using your hands
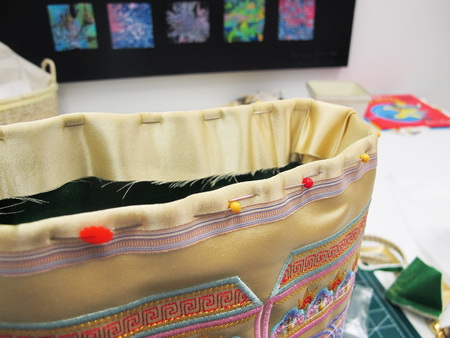
- Around the top of the bag pin matching fabric or some sort of nice binding over the edge of the bag. I used the selvedge that was on the end of the Chinese silk and stitch the binding onto the bag
- Make the lining the same as the bag (I would suggest you make the width of the lining slightly larger than the bag as you can pleat the lining nicely when it is too large)
- At this stage you should also attach the magnetic clasp to the lining
- If you are using bag handles that are not similar to mine you also need to stitch the handles on at this time
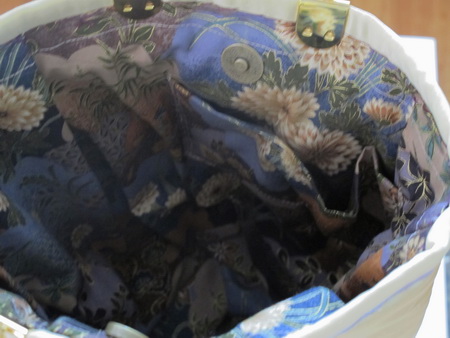
Attach the lining to the bag I slipped stitch the lining to the bag
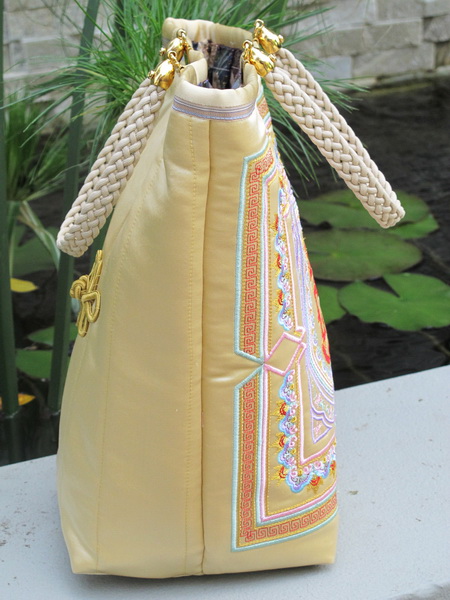
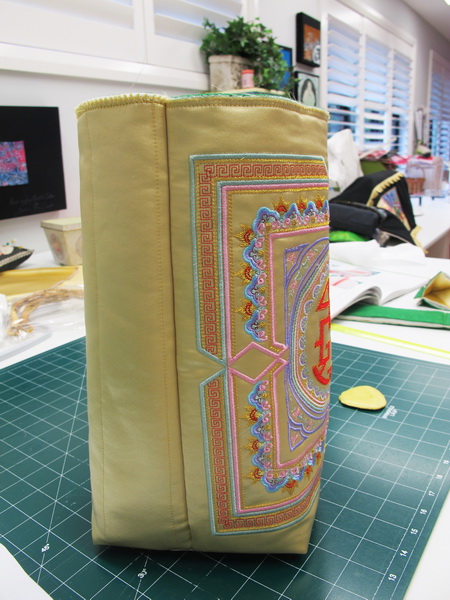
This is the side of the bag
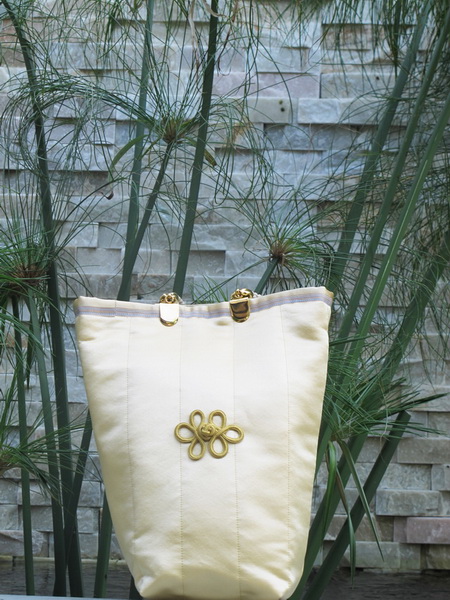
Back of the Manchu bag
Instructions for the Manchu Top
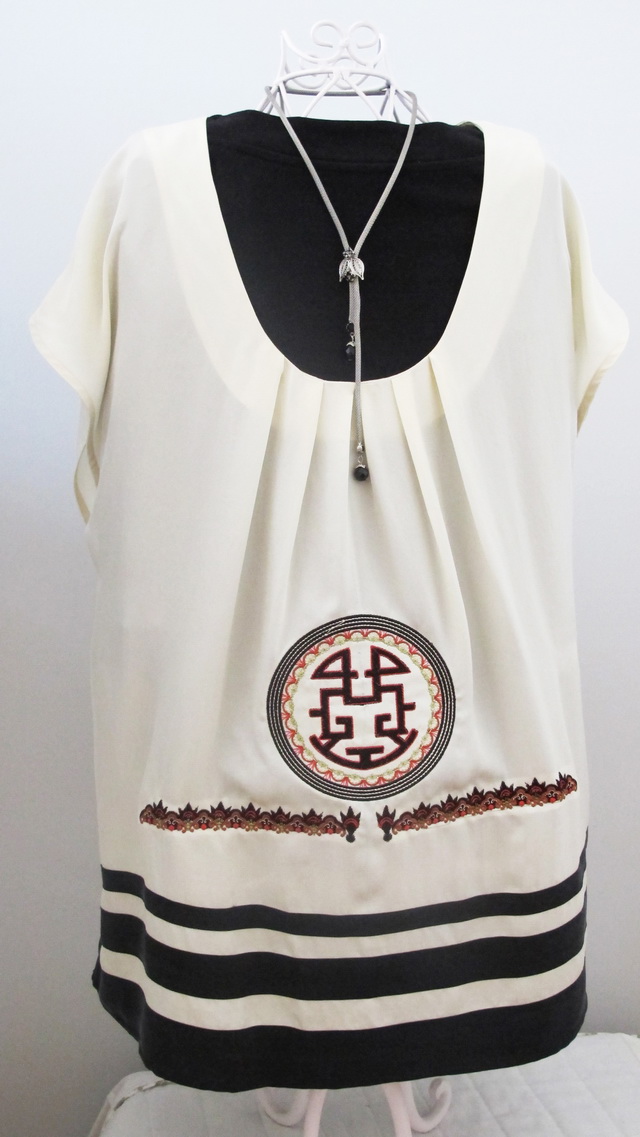
Stitch the following designs onto a top
- Manchu_01
- Manchu_04 either side of the circle
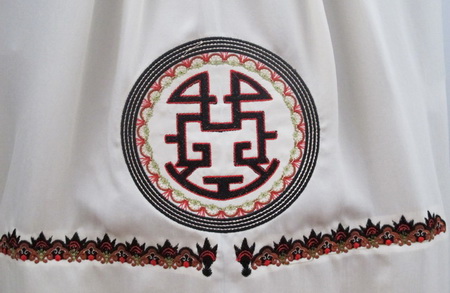
Close up of the detail in the design
Waters of Spring Instructions
Waters of Spring Kimono
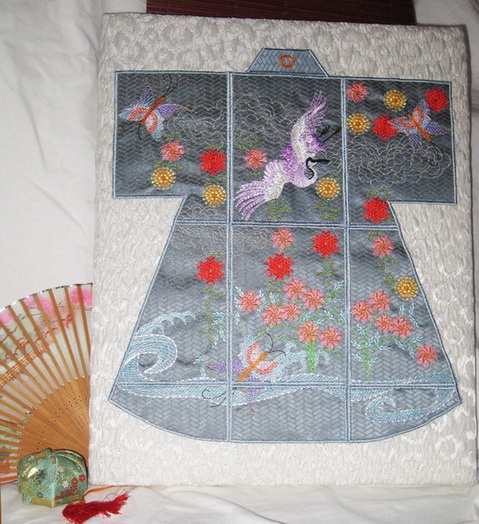
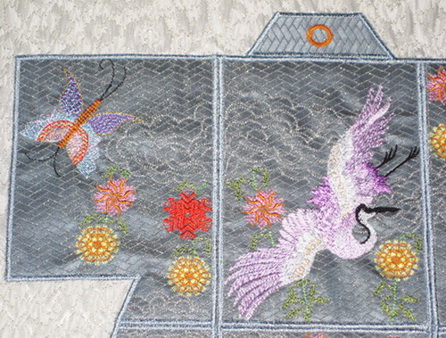
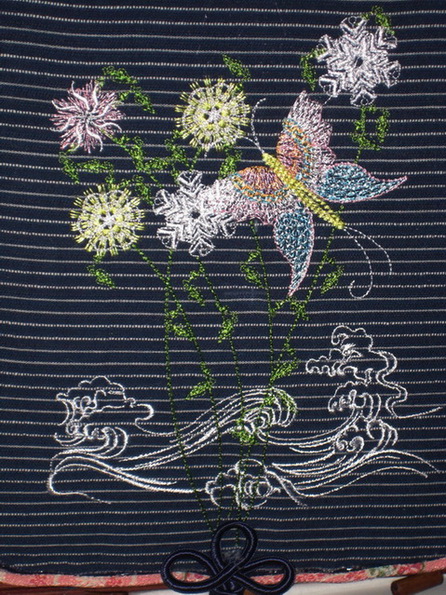
Close up of the designs
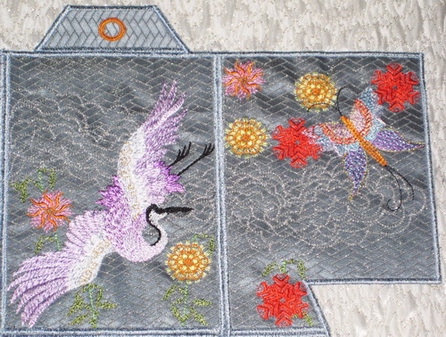
Close up of the designs
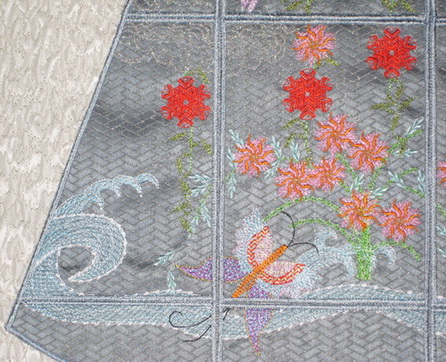
Close up of the designs
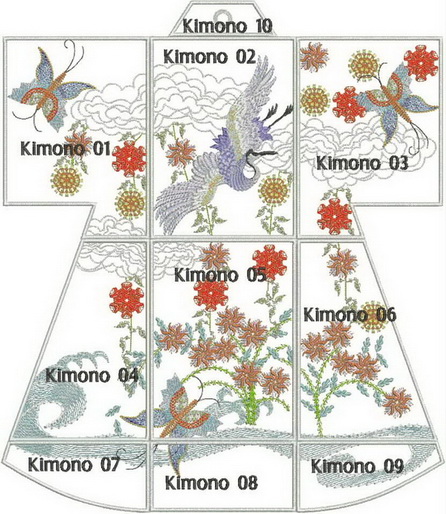
Instructions for stitching the Kimono together
- Lightly glue “Kimono_02” down on your backing fabric
- Lightly glue “Kimono_01” beside “Kimono_02
- Lightly glue “kimono_03 beside “Kimono_02”
- Lightly glue “Kimono_05” under “Kimono_02”
- Lightly glue “Kimono_04” under “Kimono_01”
- Lightly glue “Kimono_06” under “Kimono_03”
- Lightly glue “Kimono_08” under “Kimono_05”
- Lightly glue “Kimono_07” beside “kimono_08”
- Lightly glue”Kimono_09” beside “kimono_08”
Once you are happy with matching up all the designs to make up the Kimono, stitch using a zigzag stitch all the panels down onto the backing fabric.
If you are satisfied that all matches up correctly then satin stitch each panel onto the backing fabric.
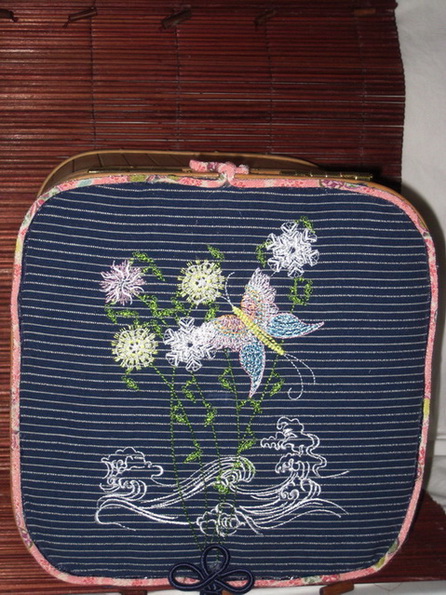
Waters of Spring Box
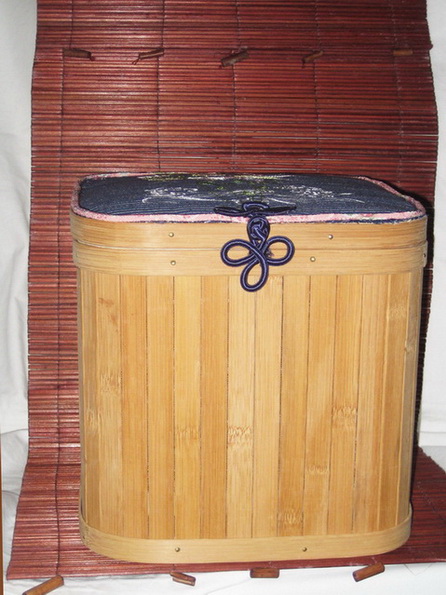
I purchased this box and as the lid was very plain and thought the box would look good with a lovely design.
I glued wadding onto the lid then covered the wadding with the design and then glued down
I also added piping to cover the raw edges of the fabric on the lid.
I stitched “Waters of Spring_07_240x150 on a Japanese cotton fabric” for those who do not have the larger hoop you can stitch “Waters of Spring_08” as that size is for 5 x 7 inch or 180 x 130 mm hoop.
Machine Embroidery Designs
Latest Releases
Folklore Machine Embroidery Designs
Released on the 25th June 2019

6 designs included in the Folklore machine embroidery design set.
The Folklore design is suitable for a 6 x 10 inch or 240mm x 150mm hoop.
The Folklore design is available in DST, EMB, EXP, HUS, JEF, PES, VIP, VP3 and XXX.
The colour chart is included in the design set
As I am now digitizing with Wilcom embroidery software (which is a commercial software) we are unable to convert files to ART format. Bernina embroidery machines will now need to purchase designs in EMB or EXP format. Sorry for the inconvenience.


