


Mandir Instructions
Instructions for Mandir Cushion
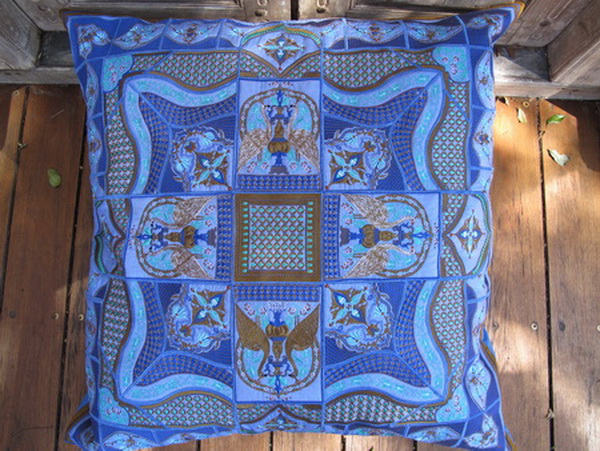
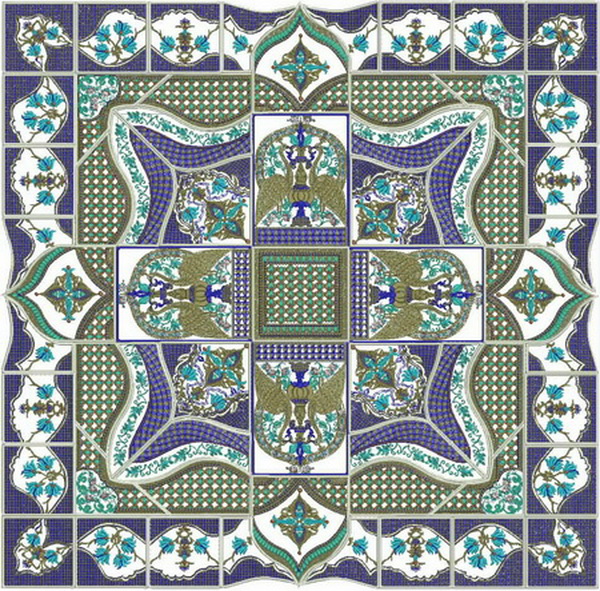
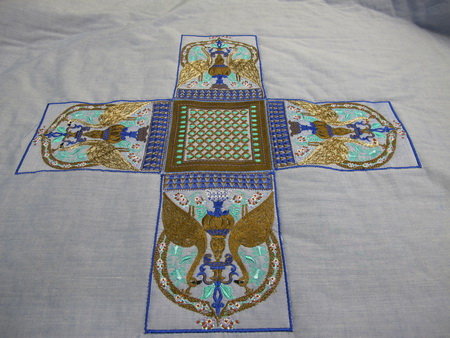
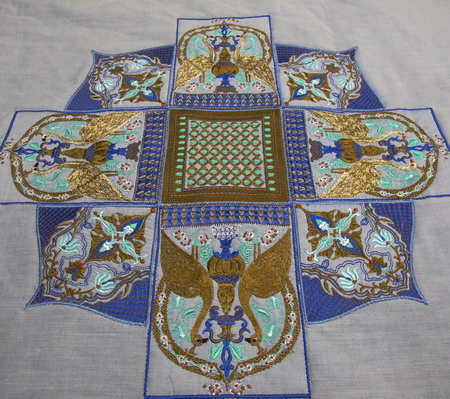
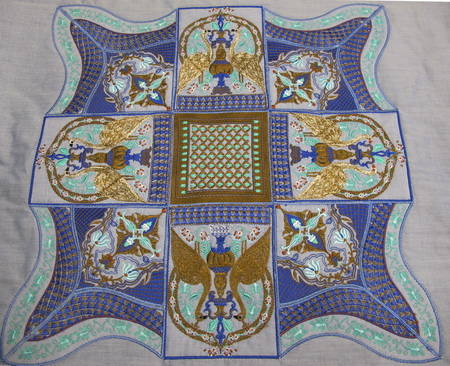
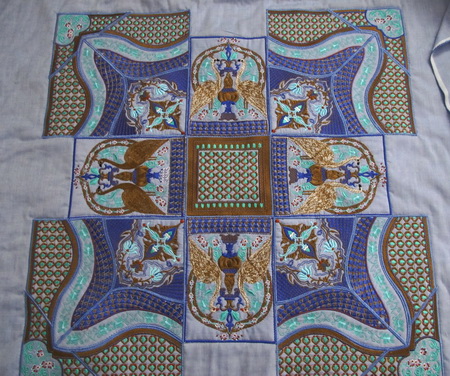
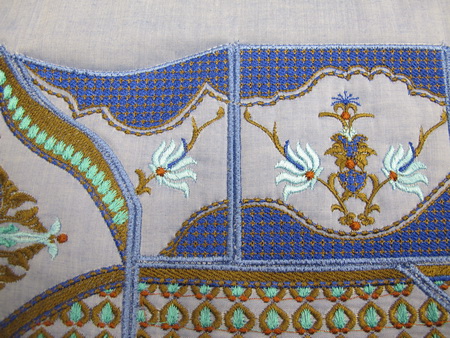
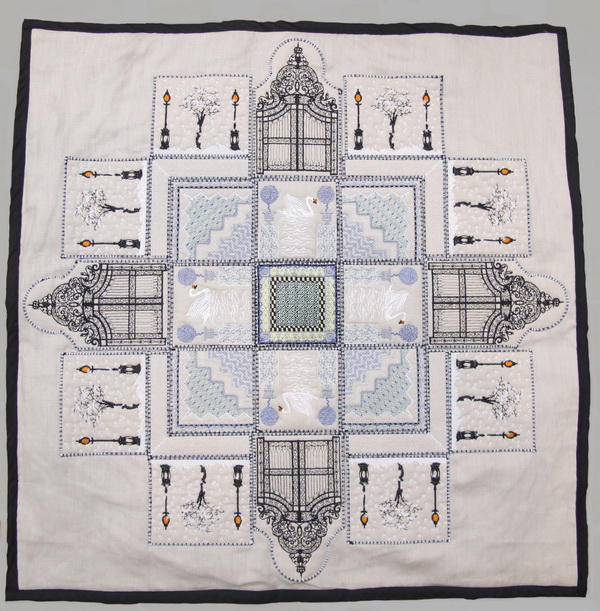
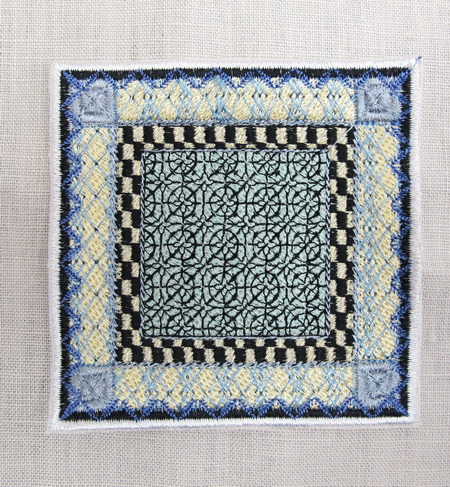
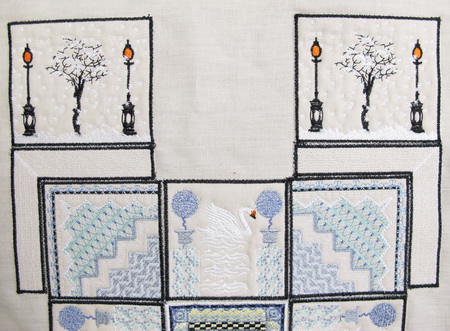
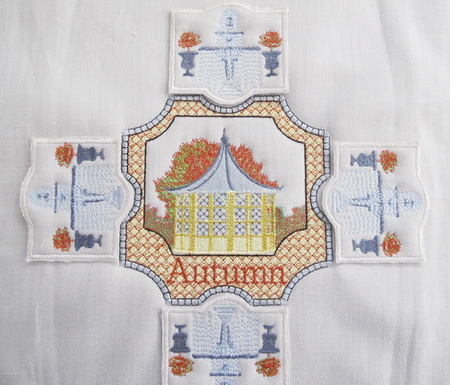
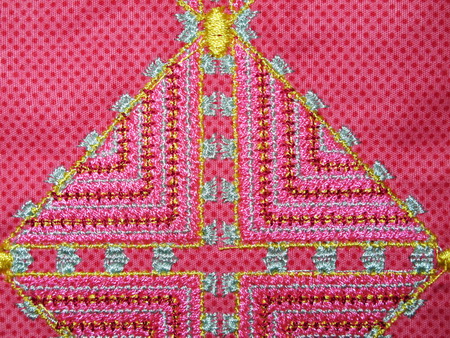
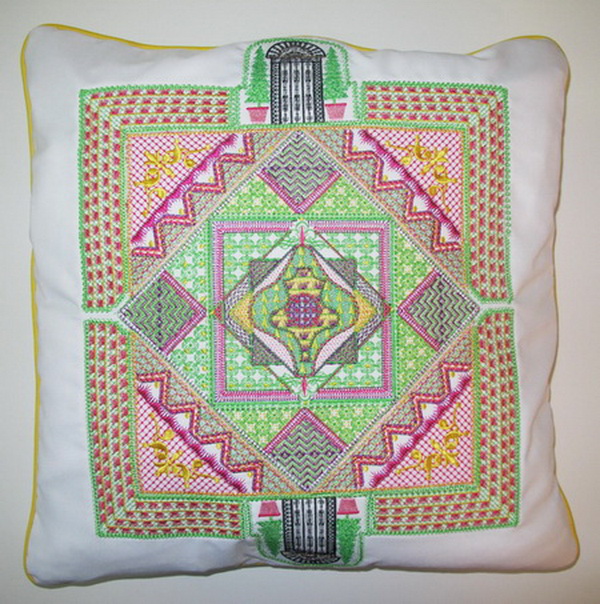
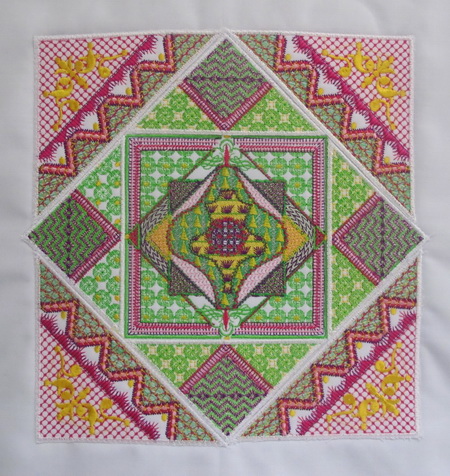
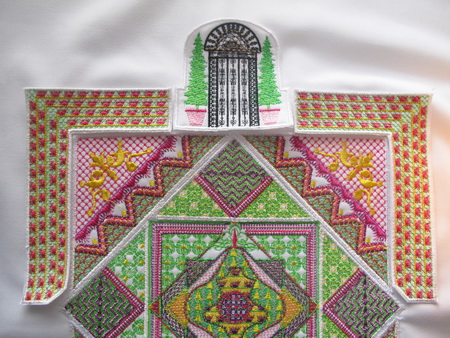
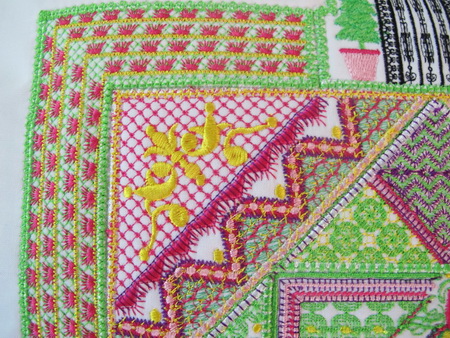
This is the actual layout of the cushion

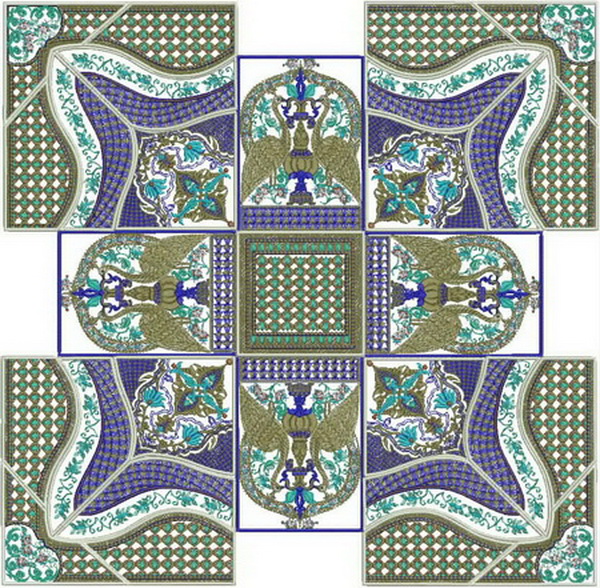
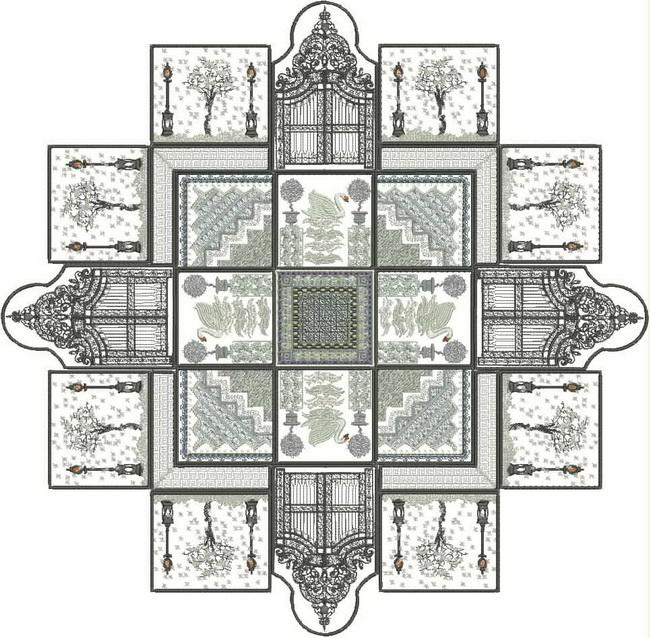
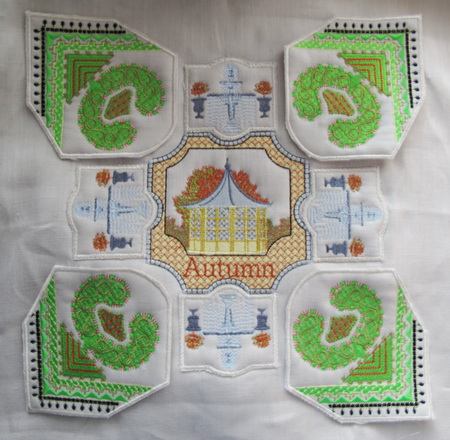
An idea using the designs in a different way
Another idea using the designs
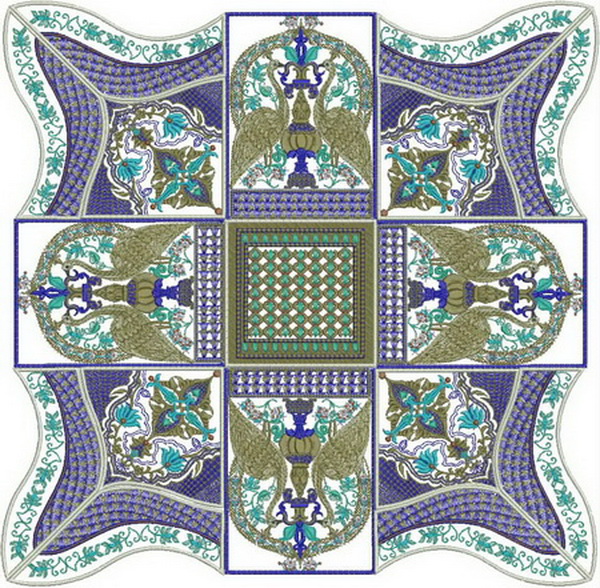
Another idea using the designs
Stitch out the following designs
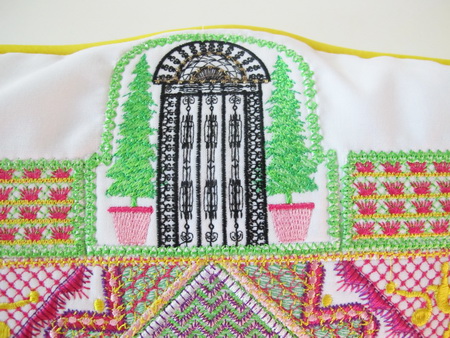
- 4 x Mandir_01
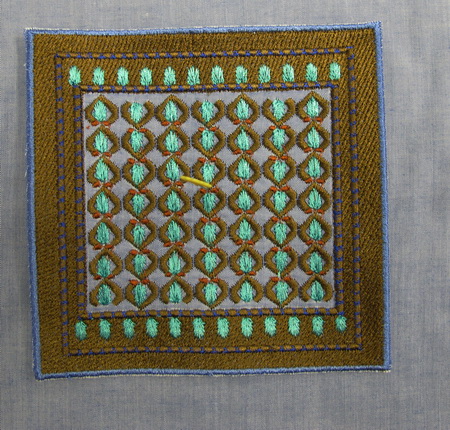
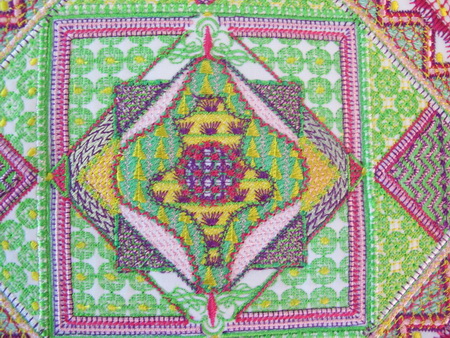
- 1 x Mandir_02
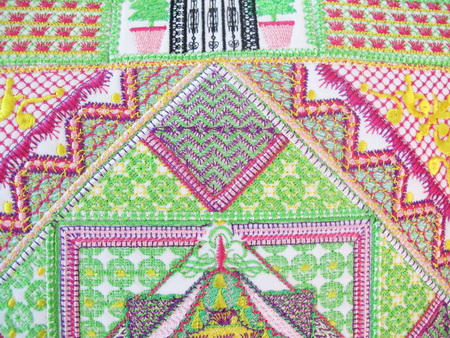
- 4 x Mandir_03
- 4 x Mandir_04
- 4 x Mandir_04a
- 2 x Mandir_05
- 2 x Mandir_05a
- 4 x Mandir_06
- 4 x Mandir_06a
- 4 x Mandir_07
- 4 x Mandir_08
- 4 x Mandir_08a
- 4 x Mandir_09
- 4 x Mandir_09a
- 4 x Mandir_10
- 4 x Mandir_10a
- 4 x Mandir_11
- 5 meters or 5 yards of cotton fabric
- 3 meters or 3 yards of thin wadding (I used iron on thin wadding)
- 3 meters of stabilizer
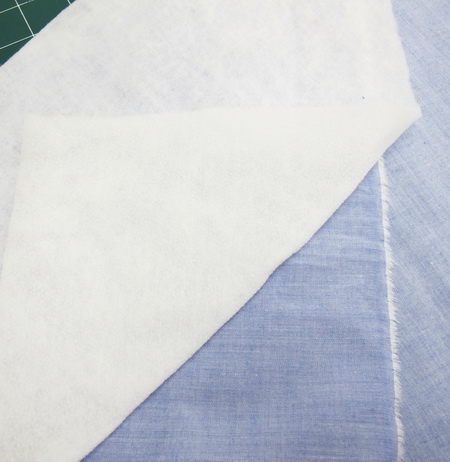
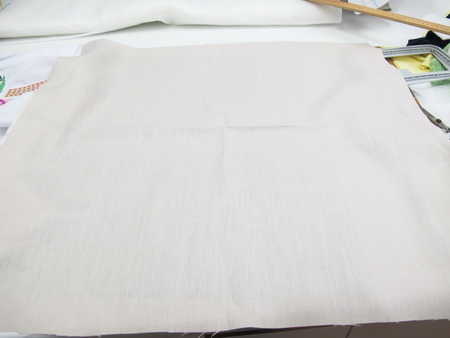
Showing the fabric, thin wadding and stabilizer to stich out each of the designs
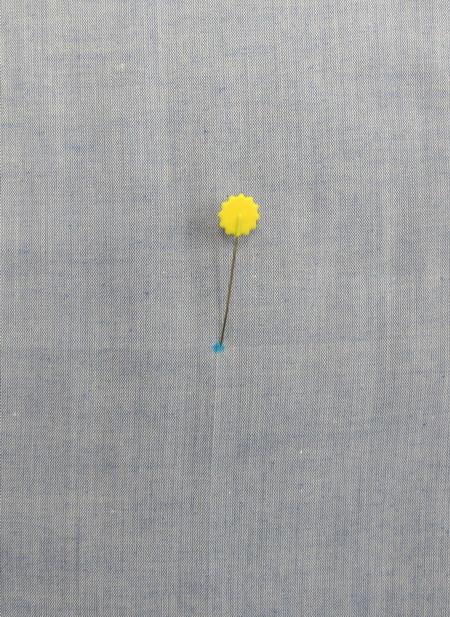
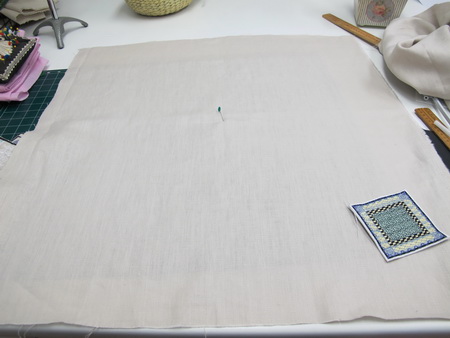
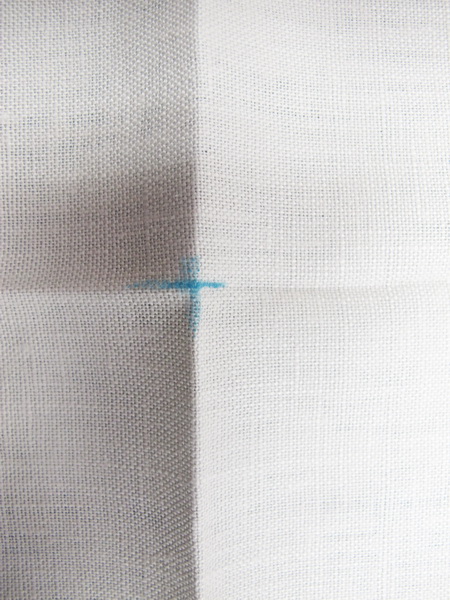
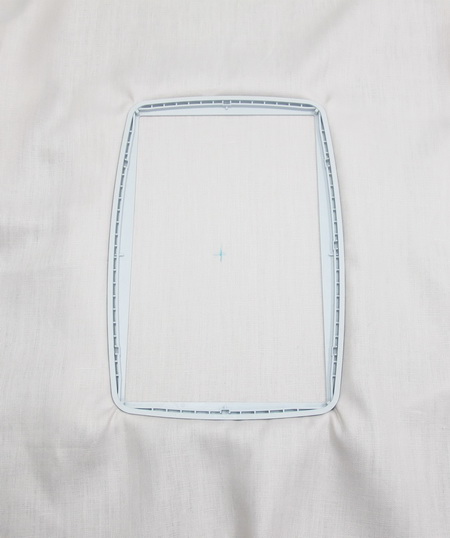
Once you have stitched all the designs out, now it is time to place the design panels on your background fabric, mark the centre of the background fabric
Cut all the panels as close to the satin stitch border as you can
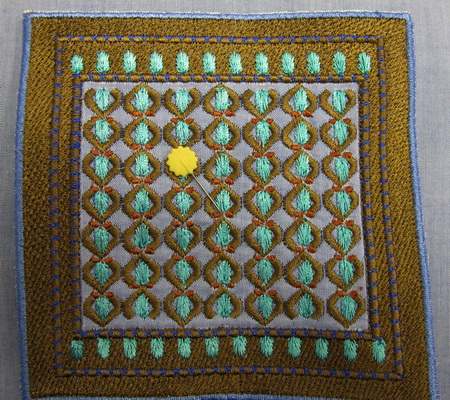
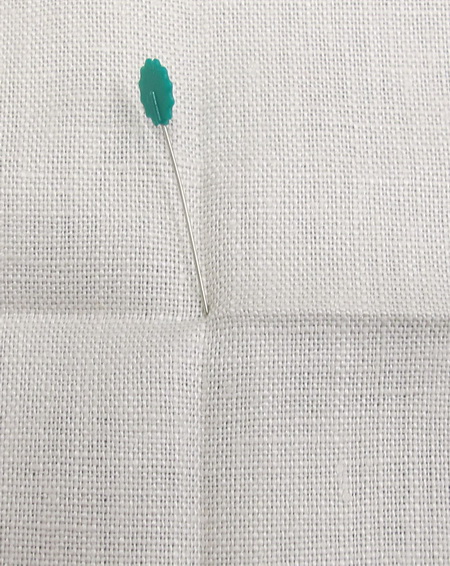
Where you marked the centre of the background fabric place “Mandir_02” in the centre you just marked
Showing you “Mandir_02” panel placed in the centre with a pin
Once I am happy with the placement of the panel on the background fabric, I then lightly hot glue the panel down to the background fabric
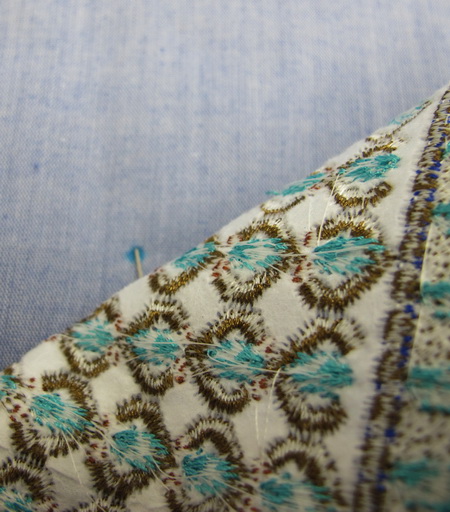
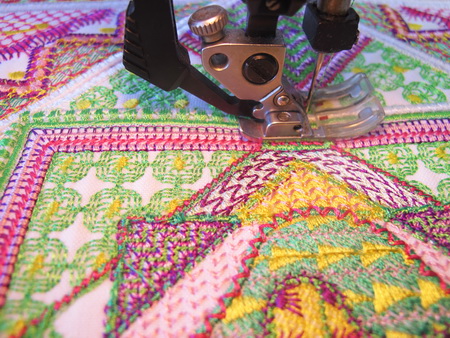
Using the same coloured thread as you used for the satin stitch border on each of the panels, zigzag stitch the panel down to the background fabric
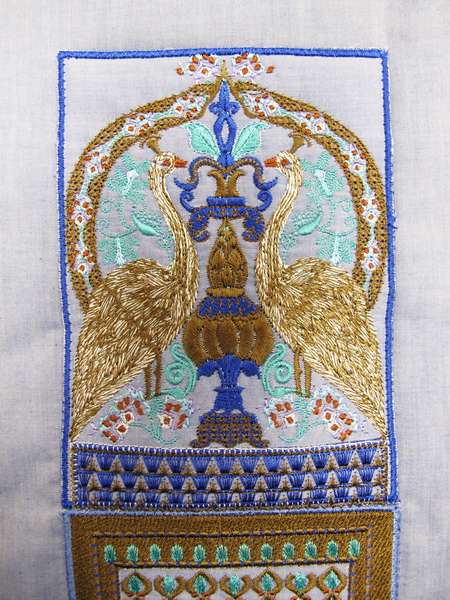
Lightly hot glue each of the four“Mandir_01” panels onto the background fabric and then zigzag all the four panels down as shown in the two following photos
Lightly hot glue each of the four “Mandir_03”panels and then zigzag stitch to the background fabric as you can see in the following 3 photos
This photo showing all four of the Mandir_03 panels zigzagged onto the background fabric
Zigzag stitch “Mandir_04”and “Mandir_04a” together as shown in the following photograph four times
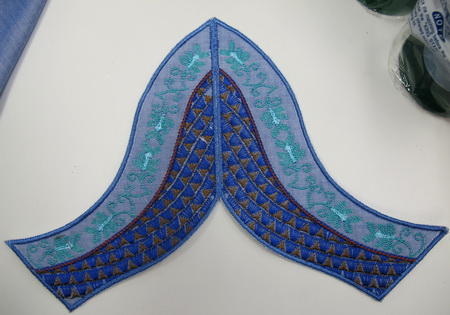
Showing both “Mandir_04”and “Mandir_04a” stitched together
Hot glue the panel onto the background fabric and zigzag stitch down as shown in the following photo
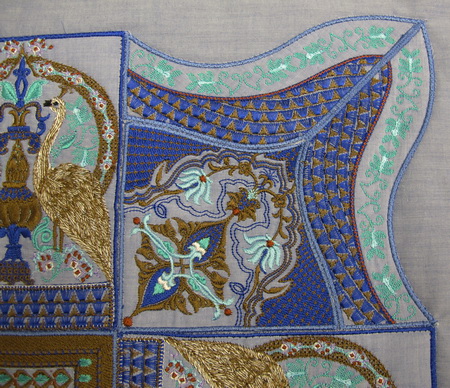
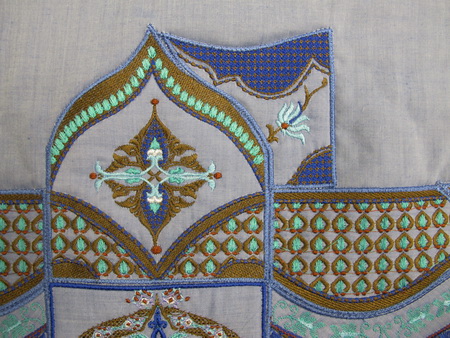
Photo showing placement of “Mandir_04”and “Mandir_04a”
Overall photo showing placement of “Mandir_04”and “Mandir_04a”
Hot glue each of the following 3 panels down to the background fabric as shown in the above photo
- Mandir_06
- Mandir_06a
- Either Mandir_05 or Mandir_05a
Zigzag stitch all the panels down to the background fabric as shown in the three photos below
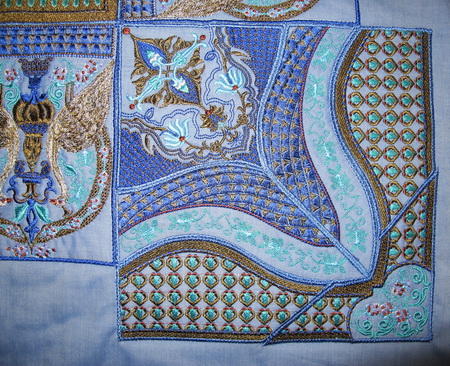
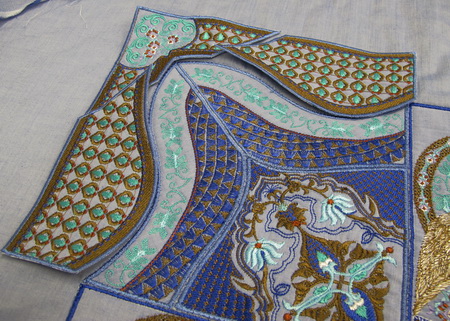
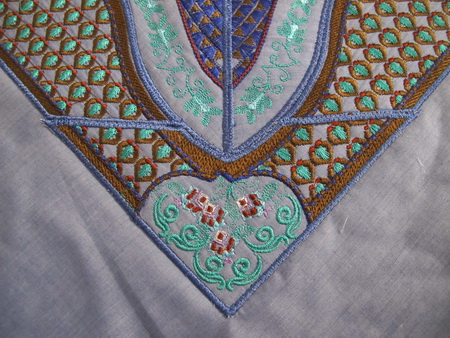
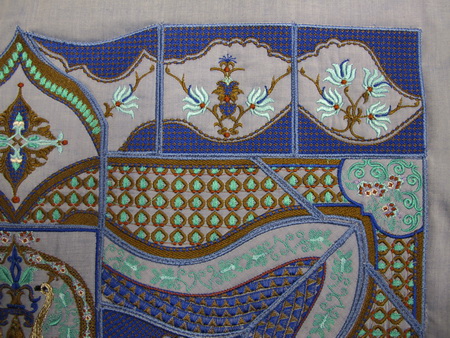
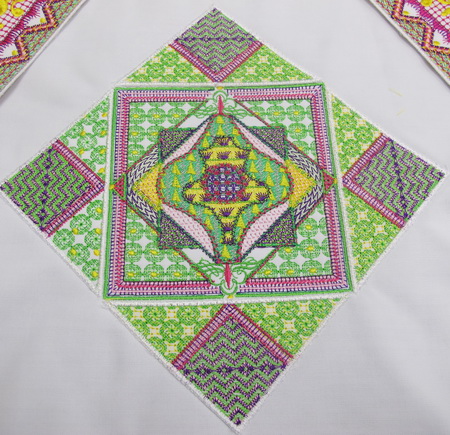
Photo showing overall view of the panels once zigzagged down to background fabric
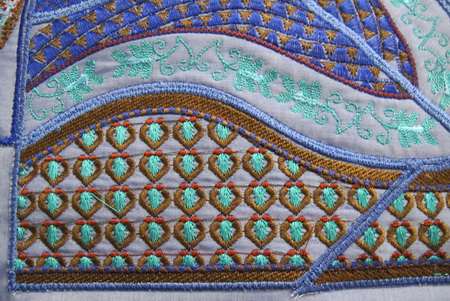
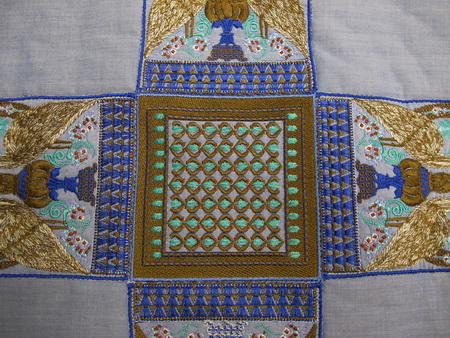
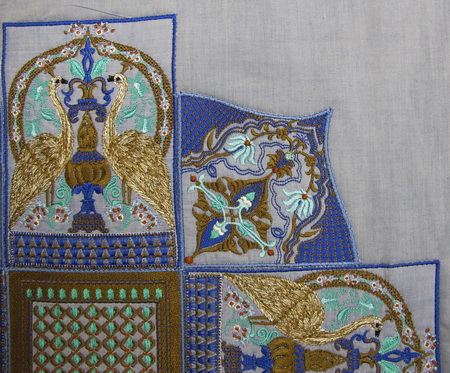
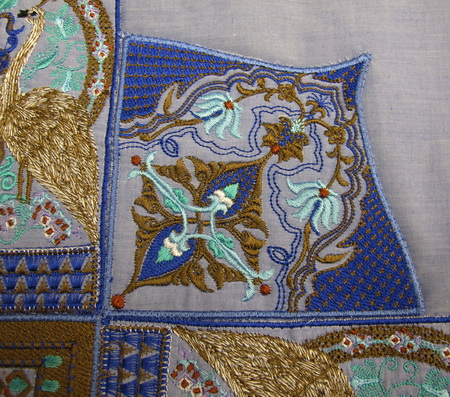
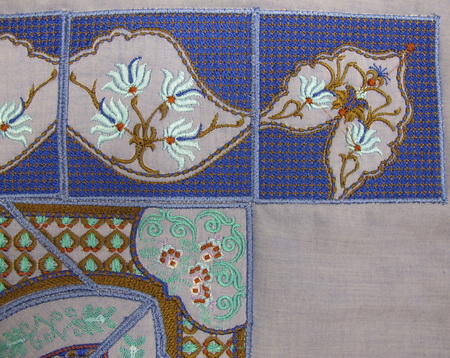
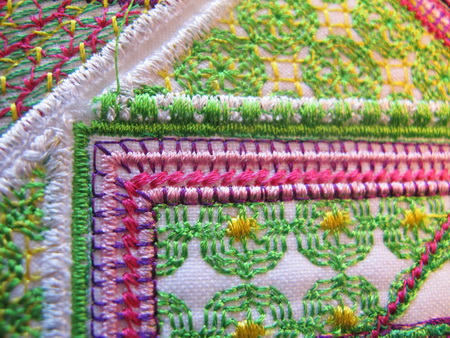
Photo showing a close up
Another close up
Overall view
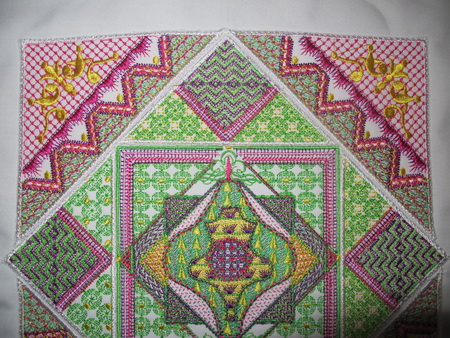
Lightly glue and zigzag stitch to the background fabric the four panels “Mandir_07”as shown in the following photo

Depending on which way you start hot glue lightly down “Mandir_08 or Mandir_08a” then zigzag stitch to the background fabric as shown in the following photo
Depending on which way you start hot glue lightly down “Mandir_09 or Mandir_09a” then zigzag stitch to the background fabric as shown in the following photo
Depending on which way you start hot glue lightly down “Mandir_10 or Mandir_10a” then zigzag stitch to the background fabric as shown in the following two photos

hot glue lightly down “Mandir_11” then zigzag stitch to the background fabric as shown in the following photo
Depending on which way you start hot glue lightly down “Mandir_10 or Mandir_10a” then zigzag stitch to the background fabric
Depending on which way you start hot glue lightly down “Mandir_09 or Mandir_09a” then zigzag stitch to the background fabric
Depending on which way you start hot glue lightly down “Mandir_08 or Mandir_08a” then zigzag stitch to the background fabric
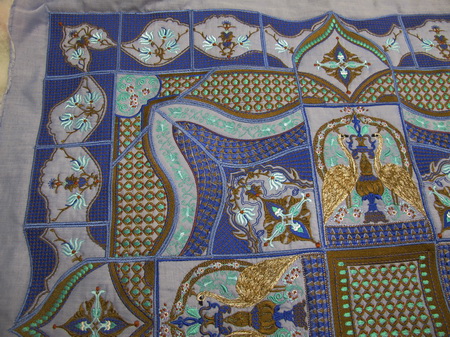
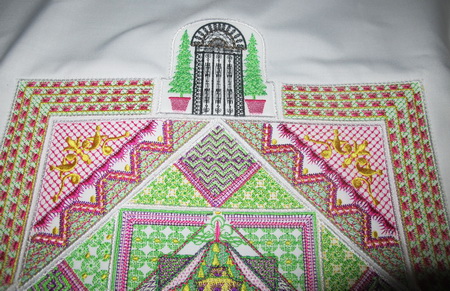
Showing you in this photo all the instructions up to No. 21
Four Seasons - Winter Instructions
Four Seasons - Winter Quilt
If you wish to make a “Four Seasons” Quilt using these designs only I have included the tree with leaves and where there was snow there is grass, all you need to do is change the colour thread for the different seasons
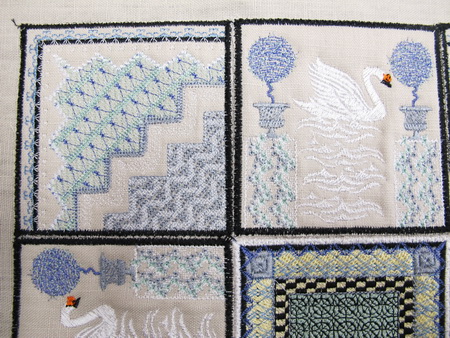
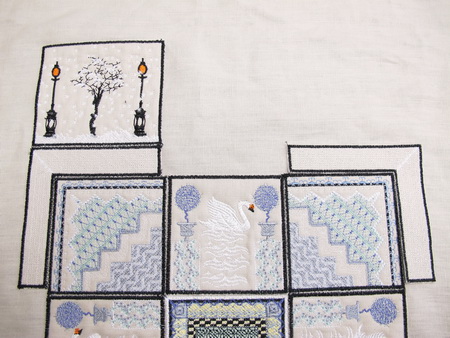
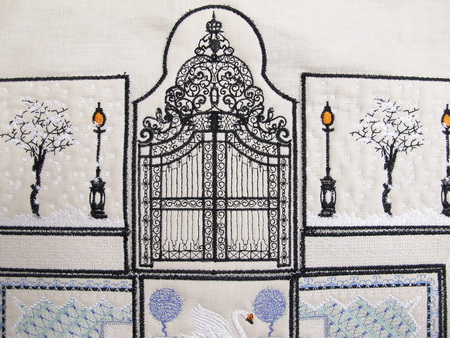
Layout of the winter designs
- Stitch out once Winter_01
- Stitch out four times Winter_02
- Stitch out four times Winter_03
- Stitch out twice Winter_04
- Stitch out twice Winter_05
- Stitch out eight times Winter_06
- Stitch out four times Winter_07
- Cut out your chosen background fabric, I cut out approximately 90 x 90cm or 35 x 35 inches the fabric used was beige linen for the background fabric and all the stitch outs.
- Mark the centre of the fabric you have just cut out
- Where you marked the centre on the background fabric place Winter_01 panel and lightly glue the fabric down, I used a hot glue gun
- Zigzag stitch Winter_01 panel.

- Lightly glue each of the four Winter _02 panels
- Zigzag stitch each of the four panels down

- Lightly glue each of the panels Winter_04 and Winter_05
- Zigzag stitch each of the panels
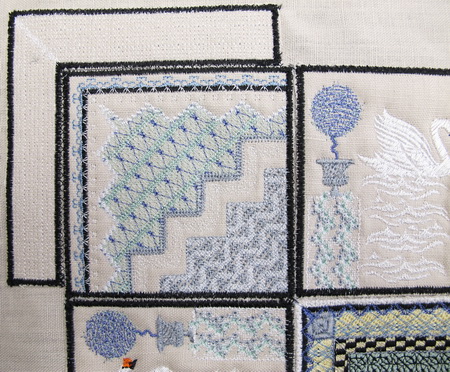
- Glue each of the Winter_03 down
- Zigzag stich each of the panels down

- Lightly glue each of the Winter_08 panels down
- Zigzag stich each of the panels down
- Lightly glue each of the panels Winter_07 down
- Zigzag stitch each of the panels
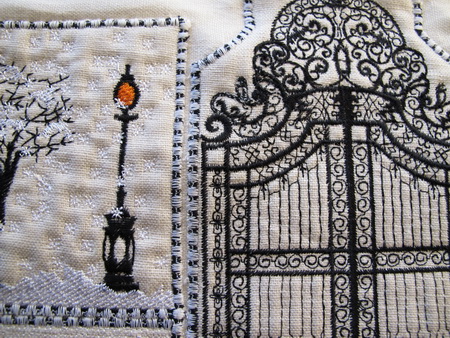
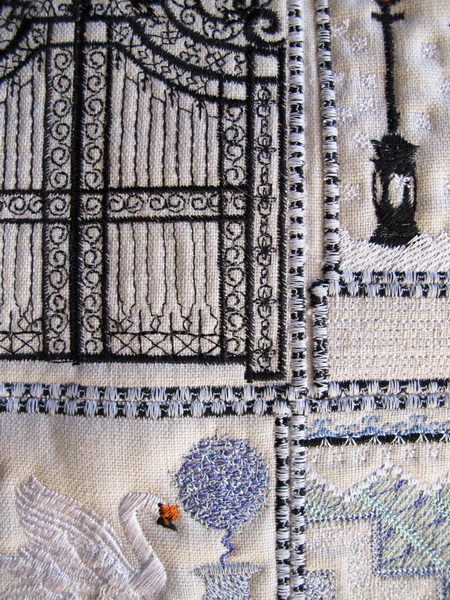
Over the top of the black satin stitch border, stitch the round stitch that is in your decorative stitches that is contained in your sewing machine, this gives a lovely finish to your work and also blends your work together
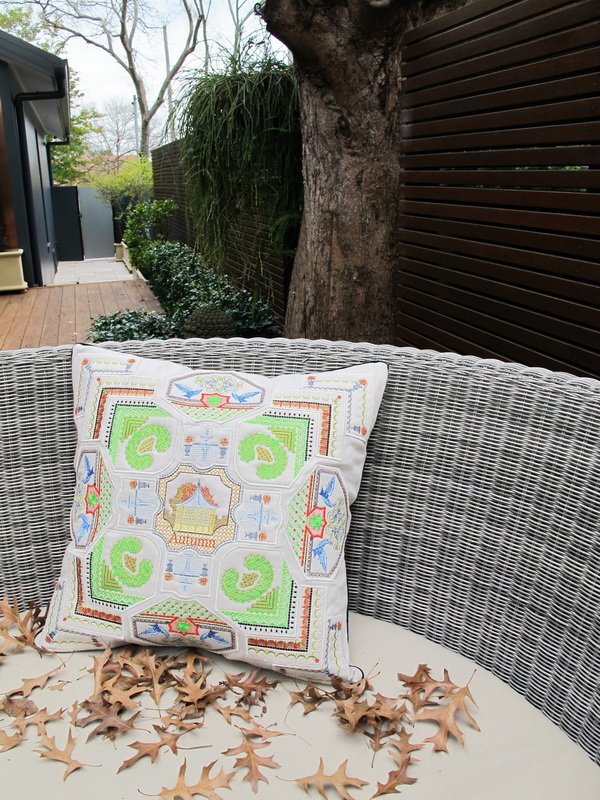
Four Seasons - Autumn
Four Seasons - Autumn Cushion
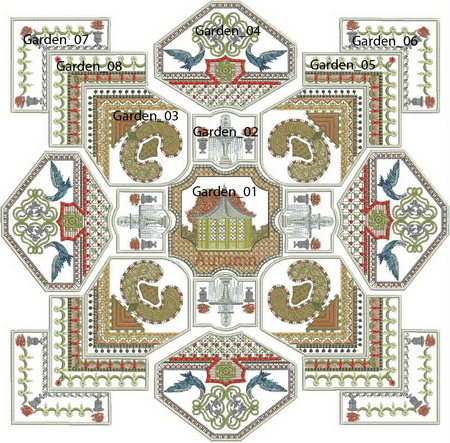
The following designs to be stitched out:
I Stitched all these designs on beige linen
- 4 x Autumn garden_02
- 4 x Autumn garden_03
- 4 x Autumn garden_04
- 2 x Autumn garden_05
- 2 x Autumn garden_06
- 2 x Autumn garden_07
- 2 x Autumn garden_08
- Measure how large you wish to make the Four Seasons autumn designs and cut the fabric, I cut 60cm x 60cm 24 x 24 inches approx.
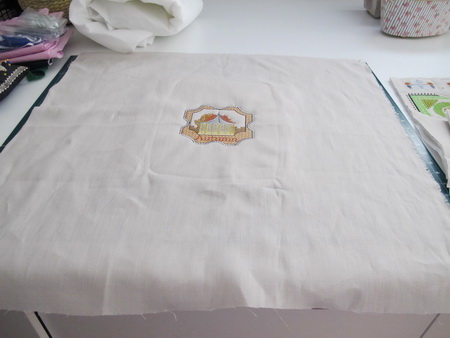
- Mark the centre of the fabric
- Centre Autumn garden_01 where you marked on the fabric the centre, Stitch Autumn garden_01 onto the fabric
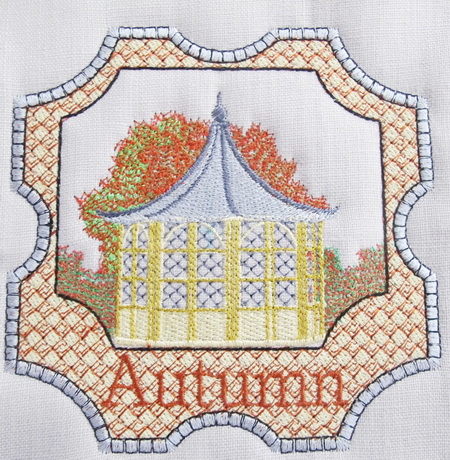
Photo of the autumn garden_01 stitched in the centre of the linen fabric
Lightly glue each of the four Autumn garden_02” I used a hot glue gun
Stitch each of the four panels down using a zigzag stitch
- Lightly glue each of the four Autumn garden_03”
- Stitch each of the four panels down using a zigzag stitch
- Lightly glue each of the four Autumn garden_04” as shown in the photo of your colour chart or at the top of the page (sorry I forgot to take photos)
- Stitch each of the four panels down using a zigzag stitch
- Lightly glue the two Autumn garden_05” as shown in the photo in your colour chart
- Lightly glue the two Autumn garden_06” as shown in the photo in your colour chart
- Lightly glue the two Autumn garden_07” as shown in the photo in your colour chart
- Lightly glue the two Autumn garden_08” as shown in the photo in your colour chart
Four Seasons - Autumn Children's Coat
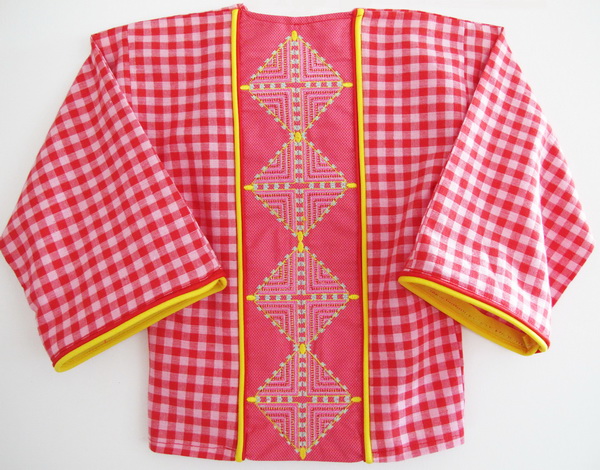
I made up a child’s coat using the design “Äutumn Garden_15”
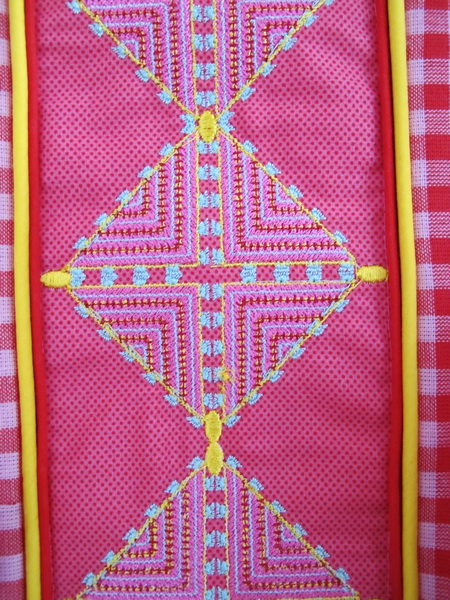
Close up of the stitches
Close up of the stitches
Four Seasons - Summer Instructions
Design measurements
32 x 44cm or 12.5 x 17.3 inches
Stitch out the following
- 1 x Summer Garden_01
- 4 x Summer Garden_02
- 4 x Summer Garden_03
- 2 x Summer Garden_04
- 2 x Summer Garden_05
- 2 x Summer Garden_06
Cut out your background fabric 48 x 48 cm or 19 x 19 inch approximately
Mark the centre of the background fabric
Hoop the background fabric in the centre and proceed to stitch out “Summer Garden_01”
Once you have stitched out “Summer Garden_01” lightly glue down the four ”Summer Garden_02” down on the background fabric as shown in the photograph above
Zigzag stitch each of the “Summer Garden_02” over the satin stitch borders
The above photograph showing a close up of the satin stitch borders zigzagged stitched down to the background fabric
Lightly glue each of the “Summer Garden_03”down as shown in the photograph above
Zigzag stitch each of the “Summer Garden_03”over the satin stitch borders
The above photograph showing you “Summer Garden_04, Summer Garden_05 and Summer Garden_06”lightly glued down to the background fabric
The photograph above showing you all the designs zigzagged stitched over the satin stitch borders
To bring all the designs together and have a bit fun using your decorative stitches that you have in your machine, stitch over the satin stitch borders that you had zigzagged down. As you can see in the above and below photographs
Machine Embroidery Designs
Latest Releases
Folklore Machine Embroidery Designs
Released on the 25th June 2019

6 designs included in the Folklore machine embroidery design set.
The Folklore design is suitable for a 6 x 10 inch or 240mm x 150mm hoop.
The Folklore design is available in DST, EMB, EXP, HUS, JEF, PES, VIP, VP3 and XXX.
The colour chart is included in the design set
As I am now digitizing with Wilcom embroidery software (which is a commercial software) we are unable to convert files to ART format. Bernina embroidery machines will now need to purchase designs in EMB or EXP format. Sorry for the inconvenience.


