


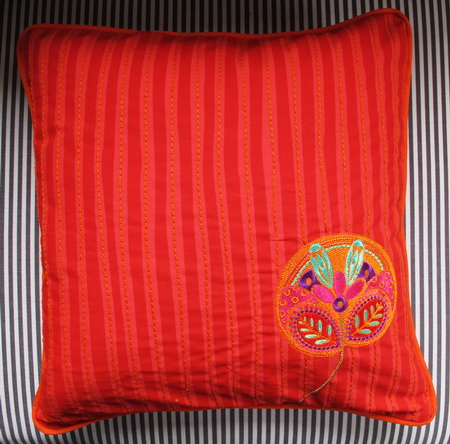
Crazy Patch No. 2 Instructions
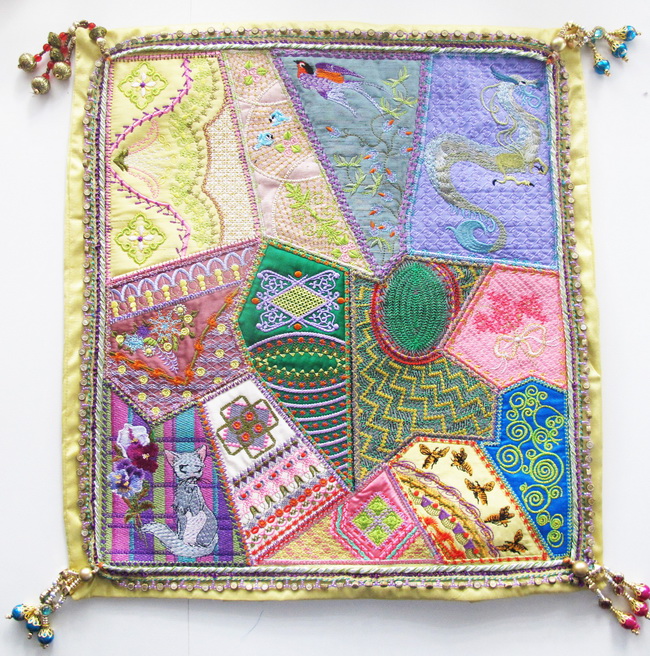
The size of the cushion is approximately 35 x 37.5 cm or 13.8 x 14.8 inches.
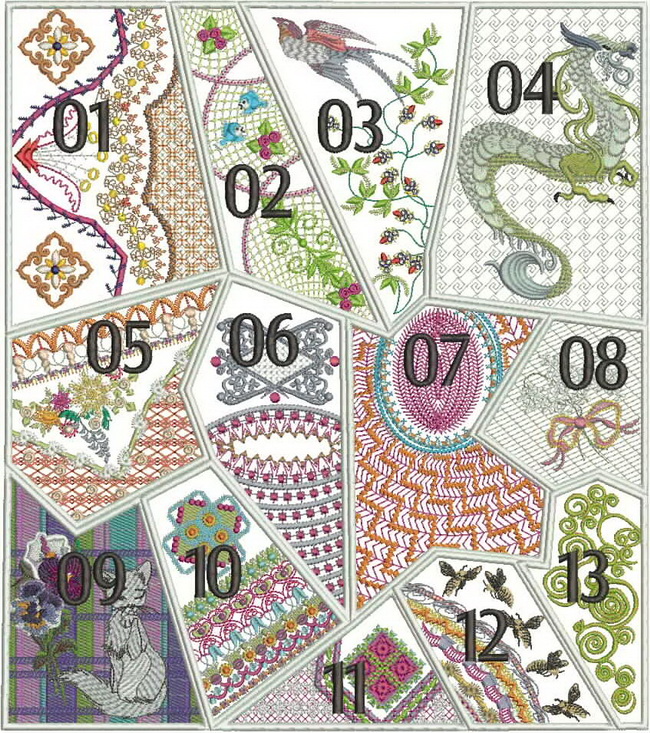
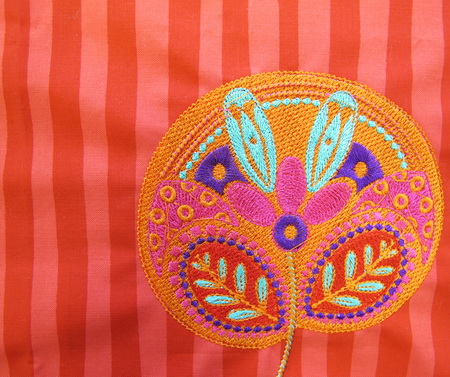
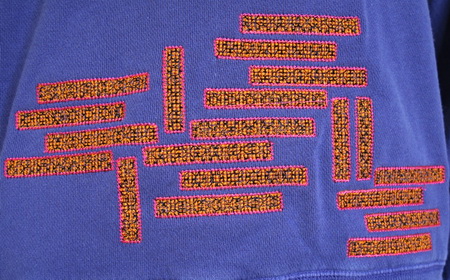
How to place the designs to make the Crazy Patch No. 2 cushion.

I used a silk background fabric to lay each of the 13 designs
The above photo showing you all the designs glued down lightly using a hot glue gun
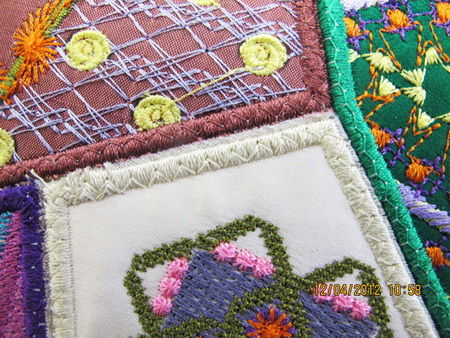
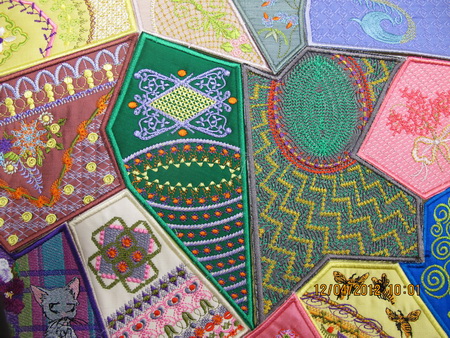
The photo above showing you each of the designs stitched down using a zigzag stitch.
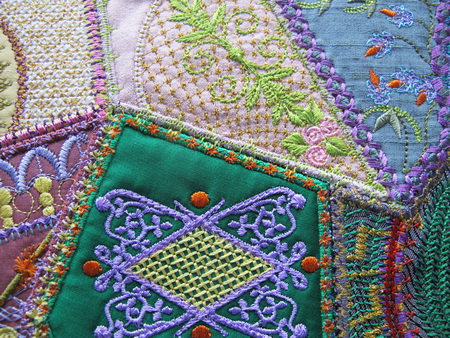
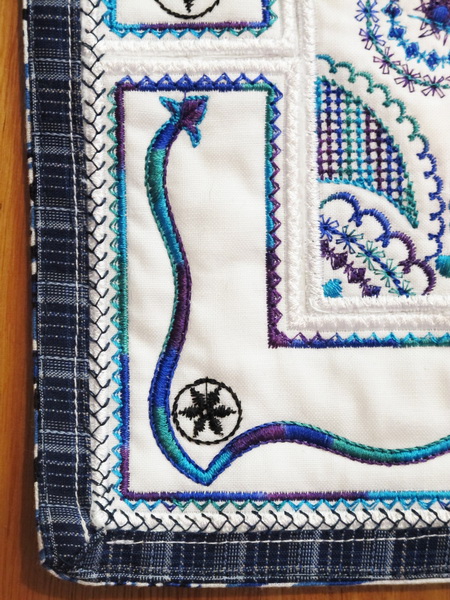
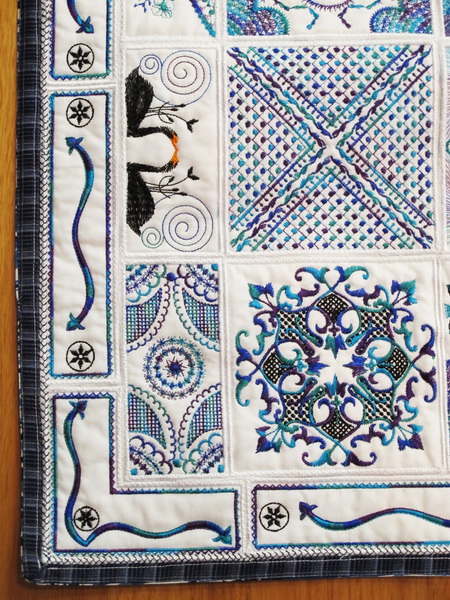
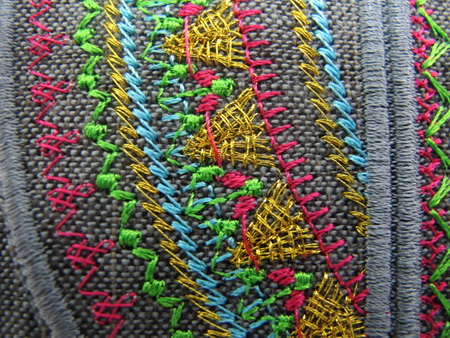
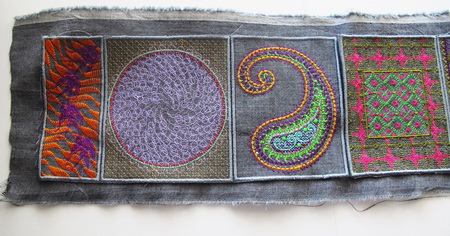
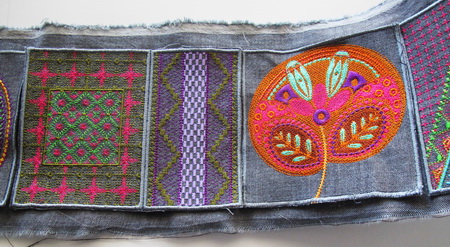
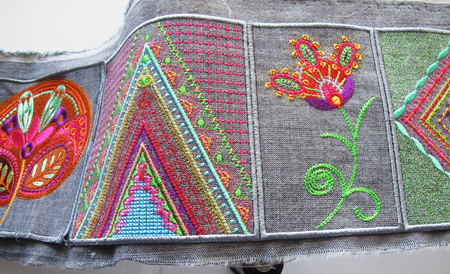
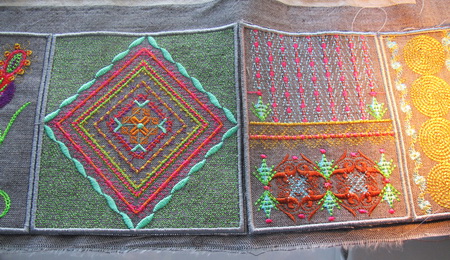
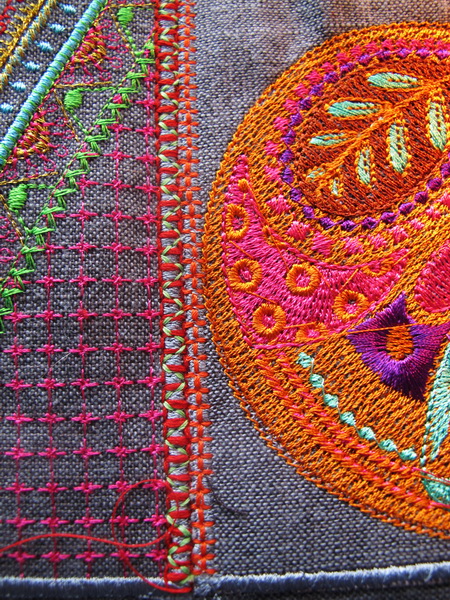
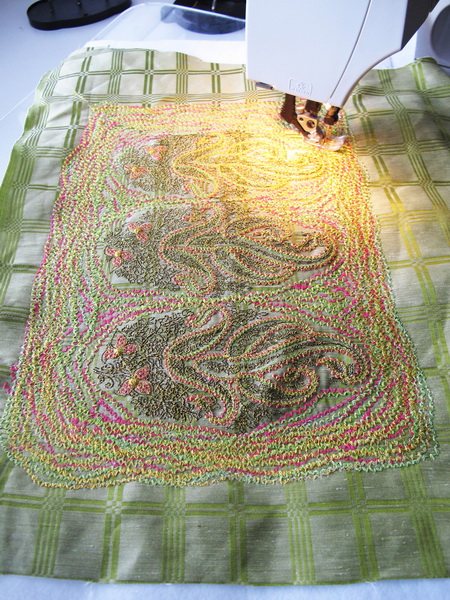
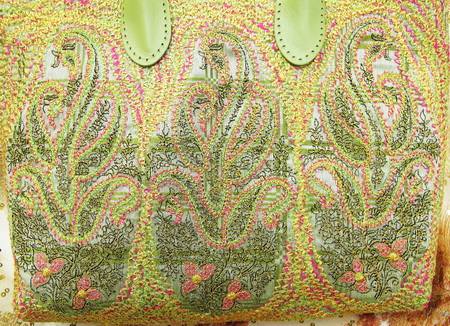
Showing you how the panels look after zigzagging each of the designs down to the background fabric. You can then use the amazing decorative stitches that you have in your machines to cover the zigzag stitches.
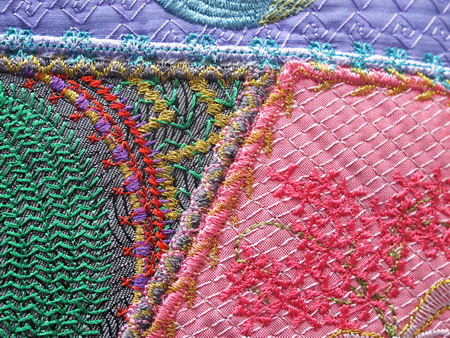
Showing you how the panels look after zigzagging each of the designs down to the background fabric. You can then use the amazing decorative stitches that you have in your machines to cover the zigzag stitches.
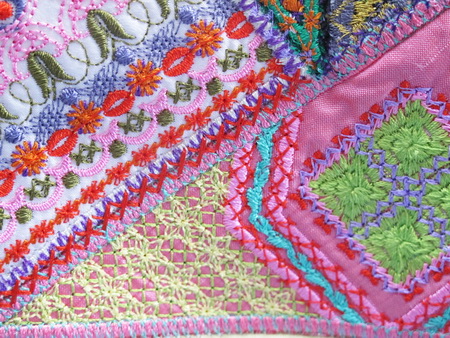
Showing you how the panels look after zigzagging each of the designs down to the background fabric. You can then use the amazing decorative stitches that you have in your machines to cover the zigzag stitches.
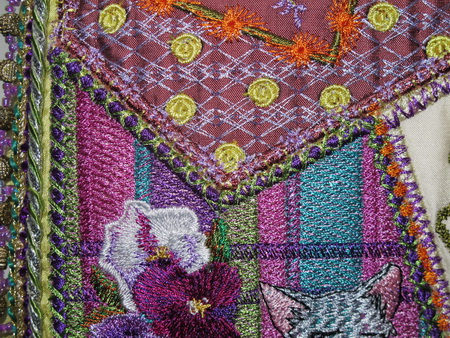
Showing you how the panels look after zigzagging each of the designs down to the background fabric. You can then use the amazing decorative stitches that you have in your machines to cover the zigzag stitches.
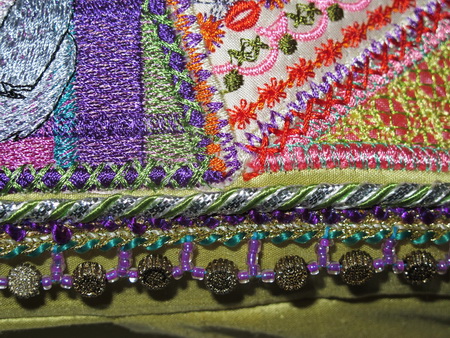
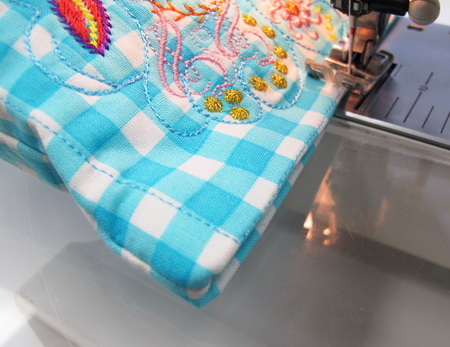
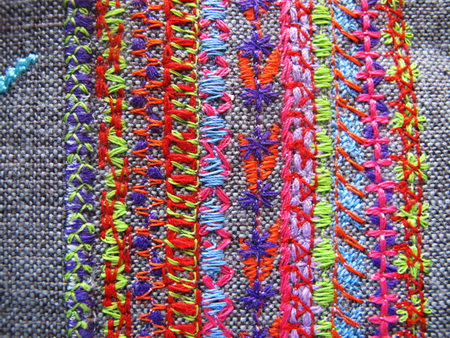
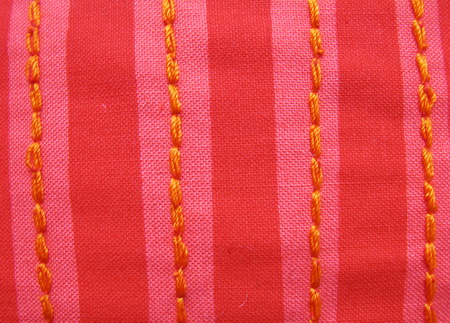
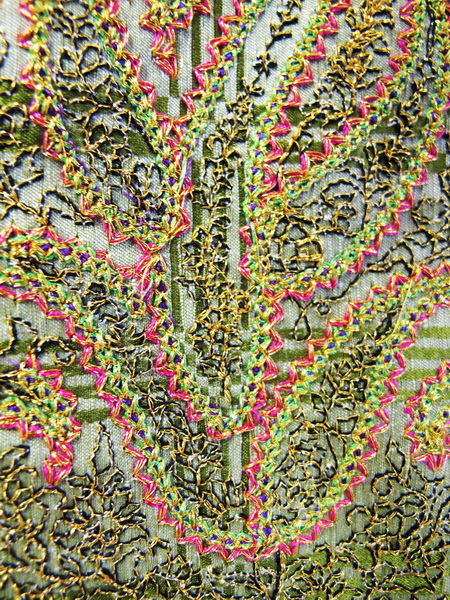
Once I had stitched over all the zigzag stitches using the decorative stitches I then used some lovely braiding around the edge of the crazy patch. I used a combination of two braids which gives the work a lovely finish.
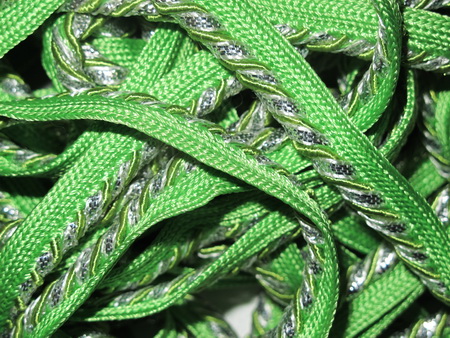
One of the braids used in combination

One of the braids used in combination
Combining the two braids
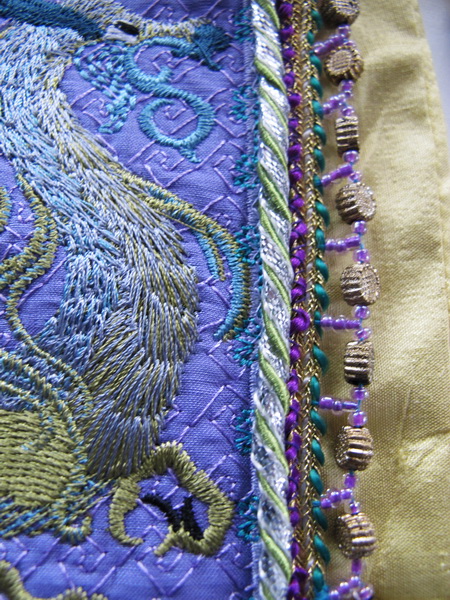
Another photo showing the two braids combined

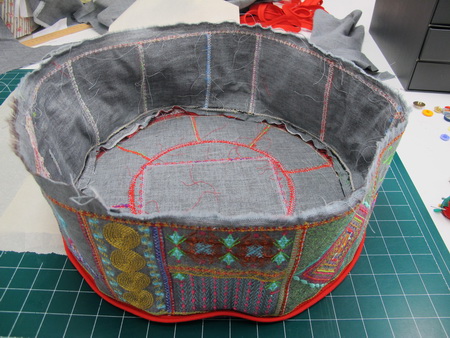
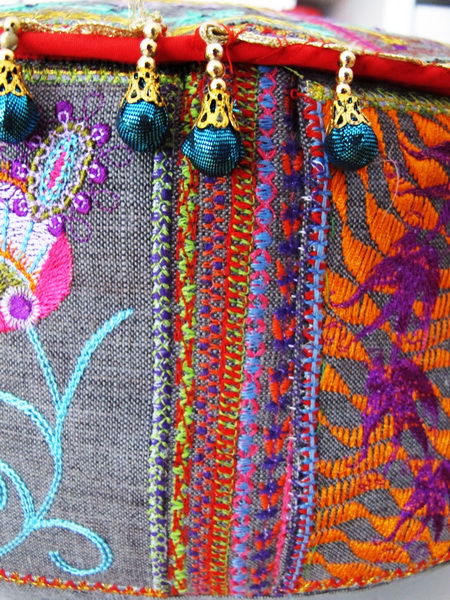
I had a number of different types and coloured dingle dangles so I used one at each corner of the cushion
I had a number of different types and coloured dingle dangles so I used one at each corner of the cushion
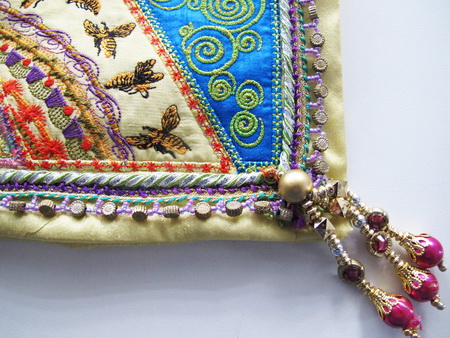
I had a number of different types and coloured dingle dangles so I used one at each corner of the cushion
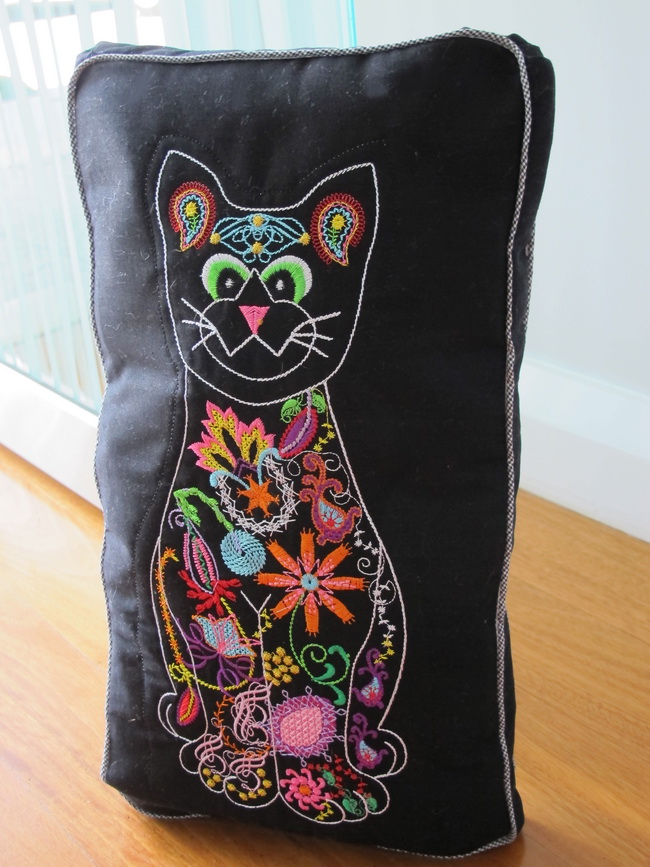
Cuddles the Cat Instructions
Notions:
- 1 metre or 1 yard of fabric
- 1 metre or 1 yard of thin wadding
- Sand
- 1 metre or 1 yard of calico
- Piping 2.75 meters or 3 yards
Instructions for making the Cuddles the Cat door stop
The following instructions are for those who wish to position the cats face to the body
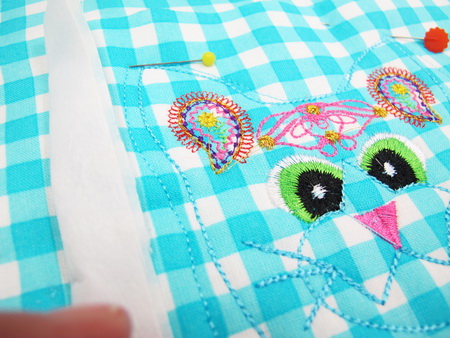
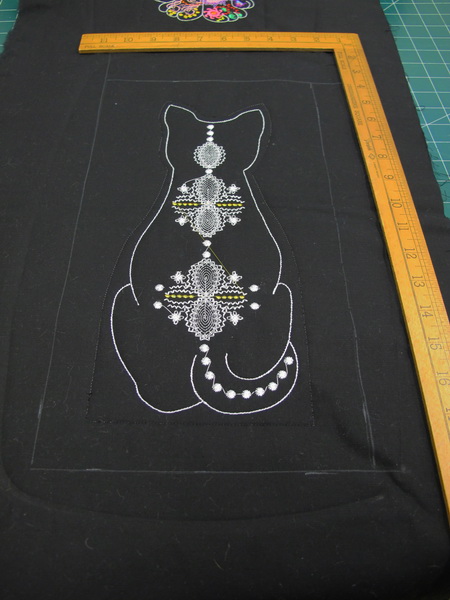
- The pin is showing you the centre of the cross on the top of the cats body (Cat front body_240x150)
- Once you re- hoop for the “Cat Face_01” leave room for you to manoeuvre your needle for the needle to be placed exactly in the centre of the cross as shown in the above photo, no need to stitch the cross out on the face as this is the exact spot for the needle when you go to the second colour in your colour chart
Cut out the front panel of the door stop the size that would best suit you then match up the front with the back panels
Matching the front panel with the back panel using pins
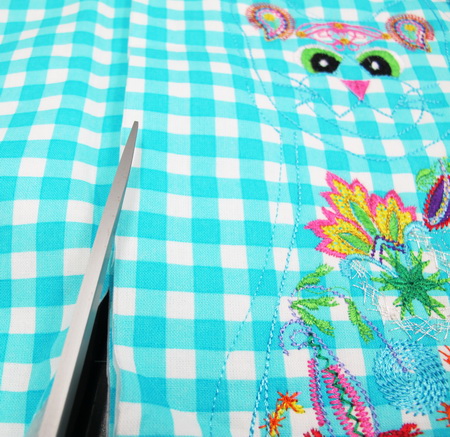
Cut the back panel the same size as the front panel
Front and back panels cut to the exact same size
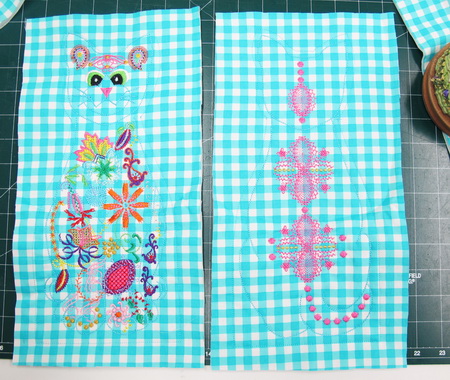
Please take note
A big mistake I made stitching this door stop out ...The mistake was not using a thread colour that would stand out for the body of the cat, I should have used black thread which would have defined the cats body so much more clearer
- I used sand to make the door stop heavier, you can buy sand from the local hardware store in a packet, put the sand on a baking tray and then put the sand into a hot oven for about 15 minutes, this kills any bugs that could be in the sand
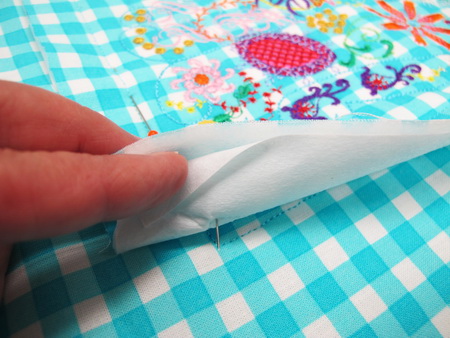
- Stitch a bag just slightly smaller than the size of your door stop I used calico and I stitched two layers for all sides as this would stop any leakage of sand getting through
Stitch the bottom panels together
Instructions for the Door Stop with side panels
Stitch the front and back panels out, then mark out how big you would like the door stop
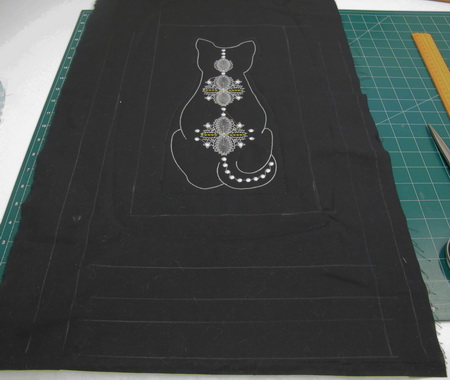
Mark out all four sides, I used the width of a ruler
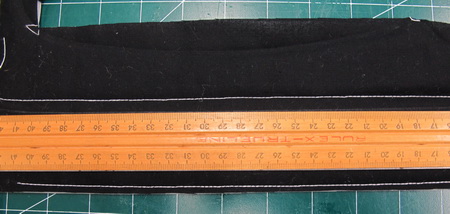
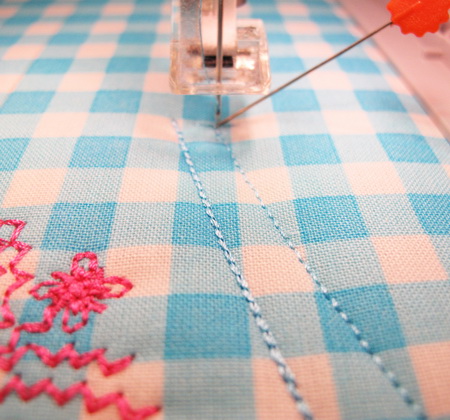
As you can see the side panels are the width of the ruler then I stitched a sewing machine foot in width for the seam (I find it easier this way, you do it the way that best suites you)
On the front panel stitched a black and white gingham piping
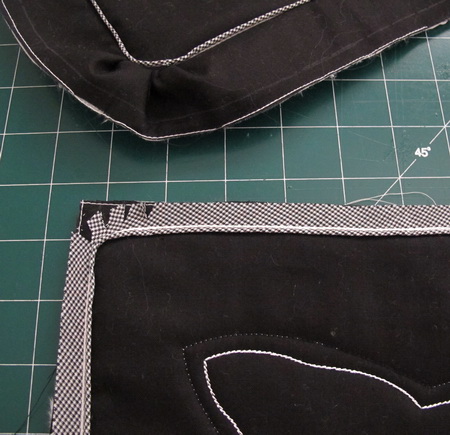
- On the back panel black and white gingham piping also
- I used sand to make the door stop heavier, you can buy sand from the local hardware store in a packet, put the sand on a baking tray and then put the sand into a hot oven for about 15 minutes, this kills any bugs that could be in the sand
- Stitch a bag just slightly smaller than the size of your door stop I used calico and I stitched two layers for all sides as this would stop any leakage of sand getting through
![]()
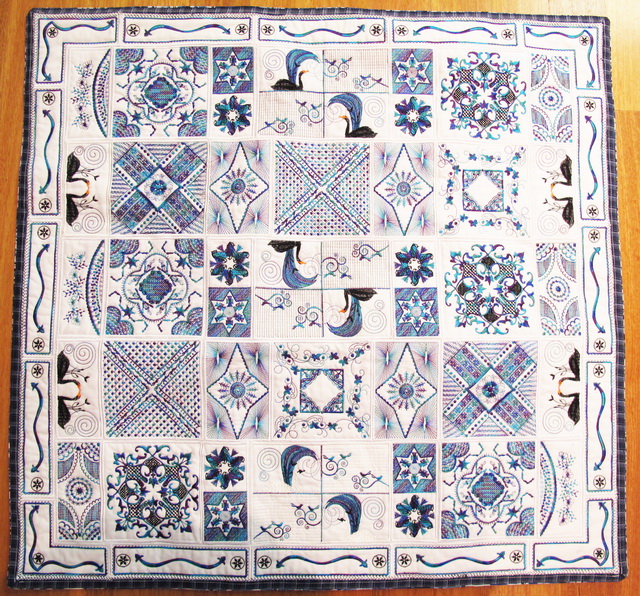
Refined and Timeless Instructions
Notions
- 90 x 90 cm or 36 x 36 inches of background fabric
- 2 metres or 6 ft of fabric for the stitch outs
- 2 metres or 6ft of thin wadding
- 3 spools of Victory Rayon variegated thread 40 weight 1,000 meters (I bought 2 spools a few years ago and for life of me I could not remember where I bought the spools from or the name of the thread. I took a photo of a spool and put the photo up on Facebook. Thankfully Dale Rollerson of Thread Studio http://www.thethreadstudio.com recognised the thread from her at craft exhibition. The thread I bought is no longer available but you can use a similar one “Barrier Reef” variegated thread. I only bought 2 spools so I was really on the edge with just 2 spools. Once I finished all the stitch outs all I had was about 1 metre left on the spool... way too close!!)
- 90 x 90 cm or 36 x 36 inches of backing fabric for the wall hanging
- Hot glue
Stitch out the following designs:
- 3 x Timeless_01
- 3 x Timeless_02
- 6 x Timeless_03
- 3 x Timeless_04
- 3 x Timeless_05
- 3 x Timeless_06
- 4 x Timeless_07
- 2 x Timeless_08
- 4 of Timeless_09
- 2 x Timeless_10
- 2 x Timeless_11
- 12 x Timeless_12
- 2 x Timeless_13
- 2 x Timeless_14
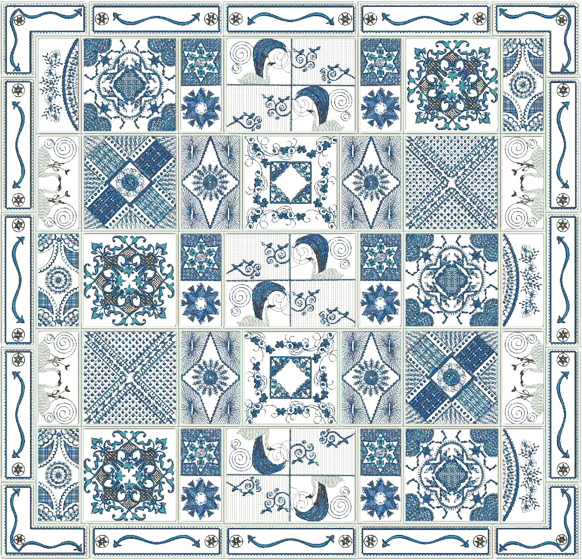
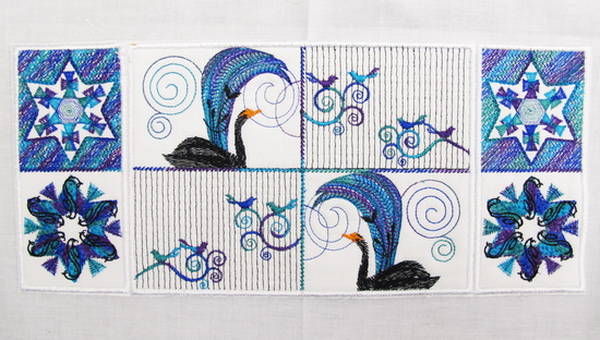
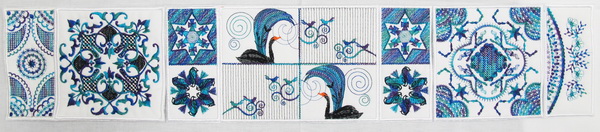
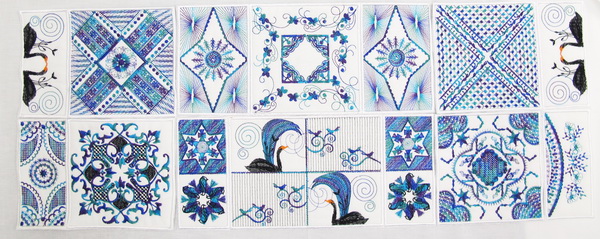
Showing you the layout of each design on the wall hanging
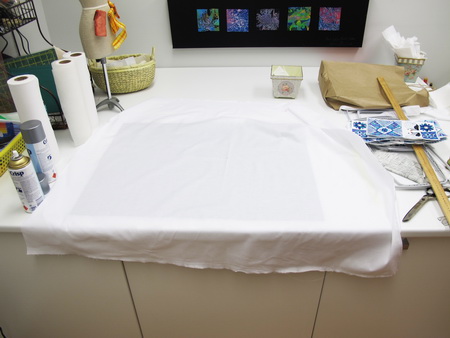
Mark the centre of the background fabric
Centre of the fabric market
Start out by either pinning or gluing the centre panel down which is one the “Timeless_04” that you have stitched out then on either side of “Timeless_04”put “Timeless_03”
Showing the first layer of all the panels lightly hot glued down to the background fabric

Showing the start of the next layer of panels
Showing the next layer of panels
Once you have placed all the designs onto your background fabric zigzag stitch each of the panels down
If you wish you can put a border around the edge of the wall hanging and stitch over the outside satin stitch border using a “Feather Stitch” in your decorative stitches on your machine this helps blend the outside panels with the fabric border
Showing you the feather stitch blending with the border fabric
Feast of Colour Instructions
Feast of Colour Foot Stool

Notions:
- 3 meters or 3 yards of fabric (you may not need that much but I always buy extra fabric
- 1 zipper 35cm or 13 inch
- 1.5 meters or 60inches of fabric to contain stuffing for the stool
- I used Goose and feathers to stuff the foot stool so I have no idea how much you would need as I buy the goose and feathers in large bags
Stitch out all the following designs on a background fabric of your choice
- Feast of colour_01
- Feast of colour_02
- Feast of colour_02a
- Feast of colour_03
- Feast of colour_04
- Feast of colour_05
- Feast of colour_06
- Feast of colour_07
- Feast of colour_08
- Feast of colour_09
- Feast of colour_10
- Feast of colour_11
- Feast of colour_12
- Feast of colour_13
- Feast of colour_14
- Feast of colour_15
- Feast of colour_16
- Feast of colour_17
- Feast of colour_18
- Feast of colour_19
- Feast of colour_20
- Feast of colour_21
Hot glue ightly the first panel “Feast of colour_01” then the following panels around “Feast of colour 02 and 02a” then “Feast of colour_03 to 10”
Close up of panel lightly hot glued down on the background fabric

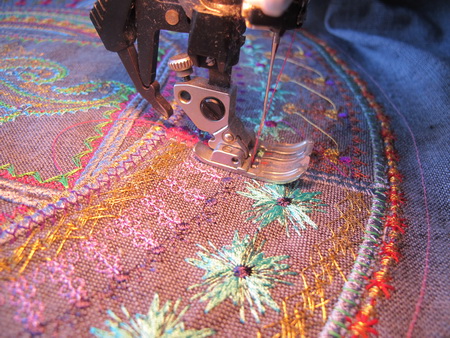
Close up of zigzagging down each of the panels
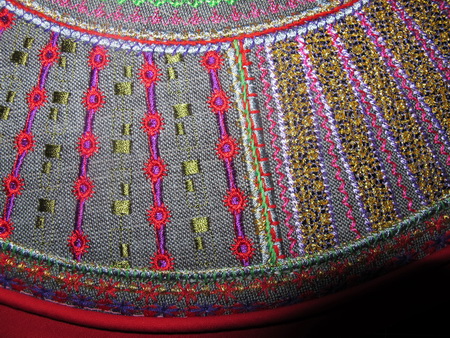
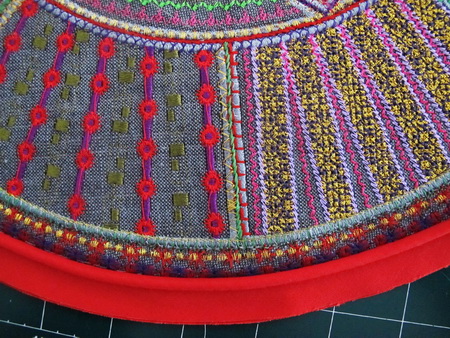
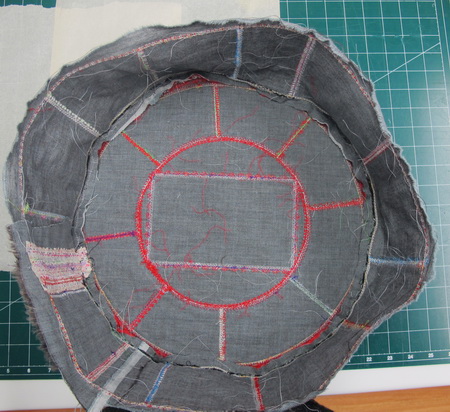
- Once you have zigzagged all the panels down, from the edge of the end panels using your straight stitch make a 5/8 inch seam allowance as you can see in the photos above (I used a pink coloured thread) now comes the fun bit :) over each of the satin stitch panels I used a variety of decorative stitches from your sewing machine also using similar coloured thread that is in the panels to cover the satin stitch this brings all the panels together...notice also the decorative stitches on the round and on the outer edge the gold stitch with another decorative stitch in red thread over the top
- Stitch out the following designs “Feast of colour_11 to 21” stitch out an extra “Feast of colour_19 using a different colour combination”
- Cut a length of fabric 135 x 20 cm or 53.1 x 7.9 inches this length of fabric will be longer than you will need
- You will need the fabric to be longer as you may have to fill in a gap using your decorative stitches from your sewing machine (I will show you this later in the instructions)
- Lightly hot glue each of the panels together to the length of fabric you just cut... you can do this a similar way to the photos below or how you would care to place the panels.
- Zigzag stitch each of the panels down to the background fabric. After the last panel leave at least 13cm or 5 inches of spare background fabric
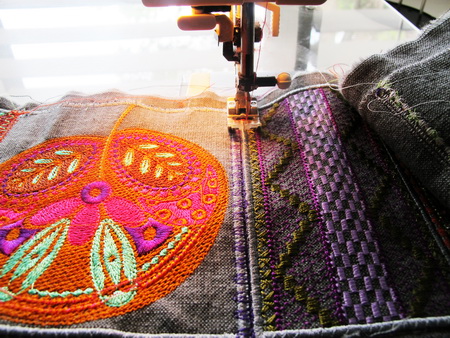
- The following photos are showing you the decorative stitches used over the satin stitch borders once I had zigzagged stitched each of the panels down to the background fabric
- I would also like to point out that I have used decorative stitches over one another using different coloured thread. Look closely at the photos

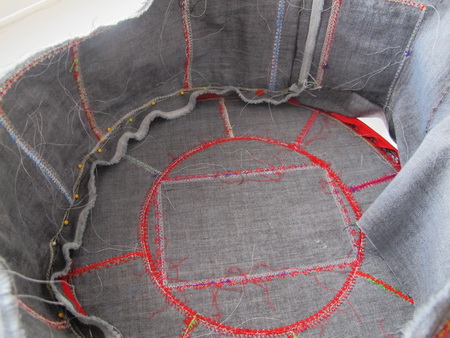
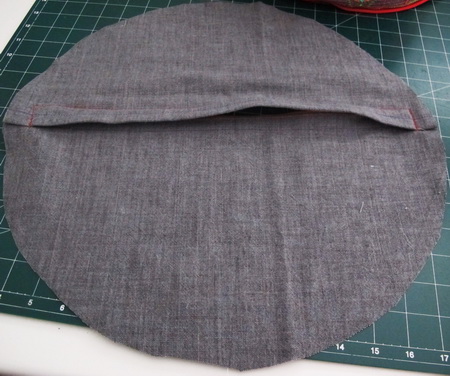
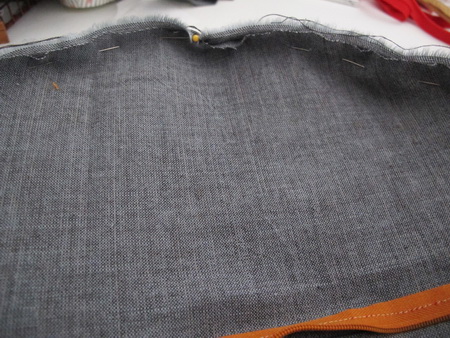
Using paper, make a template of the top the exact same size as the top (the reason why I used fabric as I did not think about leaving enough fabric for the zipper, one of those moments!!! :)
- Cut around on the straight stitch seam you made earlier in Instruction No. 2
- Add a bias piping to the edge
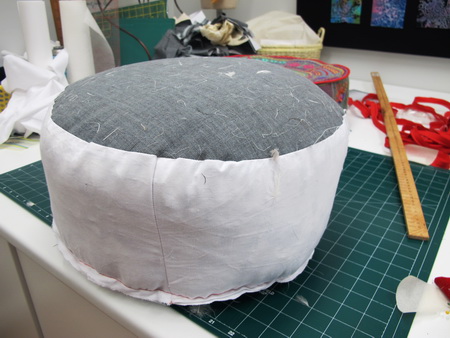
Pin the side panel to the top panel
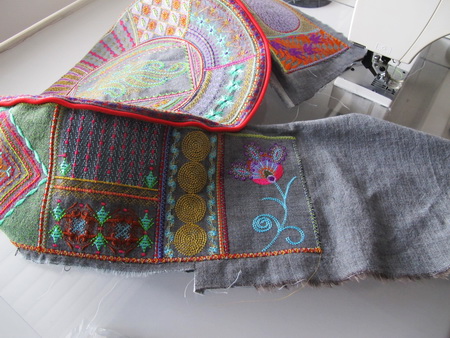
I suggest after you have pinned the side and top panel together that you hand stitch the panels together, (Once you have everything placed properly to the top panel you can then machine stitch both the top and side panel together) do not hand stitch the first and last panel to the top panel as you can see in the photo above.
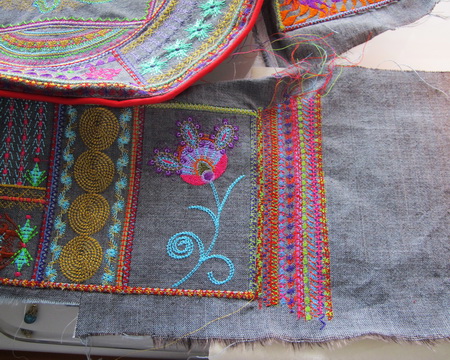
There will be a slight difference of joining the side panel to the top, to make up the difference I have used the decorative stitches in your sewing machine using similar colours that you have used through all the designs
Close up photo of the join to bring the side panels to the back side panel as in Instruction No. 15, as you can see I have had fun playing with the decorative stitches in this photo
Close up photo showing where I joined all the panels together as you can see where I did the decorative stitches from my sewing machine
- The three photos above showing the side panel hand stitched to the top panel
- Stitch over your hand stitching using your sewing machine
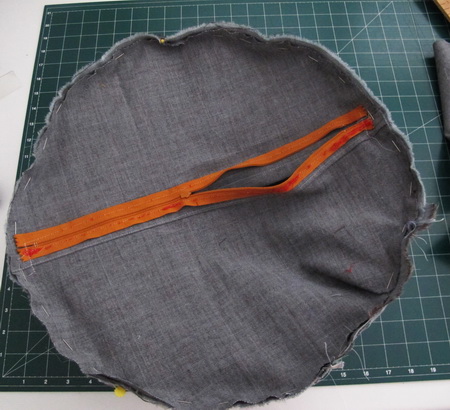
- On a square piece of fabric insert a 35 cm or 13 inch zipper
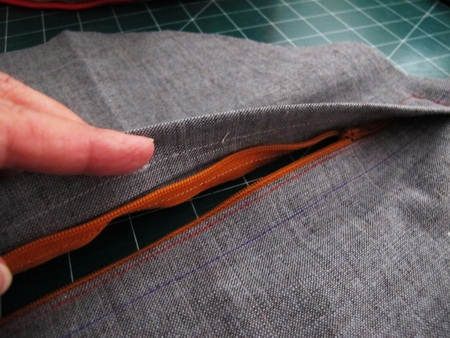
Zipper inserted
For the base of the foot stool cut your fabric from your paper template that you had made in Instruction No. 10
Pin the base to the side panels not forgetting to leave a portion of the zipper open
Stitch the base to the side panels
- Cut two pieces of fabric top and base from your paper template to make the lining for the foot stool. Cut the side panel to join the top and base panels. As you can see I used Goose and Duck feathers for the stuffing
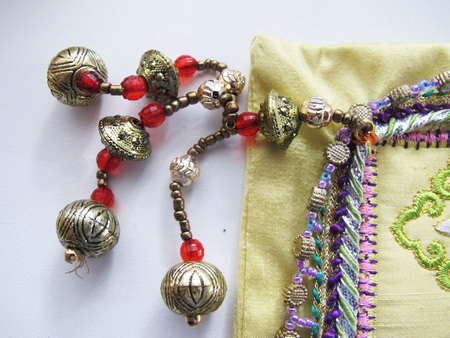
- Over the top of the bias piping I hand stitched on dingle dangles that I had bought in Dubai.
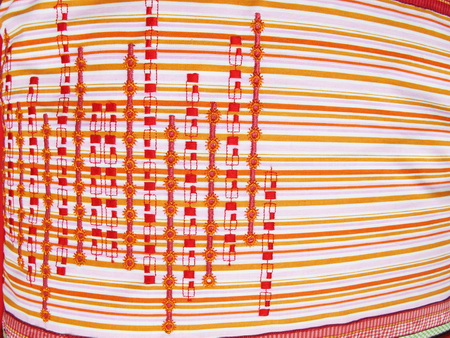
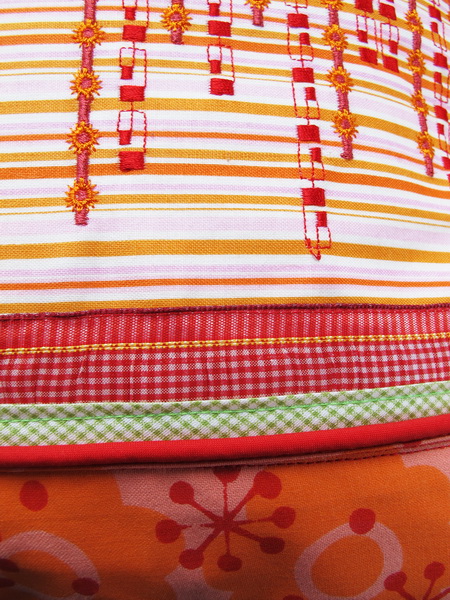
Instructions for the Striped Cushion
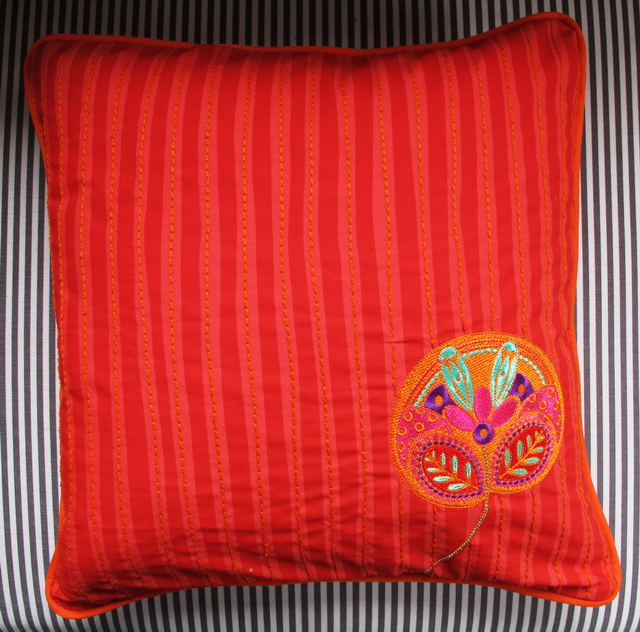
- Stitch the design “Feast of Colour_40”
- I am finally working with these fabrics that I bought at the Quilt and Craft fair at Darling Harbour ...love the prints...so much you can do with them...I have no affiliation with these fabric designers just by chance I went past their booth at a Craft Fair and just loved the prints...You can go to their website and look at their fabric prints http://www.printscharming.typepad.com/
- I used cotton orange top stitch thread which is thicker than most orange bias piping
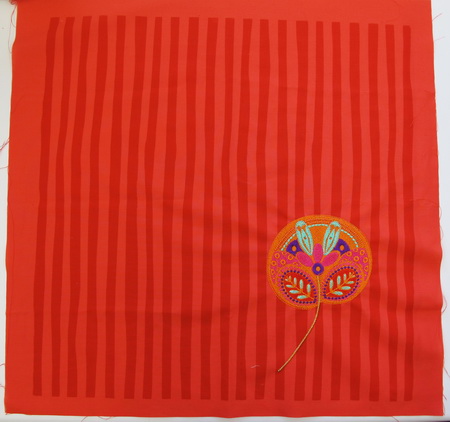
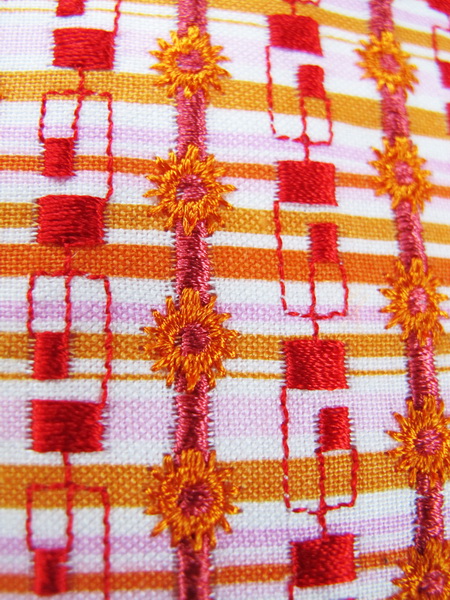
This is the printed fabric I bought from Prints Charming with the “Feast of Colour_40” stitched on the fabric
Close up of the fabric and design stitched out
Using your triple straight stitch and the orange top cotton thread in between each of the pink rows this gives another dimension to the fabric
Around the cushion is an orange bias piping.
Instructions for the Striped Funky Cushion
- Stitch out twice side by side “Feast of Colour_28”
- The fabric is from Prints Charming hand painted which is the floral fabric on either side of the stripped centre panel
- Red and white gingham ribbon
- Green and white gingham bias tape
- Red bias pipping
- Striped fabric half a meter or half yard
Stitch on a complimentary striped fabric “Feast of Colour_28” twice side by side
Close up of stitches
- Stitch the red and white gingham ribbon onto the stripped fabric
- Stitch over the red and white gingham
- Stitch onto the floral fabric the red bias piping
- Stitch the floral fabric and piping onto the green and white gingham bias tape
- Stitch around the cushion red bias piping
Blunder Bag
The reason why this bag is called The Blunder bag as it started off as a vest
I will give you information as to how I did this
- This started off as a vest I stitched out 6 of the “Feast of Colour_22” then went and cut out the vest pattern. Realised once I had cut out the vest that the designs were too close to the front edge of the vest. So what do I do? I stitched extra fabric to the edge of the vest fabric, which looked something shocking for the front of the vest.
- Now you would see the join, how do I cover the join?
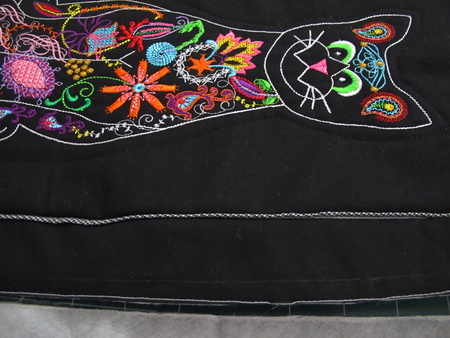
- The 6 designs “Feast of Colour_22” that I had originally stitched out were threaded in the sewing machine with each of the coloured threads and also gold metallic thread which gives a 3D look
- Showing you a close up of the design “Feast of Colour_22” combining with each of the thread colours a gold metallic thread
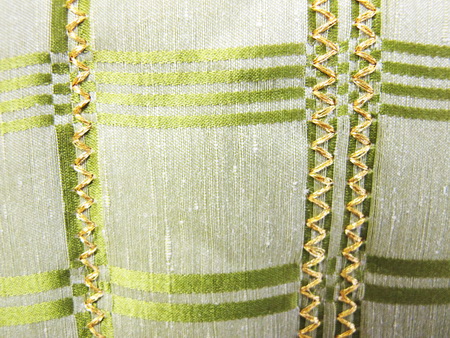
- What I decided to do ....I used a decorative stitch from the sewing machine a triple zigzag stitch using the same colours as the “Feast of Colour_22” design also adding the gold metallic thread.

Close up showing the triple zigzag stitch from the sewing machine
Showing you the back of the designs
Close up showing you the front of the bag
Close up showing you the back of the bag this is the triple zigzag stitch using your decorative stitches from the sewing machine
Place Mat
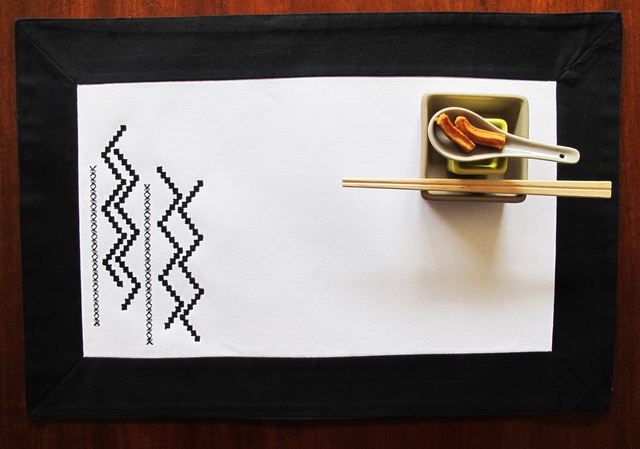
Stitch “Feast of Colour_34” on dinner mats
Feast of Colour Jumper
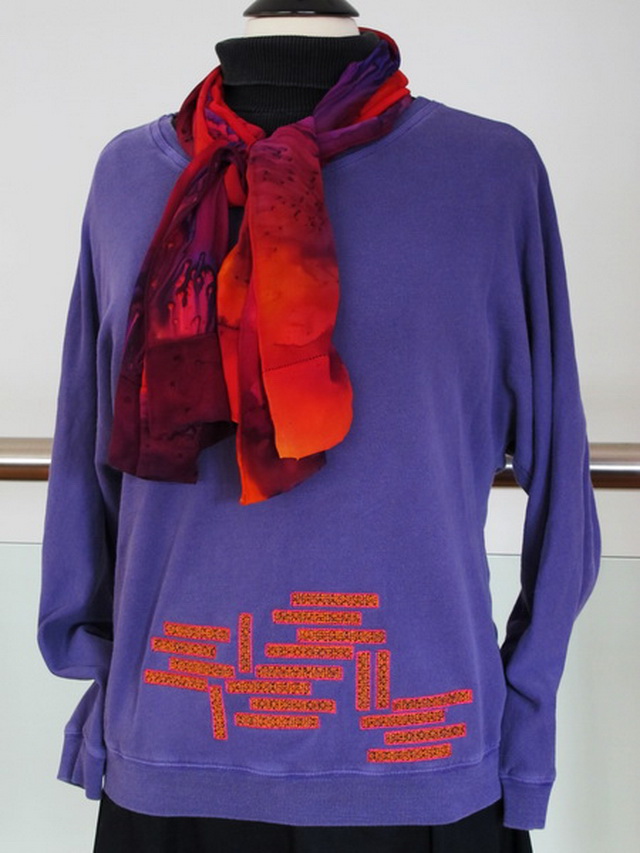
On the front of the pullover I stitched 3 times “Feast of Colour_30” different ways to make the design interesting
Feast of Colour Bookmark
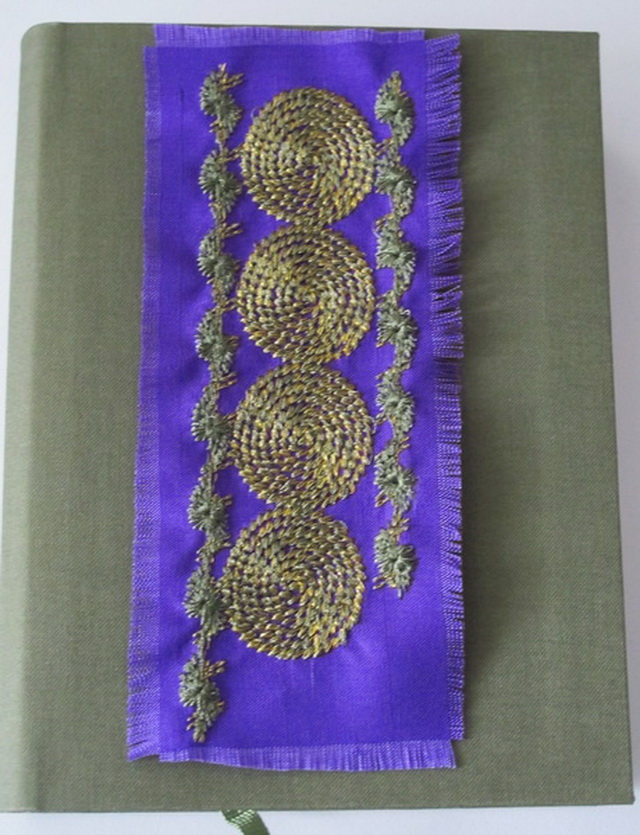
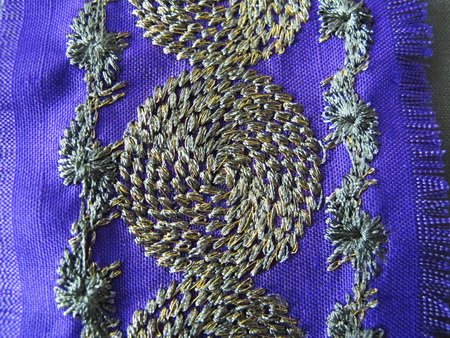
Glued the design “Feast of colour_45” onto the front of a Notebook which would make a lovely gift
Machine Embroidery Designs
Latest Releases
Folklore Machine Embroidery Designs
Released on the 25th June 2019

6 designs included in the Folklore machine embroidery design set.
The Folklore design is suitable for a 6 x 10 inch or 240mm x 150mm hoop.
The Folklore design is available in DST, EMB, EXP, HUS, JEF, PES, VIP, VP3 and XXX.
The colour chart is included in the design set
As I am now digitizing with Wilcom embroidery software (which is a commercial software) we are unable to convert files to ART format. Bernina embroidery machines will now need to purchase designs in EMB or EXP format. Sorry for the inconvenience.


