


Saffron Instructions
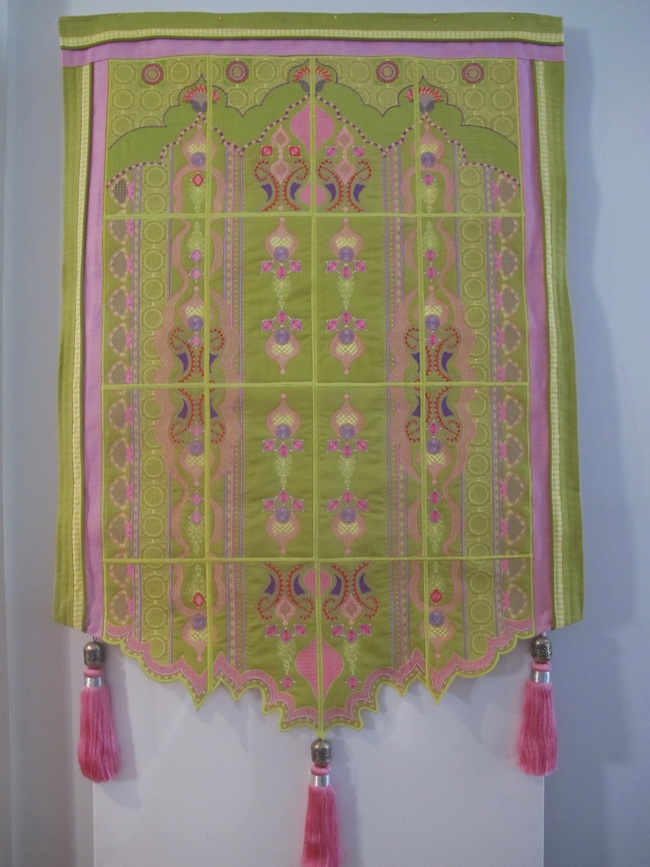
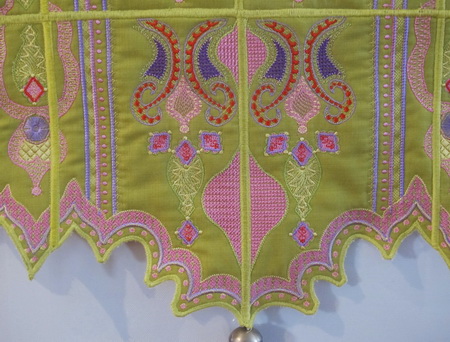
Saffron Wall Hanging
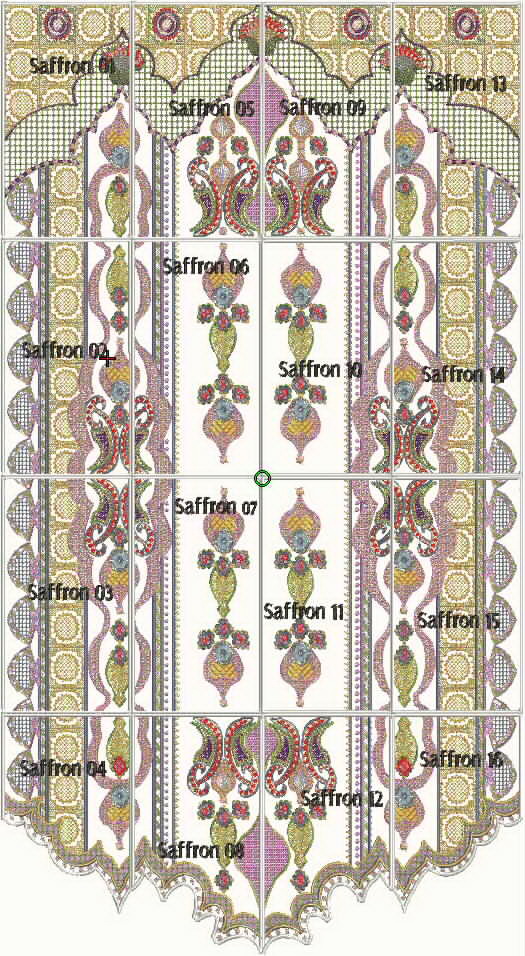
Stitch out the following designs
Saffron_01 to Saffron_16
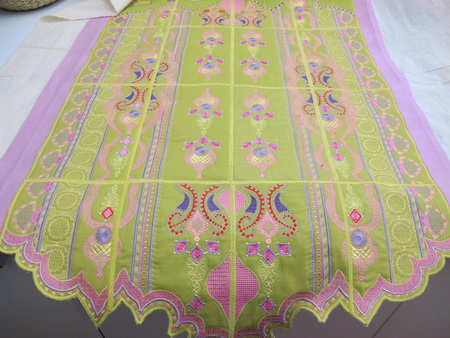
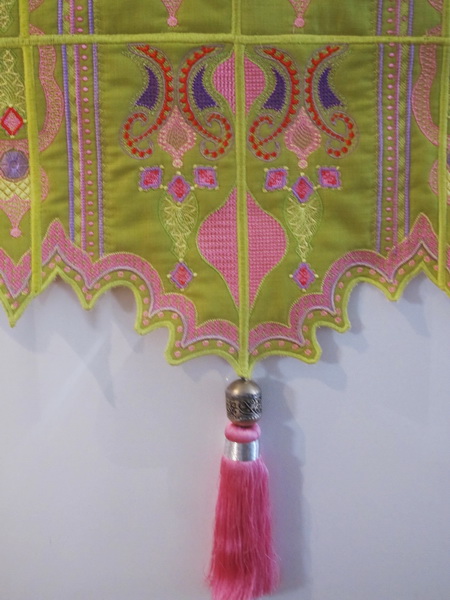
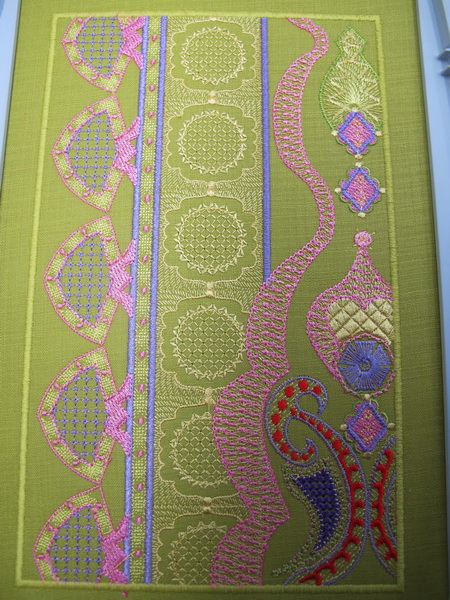
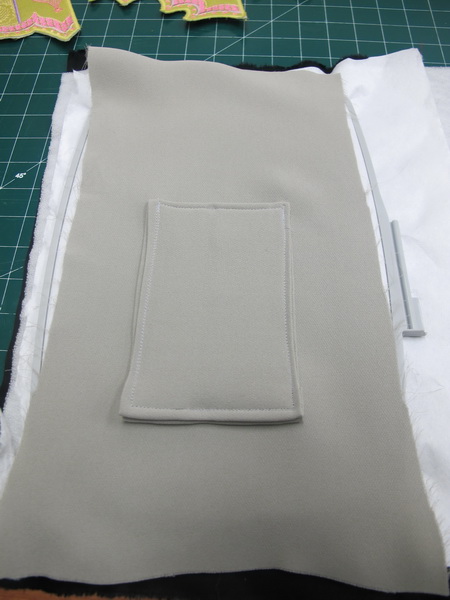
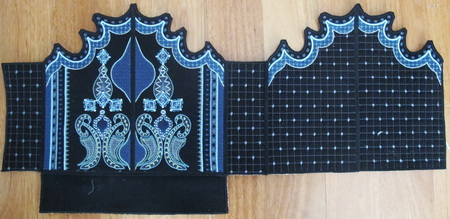
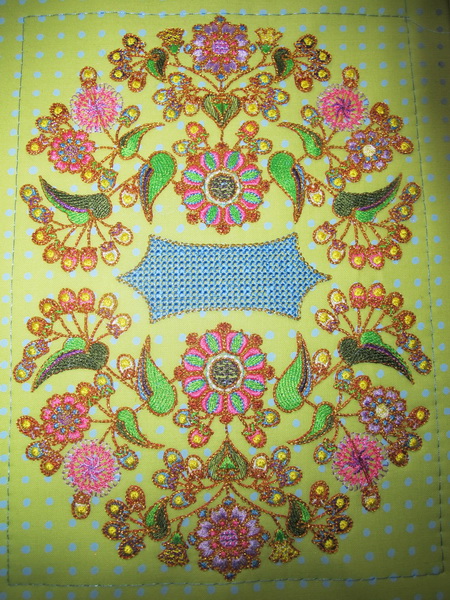
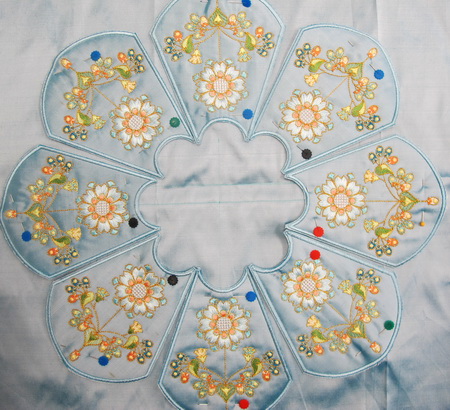
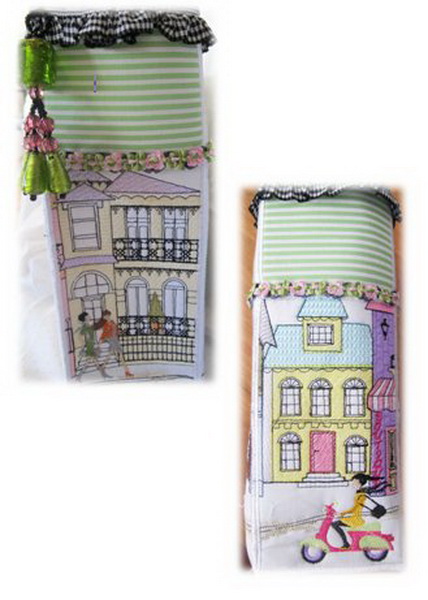
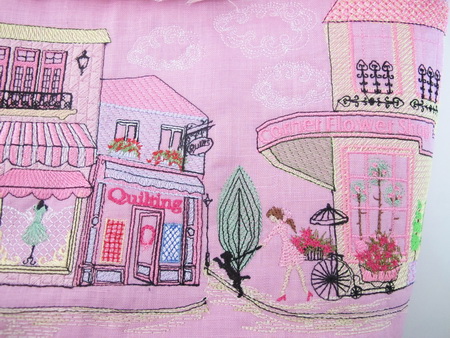
- Once you have stitched all the designs out, place the designs as I have shown in the photograph above on fabric. I used calico.
- Once you have the designs placed correctly, mark the centre of your background fabric, as this is where you will start gluing and stitching each of the designs down
- Start of with “Safron_06” lightly gluing it down and zigzagging on the background fabric, then “Saffron_10” “Saffron_07” and “Saffron_11” and so on
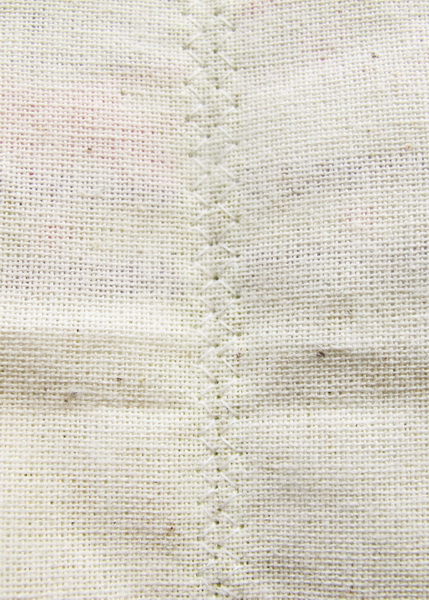
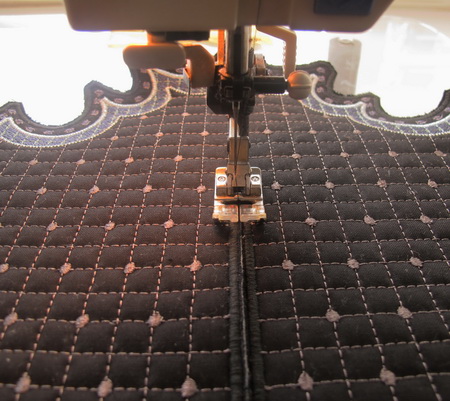
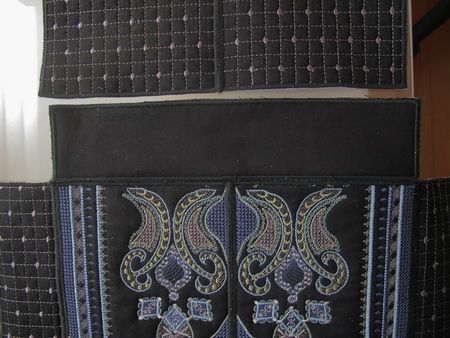
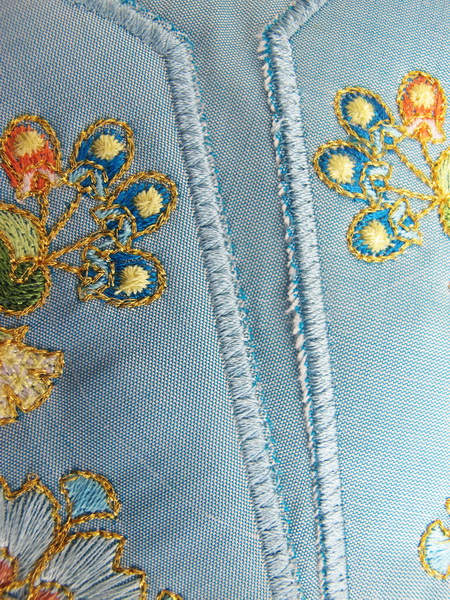
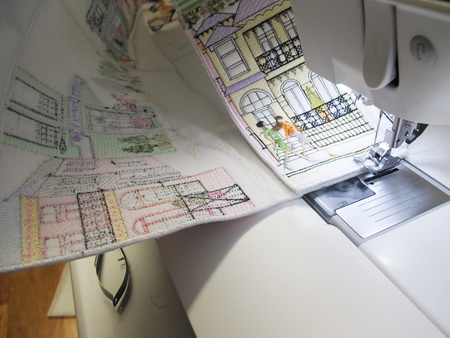
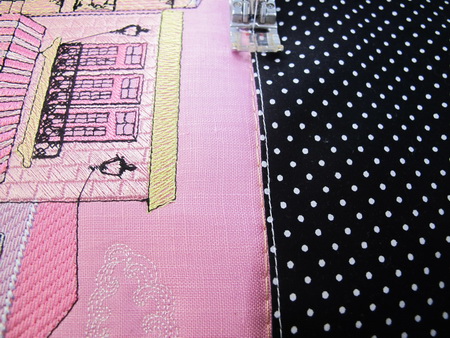
This photo is showing you the zigzagging of each panel onto the background fabric (This photo is of the back of the fabric)
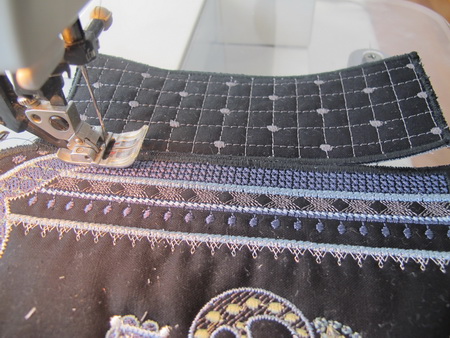
- Once you have zigzagged all the panels down, I suggest you satin stitch each of the panels
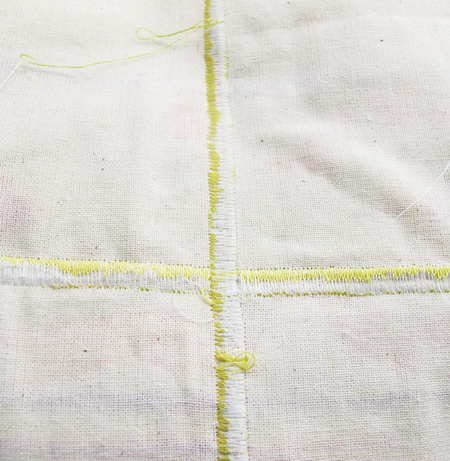
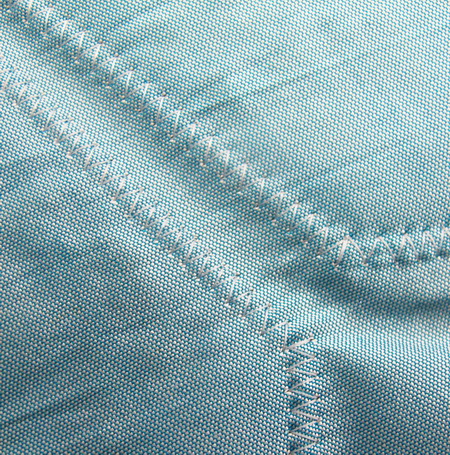
This photo showing you satin stitch (Once again the back of the fabric)
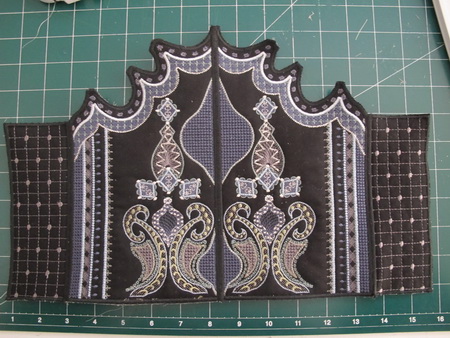
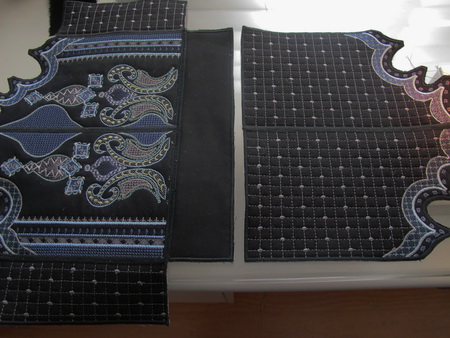
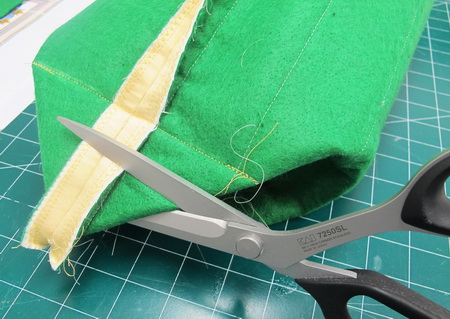
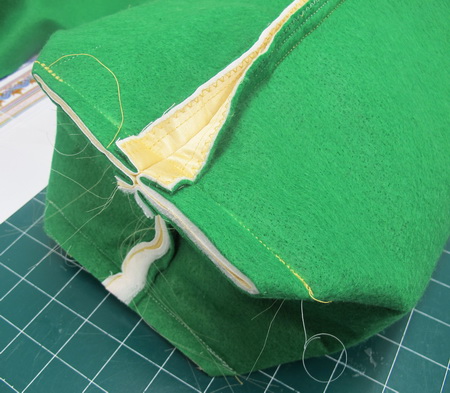
- Cut away the background fabric around the bottom of the wall hanging and then satin stitch once again
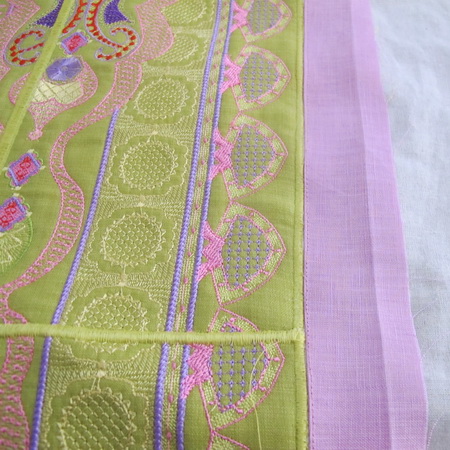
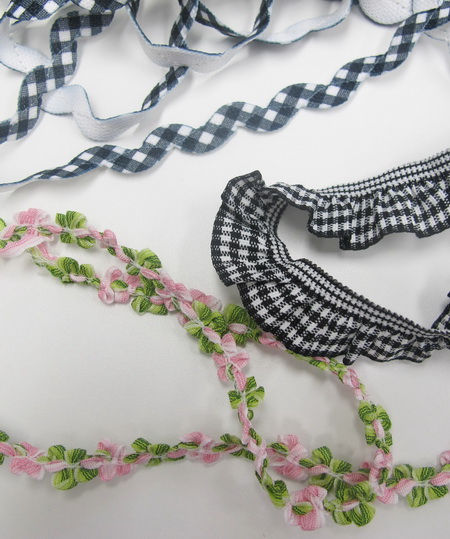
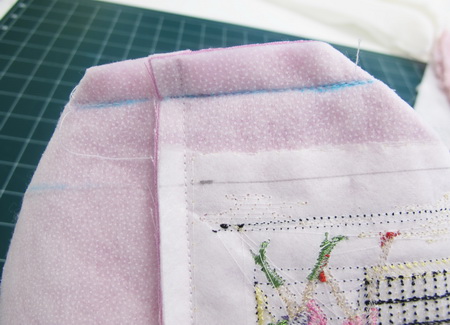
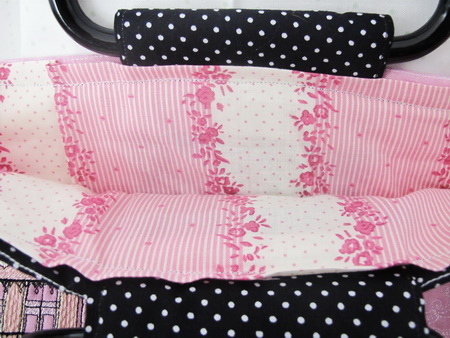
- Cut fabric strips as seen in pink for the sides and top of the wall hanging
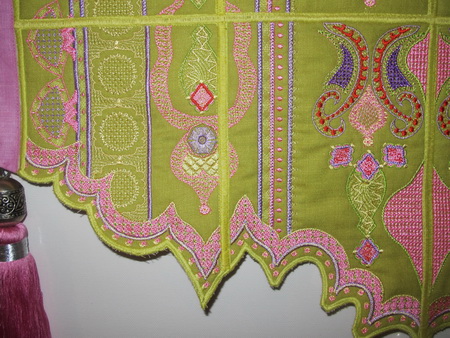
Use similar coloured piping as the background fabric for the Wall hanging and attached the piping to the gingham fabric then stitched the same fabric that is in the background fabric in the wall hanging for the end, as you can see in the photo above
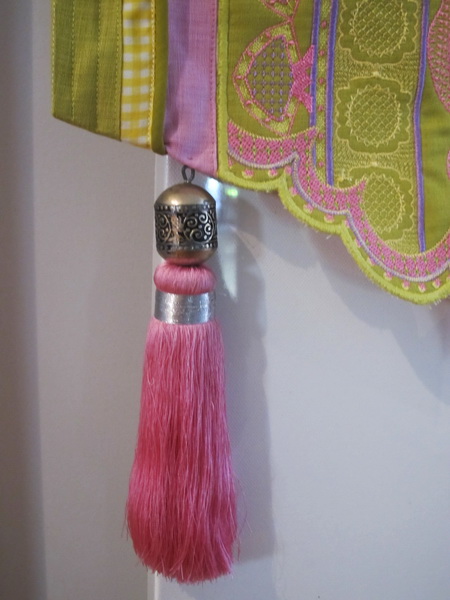
Add tassells
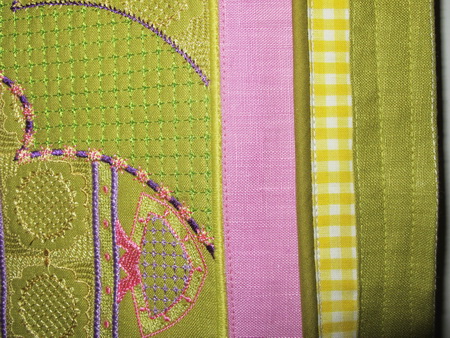
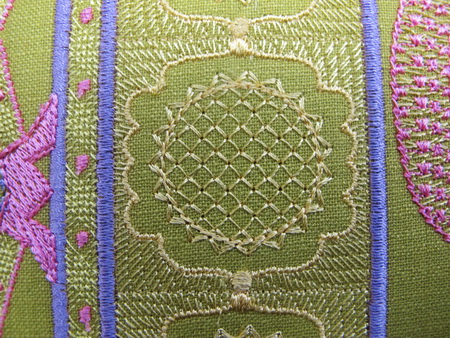
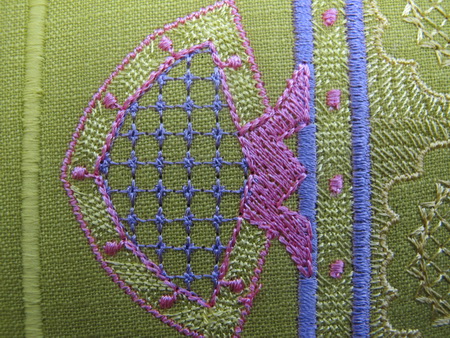
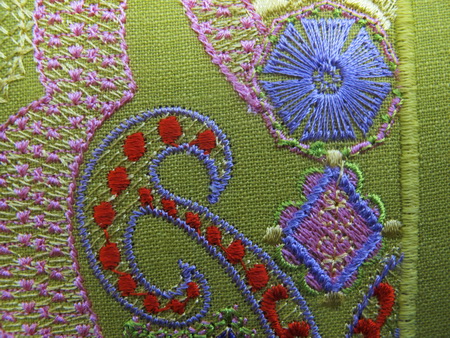
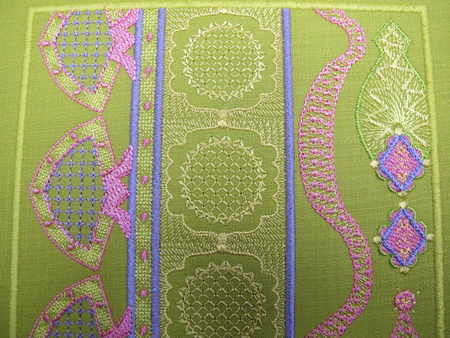
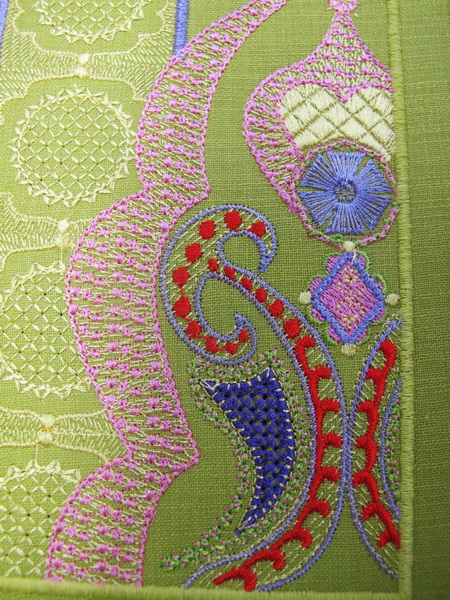
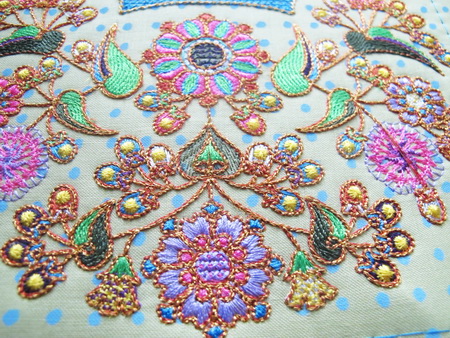
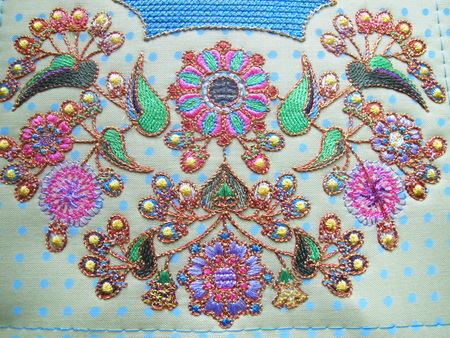
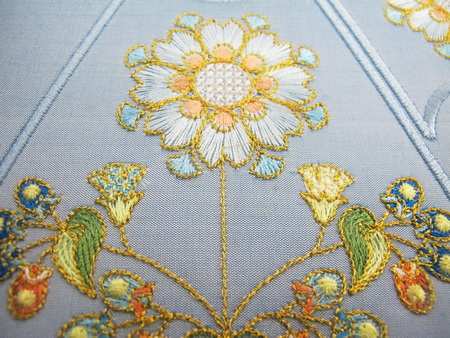
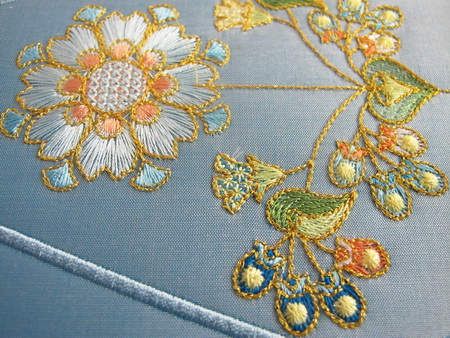
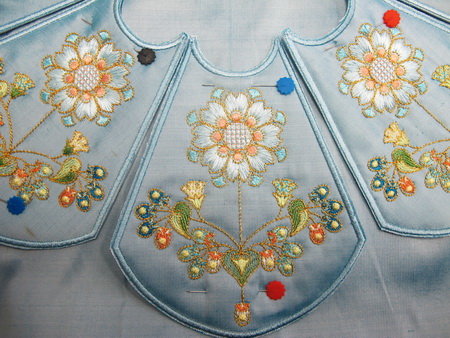
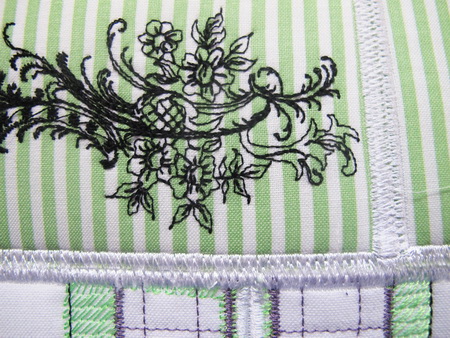
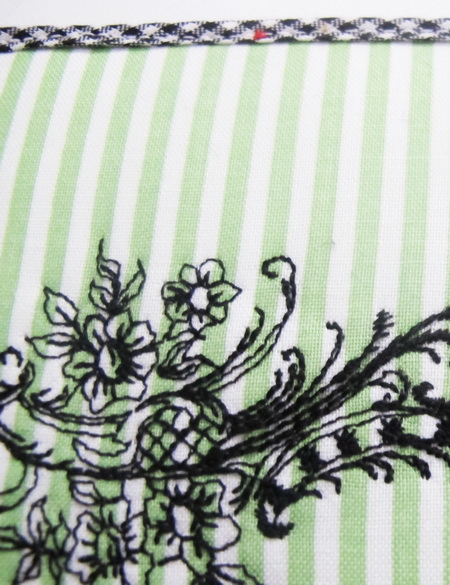
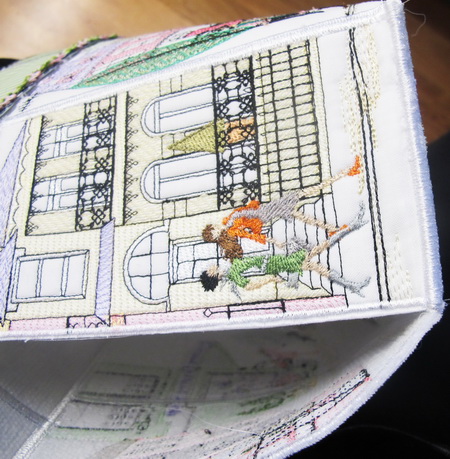
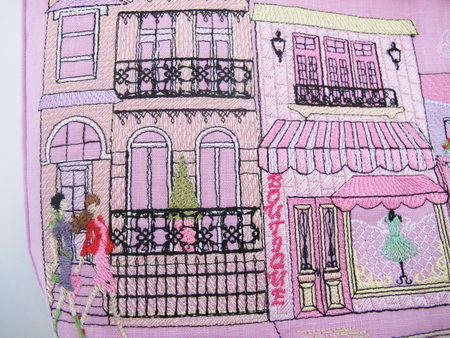
The following photos are close ups of the detail in some of the panels
Saffron Bag
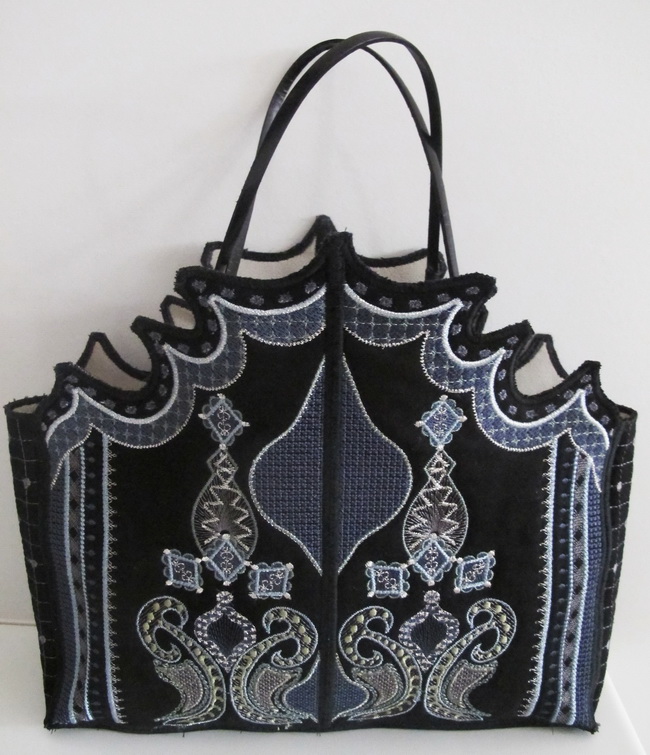
Stitch out the following designs:
- Saffron_17
- Saffron_18
- Saffron_19
- Saffron_20
- Saffron_21_bag side stitch two
- Saffron_22_ bag base stitch two
- Saffron_23_bag base_large stitch one (this design is for those who have a larger hoop)
- Follow the colour chart as this gives you the step by step instructions
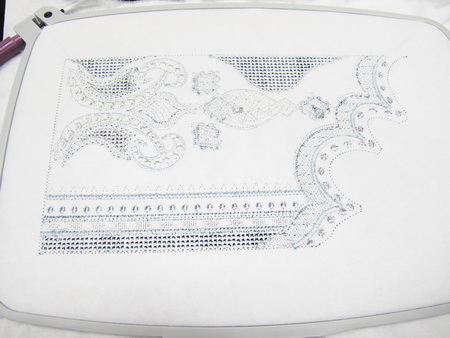
- The above photo showing the hoop taken out of the machine
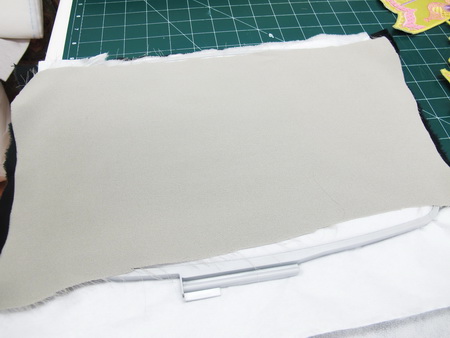
The above photo showing you the hoop taken out of the sewing machine and lining fabric over the back of the design, lightly glue the lining down as this makes it so much easier to place the hoop back in the machine without any problems of fabric folding in on itself
If you wish to put in pockets in your lining
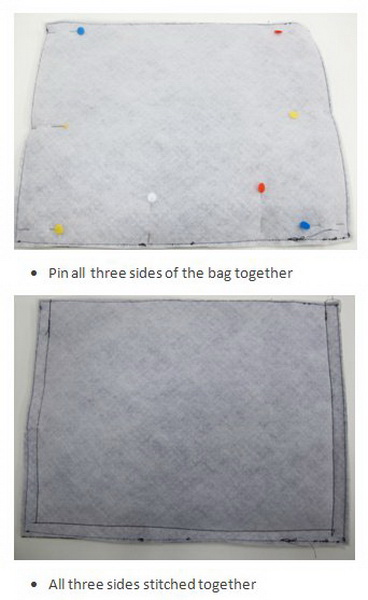
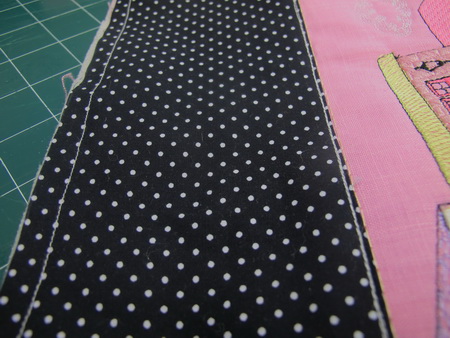
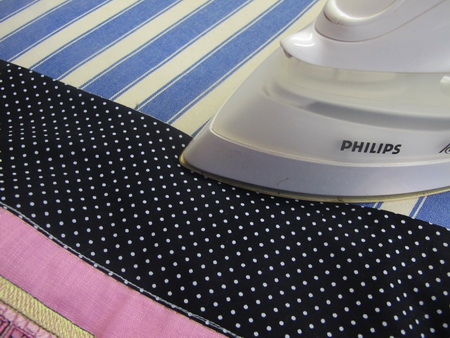
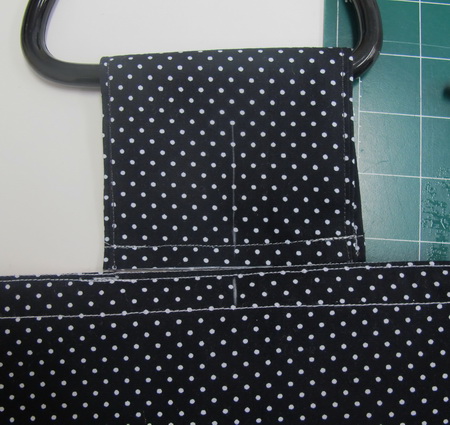
Once you have stitched all the panels out, stitch both the front and back panels together also for all the other panels using a zigzag stitch.
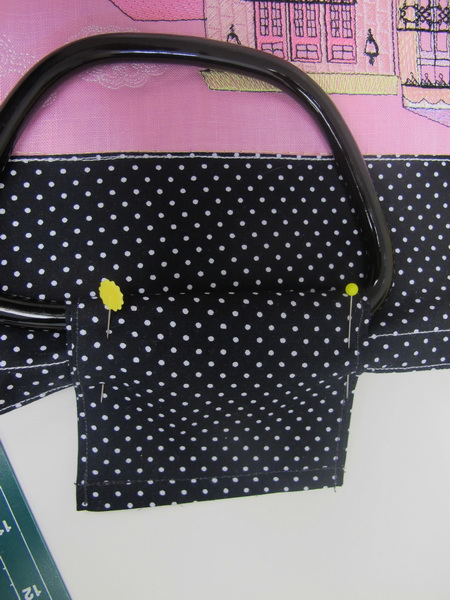
Stitch each of the two side panels to the front panel
The above photo showing you both the side panels stitched to the front panel
- Stitch the base panel to the front panel
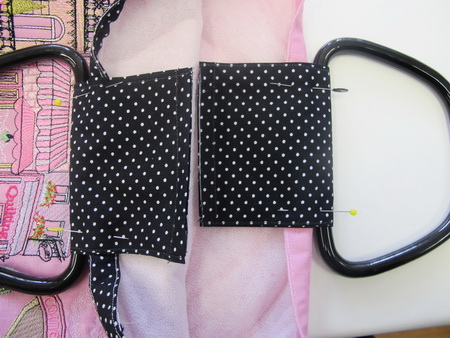
- Stitch the back panel to one of the side panels
- Stitch the back panel to the base panel
- Stitch the side panels to the base panel
- Stitch the rest of the panels together
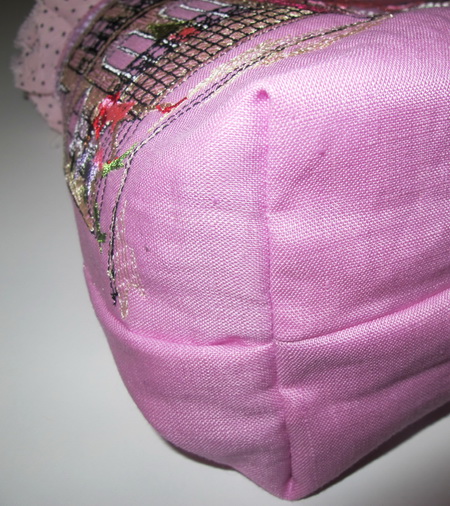
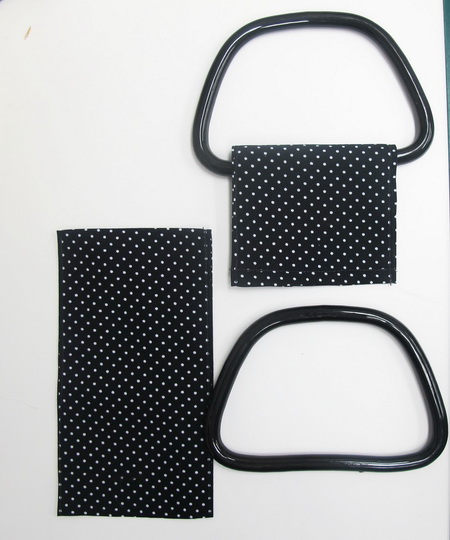
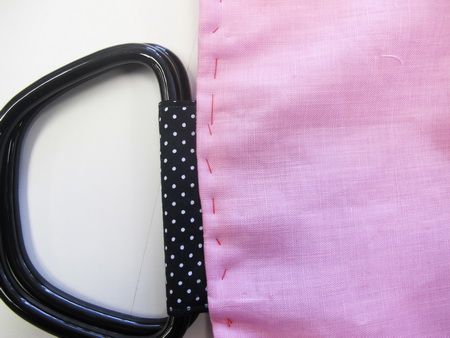
- Place handles on the bag
Tender Heart Instructions
Tender Heart Bag
- Stitch “Tender Heart_07”
- Stitch “Tender Heart_01”
- Mirror “Tender Heart_01” and stitch below “Tender Heart_07”
Showing the detail of the design
Showing detail of the design
Tender Heart Cushion
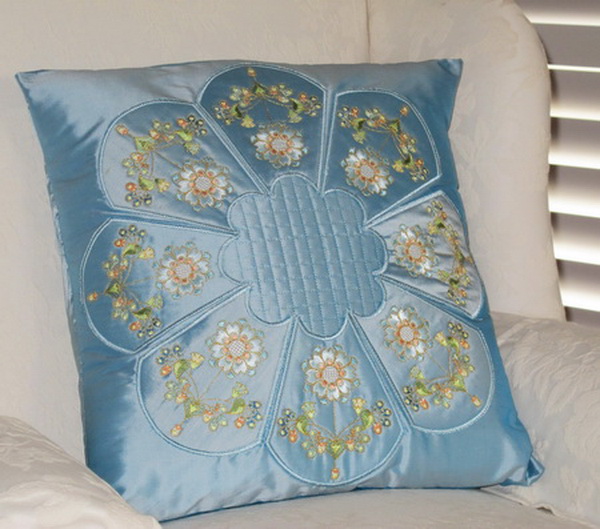
Stitch “Tender Heart_10” eight times
Place the eight panels as shown in the above photo
- Pin each panel
- Lightly glue each panel
Zigzag stitch each panel down
Showing you the zigzag around each panel from the back of the cushion
Once all the panels are zigzagged down then satin stitch over the zigzag
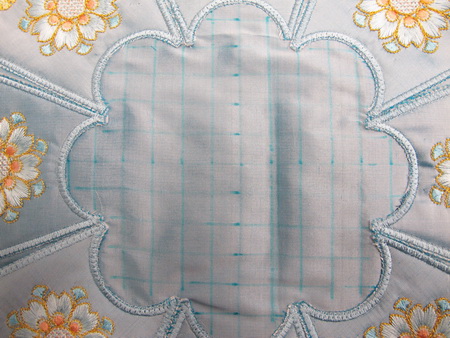
At this point you can either do what I have done by marking in a graph in the centre of the cushion or you can stitch down “Tender Heart_16” I leave this decision up to you
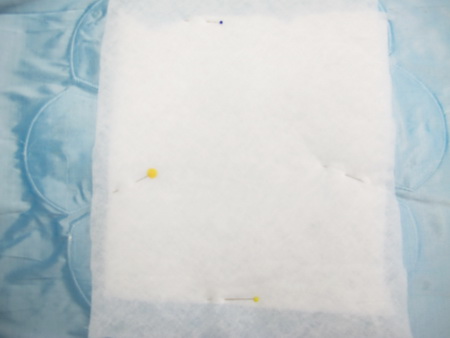
Place wadding on the back of the cushion and pin it down. This gives the centre a puffy look, which gives texture
Showing you the centre after I stitched, I am very pleased with this look
Main Street Instructions
Instructions for making Main Street Bag
Bag size is approx: 35 x 9.5 cm or 13.7 x 3.7 inches
Notions
I have learnt over the years to allow for far more fabric than you need due to things going wrong :)
- 2 meters or 2.2 yards of Medium weight tear away stabilizer
- 2 meters or 2.2 yards of Thin wadding
- 2 meters or 2.2 yards of Floriani's Stitch N Shape (Use for adding shape, form and/or dimension to tote bags) I use this product but if you prefer another product I leave that up to you, I have no affiliation with this product, it is just the one I prefer.
- 2 meters or 2.2 yards of white cotton fabric
- 1 meter or 1 yard of stripped green fabric for the top of the bag
- 1 meter or 1 yard of green spotted fabric for the lining
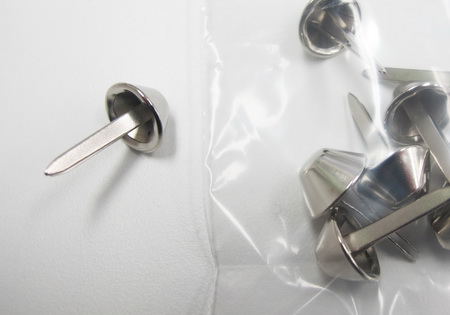
- Purse feet 2 you can purchase at the following URL http://www.pinkchalkfabrics.com/index.php?main_page=index&cPath=3_690
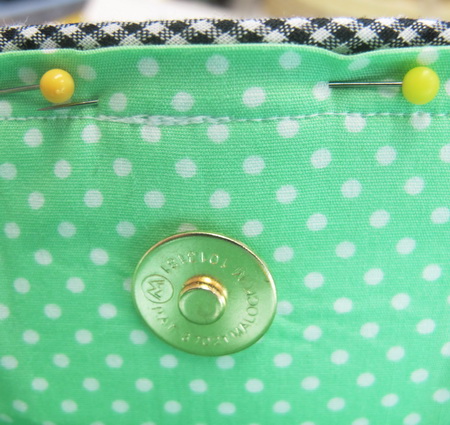
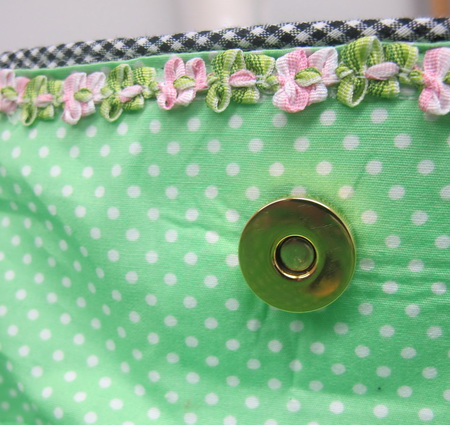
- Magnetic snap 1 you can purchase also at the above URL http://www.pinkchalkfabrics.com/index.php?main_page=index&cPath=3_690
- Assorted haberdashery items
- Small tassel or dingle dangle
- 2 Bag handles ST1037BL 37cm you can order on the following URL http://www.studiomio.com.au/categories/-Bag-Handles/Leather-Handles/?page=4&sort=featured
Stitch out the following designs
- Main Street_01
- Main Street_02
- Main Street_03
- Main Street_04
- Main Street_05
- Main Street_06
- Main Street_07
- Main Street_08
- Main Street_09_Top (Stitch 2)
- Main Street_10_Top (Stitch 2)
- Main Street_11_Top_side
- Main Street_12_Base
- Main Street_13_base_side (Stitch 2) Please Take Note
When you have finished stitching each panel for the top and base please mark on the back of the panels which panel is which otherwise it can be confusing.
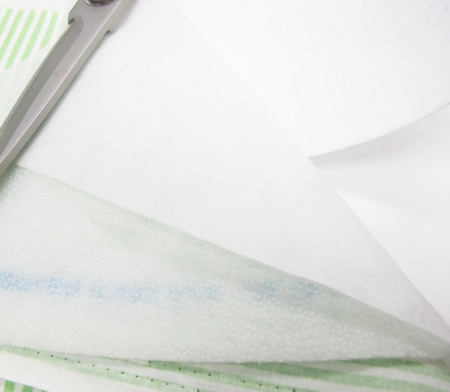
- Hoop together white cotton fabric, thin wadding and the medium weight tear away stabilizer
- Insert your hoop into your machine
- Now lay under the your hoop the Stitch N Shape (you cannot hoop this product as it is just too thick)
- Press the button on your machine to do an automatic stitch around the inside of your hoop to hold everything together
- Now start stitching each of the designs
- Once you have finished stitching all the designs out it is time to cut each panel along the outside of each satin stitch border
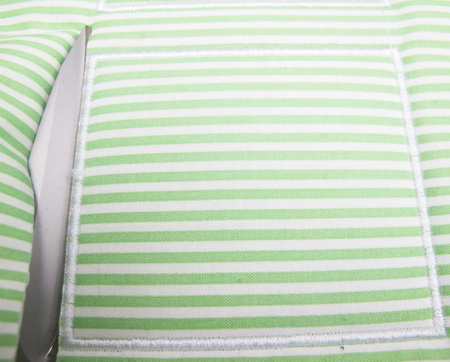
Cutting away from the satin stitch border using scissors
Zigzag stitch each panel together using the same coloured thread as you used for the satin stitch border. The photo above showing you the zigzag stitch holding the panels together
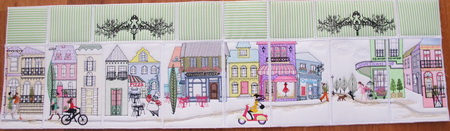
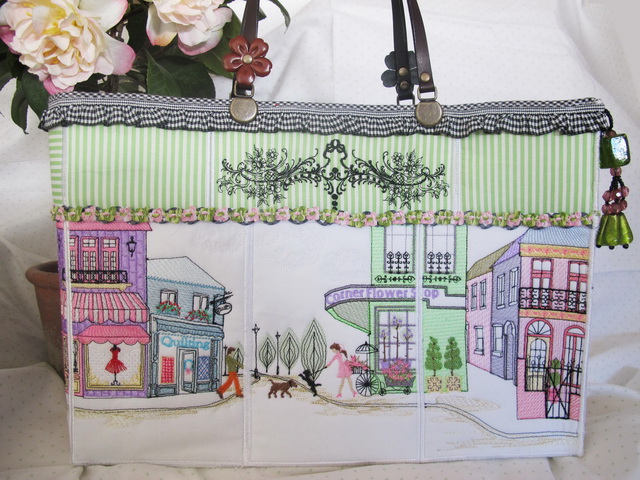
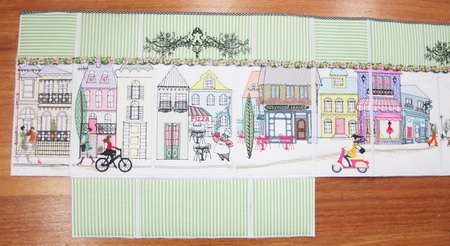
The photo above shows you the layout of each design panel
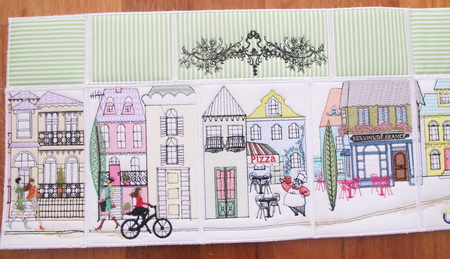
Close up of showing you the layout of each design panel
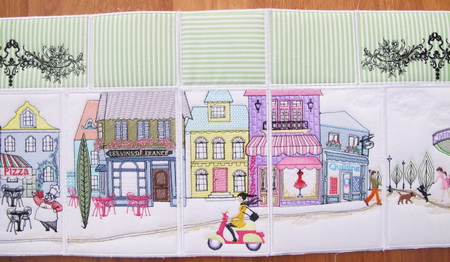
Close up of showing you the layout of each design panel
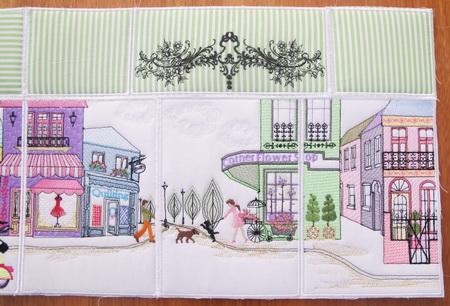
Close up of showing you the layout of each design panel
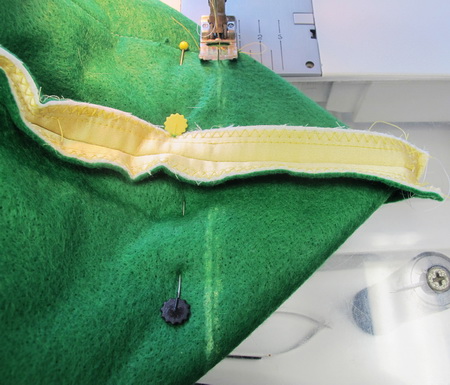
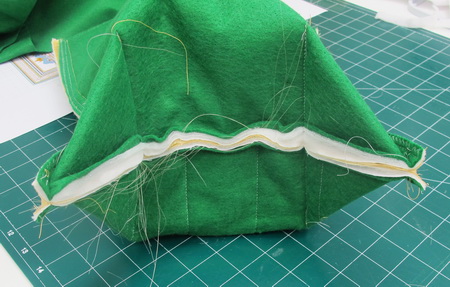
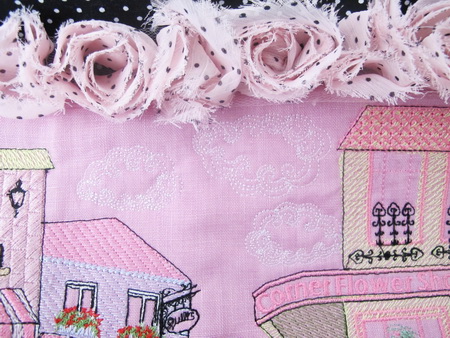
Before I zigzagged the base panels to the rest of the panels I started by adding the black and white gingham petite piping to the top of the bag

- Using a hot glue gun and gluing the black and white rickrack over the satin stitch that joins the main street panels to the top panels
- Over the top of the rickrack I then hot glued the flowers
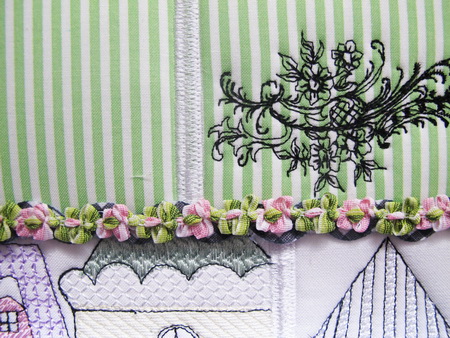
The above photo showing you the flowers hot glued to the rickrack
The above photo showing you the layout for the base panels after I had zigzagged the panels together
The above photo showing you the type of haberdashery I used on the bag
The photo above showing you the two side panels
Zigzag stitch the main street panels together with the base panels starting with one of the two side panels and ending like I have in the photo with the other side panel
Stitch the side panel to the last panel
I used the larger purse feet. You can purchase from the following URL http://www.pinkchalkfabrics.com/index.php?main_page=index&cPath=3_690
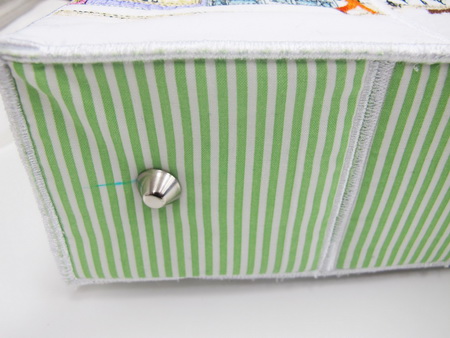
- Measure how far in you would like the feet for both ends of the bag
- Insert the 2 large purse feet into the bag where you had marked
- Measure the bag for the lining, I always make the lining slightly larger both width and length, you can always just pleat the extra bit of lining at a corner or where ever it best suites you
- Iron the lining and fold over the top and stitch
Mark the centre on the front and back of the lining
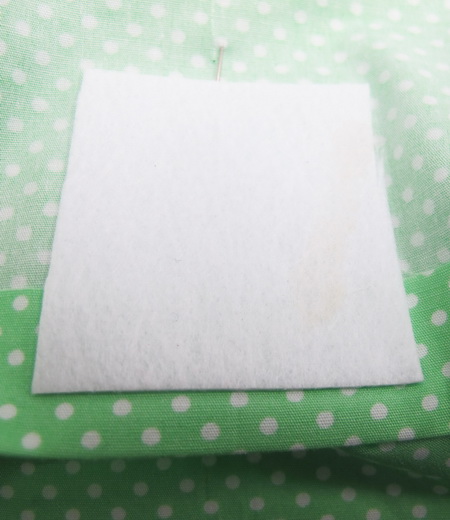
Cut some of the left over Stitch N Shape larger than the magnetic snaps and pin to both sides of the lining where you marked the centre, making sure you do this on the wrong side of the lining
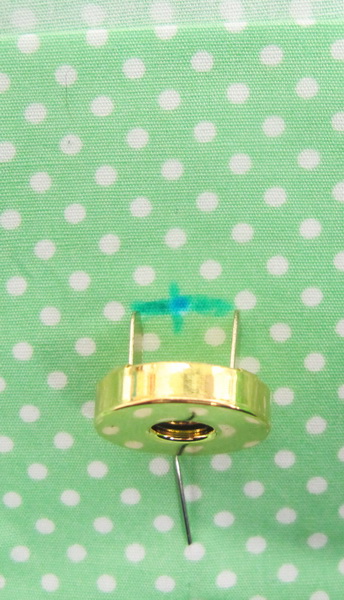
Measure the distance of the two spokes and mark
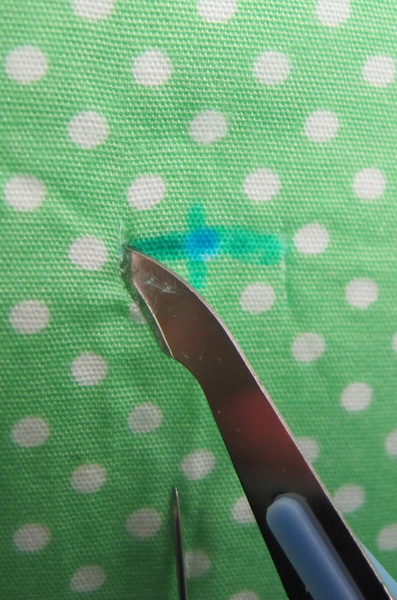
Using a sharp blade cut where you marked for each side
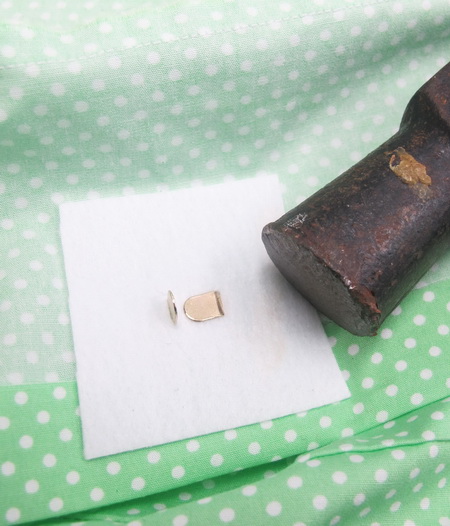
Hammer the two spokes down
Pin your lining to the bag matching up the centre of the bag with the lining then stitch the lining to the bag
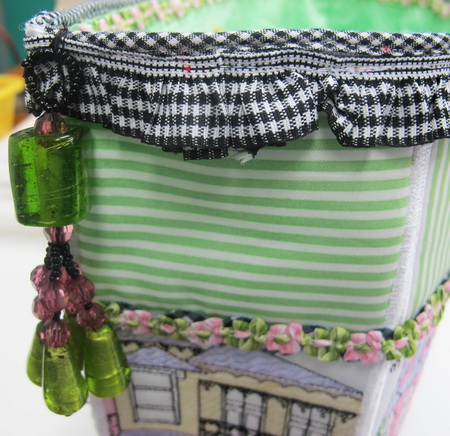
On the outside of the bag I stitched the black and white gingham ruffle over the stitching that I had previously done for the lining. I then added a pretty dingle dangle at the corner as this covers up where I could not stitch on the machine. This was where I joined the front and side panels and the join was a little too thick for the machine
I hot glued the flowers over the top of the stitching for the lining just to give the bag a nice finish
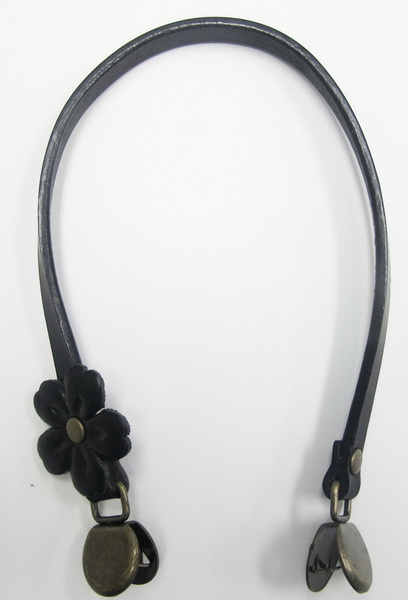
Using the centre mark on both the front and back of the bag mark as to the distance you would like to hammer your bag handles into your bag. I do like this type of bag handle as it is so easy to do and I just love easy at times :)
I do hope you enjoyed making the “Main Street” bag
Instructions for making the pink “Main Street” bag
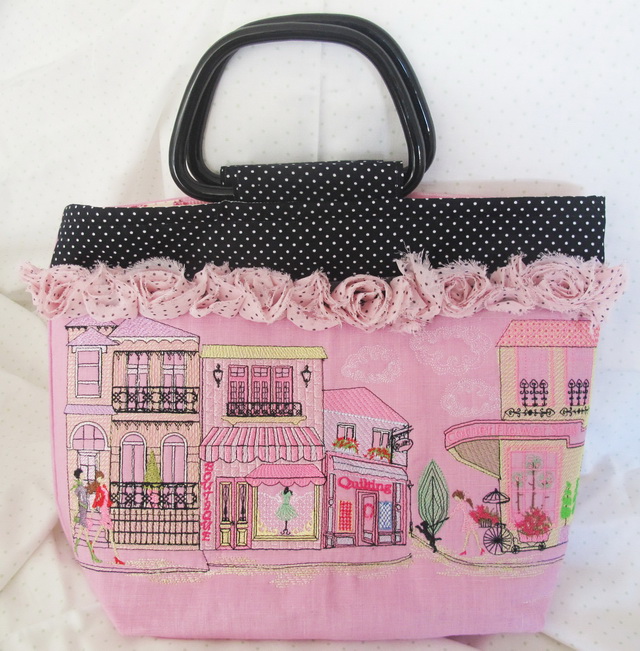
Bag size is approx: 35 x 26 cm or 13.7 x 10.2 inches
Notions
- 1 meter or 1 yard of pink linen fabric
- 1 meter or 1 yard of thin wadding
- 1 meter or 1 yard of medium weight stitch and tear stabilizer
- ½ meter or ½ yard of contrasting fabric for the top of the bag
- Haberdashery of your choice
- Two handles
- 1 magnetic snap
Stitch out the following designs:
- Main Street_14
- Main Street_16
- Main Street_20 Please Note
- The above 3 designs were my choice for the bag but you can use any combination that you wish from Main Street_14 to Main Street_21
- Print out any 3 designs of your choice in “Actual Size”
- Mark on the pink fabric the centre and rule a line across using a marker pen
- From the centre position place each of the 3 prints as to how you would like the layout, then placing the centre point of each print on the centre point of the pink fabric you had marked using your marker pen
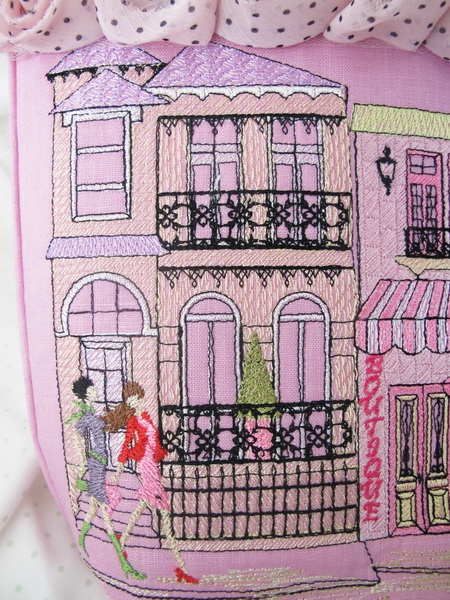
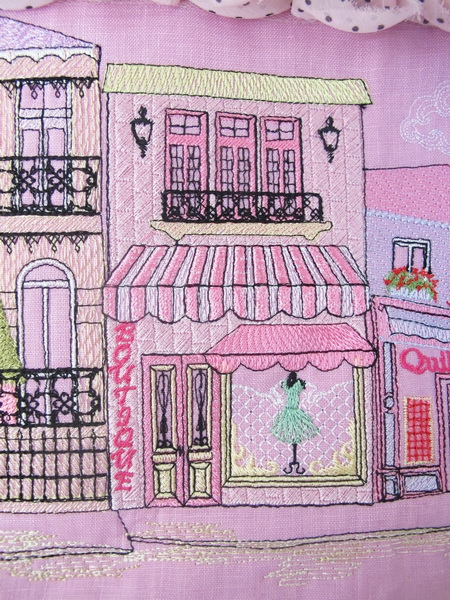
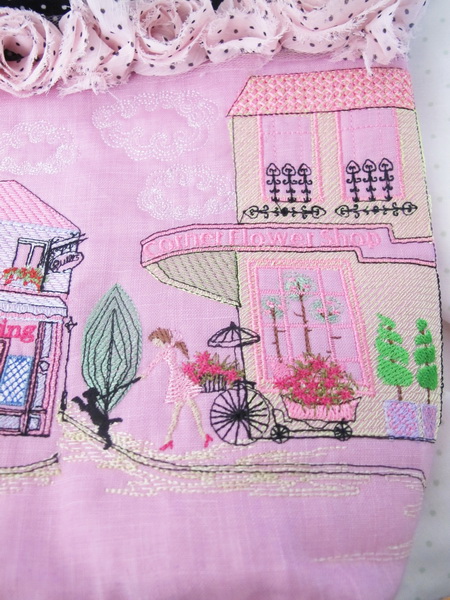
The following photos showing you the layout of the bag
After you have stitched out your designs you can then cut out the fabric, what I did was to double the fabric over before cutting out the following measurements for the bag but you can either make the bag larger or smaller, that I leave up to you
Measurements for the front and back pink fabric of the bag
- Length 35cm or 13.7 inches
- Width 37.5 cm or 14.7 inches
Measurements for the black and white poker dot fabric
- Length 8cm or 3.1 inches
- Width 37.5cm or 14.7 inches
- Stitch the contrasting fabric of your choice to the pink fabric
- Stitch both the front and back together on all three sides
To make box corners
- Flatten the bottom corner to make your bag bottom flat, hold one of the bottom corner of the exterior and match the side seam line with the bottom seam line (have a good look into your bag to see if the side seam and the bottom seams meet and flow into one another) Completely flatten the bag corner to form a triangle and pin.
- Measure and mark your chosen flat bottom depth...I would for example, if you want your bag bottom to be 5 cm (1.9 inches) in depth. To make your bag bottom 5cm (1.9 inches) deep all you have to do is measure and mark a line that is 90 degrees to the side seam and is 5 cm (1.9 inches) long across the width of the triangle
- You can make a mock up to see how you flat bottom will look on your bag, experiment with a piece of paper
Stitch flat bottom along the bottom line mark you made. Be sure to sew securing stitches at both ends to finish, trim off any excess fabric from the triangle, please not too close to the seam
The following photos are from the Manchu Bag but these photos show you a clearer way to make the box corners even though the measurements are very different you still come out with a similar result
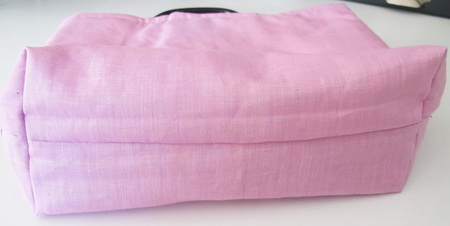
Showing you the base of the Bag
Close up of the base
You can purchase similar handles on the following website:
http://www.studiomio.com.au/categories/-Bag-Handles/Plastic-Handles/?page=1&sort=featured
- Using the contrasting fabric for the handles
- Length of fabric cut out four 18cm or 7.8 inches
- Width 11 cm or 4.3 inches
- Fold over on both sides the length of fabric and press down with an iron and stitch the two sides together
- Fold the fabric over the handle and stitch down at the end of the fabric
To have a nice even seam at the top of the bag I stitched along the top about 5/8 inches
I used the iron to press down where I had previously stitched
- Measure the centre of the front and back of the bag and mark
- Measure the centre of the loop you had made for the handle
- Join the two centres and pin
Fold over where you had stitched once again using your iron to press the seam down
Fold over where you had stitched once again using your iron to press the seam down
- Make the lining for the bag
- Hand sew the lining to the bag
- Then using your sewing machine sew around the top and then take out all your hand stitching
I added the roses just to give the bag an added finish, I hot glued the roses onto the front of the bag
Vasanta Instructions
Instructions for the Vasanta Quilt

This quilt was stitched on satin silk
Measurements of Vasanta quilt is the following 24.8 wide x 27.6 inches length or 63 wide x 70 cm length
If you wish to stitch the border around the quilt then the dimensions of the quilt will not be the same


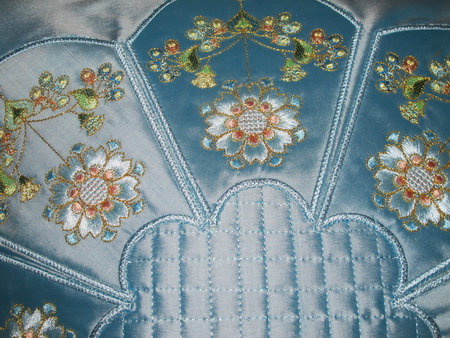
This is a photo showing you the layout of the quilt.
This photo is included in your colour chart

Showing you the layout using the border designs
This photo is included in your colour chart
Notions
- 4 metres or 4.5 yards of background fabric approx
- 2 metres or 2.5 yards of thin wadding approx
- Tear away
Stitch out the following designs
- “The Taj_01” to “The Taj_20”
Instructions
- Once you have stitched out all the 20 designs cut around each panel using your scissors as close to the satin stitch border as possible
- Place the panel No 8 down on your background fabric and lightly glue the panel to the background fabric
- Stitch the panel No. 8 down using the same coloured thread as you used for the satin stitch border using a zigzag stitch over the satin stitch border
- Place the panel No. 13 down below No. 8 panel and lightly glue in place and then zigzag stitch that panel down onto the background fabric
- From both these panels start placing and gluing each panel down on the background fabric and then zigzagging over the satin stitch border
Machine Embroidery Designs
Latest Releases
Folklore Machine Embroidery Designs
Released on the 25th June 2019

6 designs included in the Folklore machine embroidery design set.
The Folklore design is suitable for a 6 x 10 inch or 240mm x 150mm hoop.
The Folklore design is available in DST, EMB, EXP, HUS, JEF, PES, VIP, VP3 and XXX.
The colour chart is included in the design set
As I am now digitizing with Wilcom embroidery software (which is a commercial software) we are unable to convert files to ART format. Bernina embroidery machines will now need to purchase designs in EMB or EXP format. Sorry for the inconvenience.


