


Miniature Baltimore Quilts Instructons
Miniature Baltimore Quilt Instructions
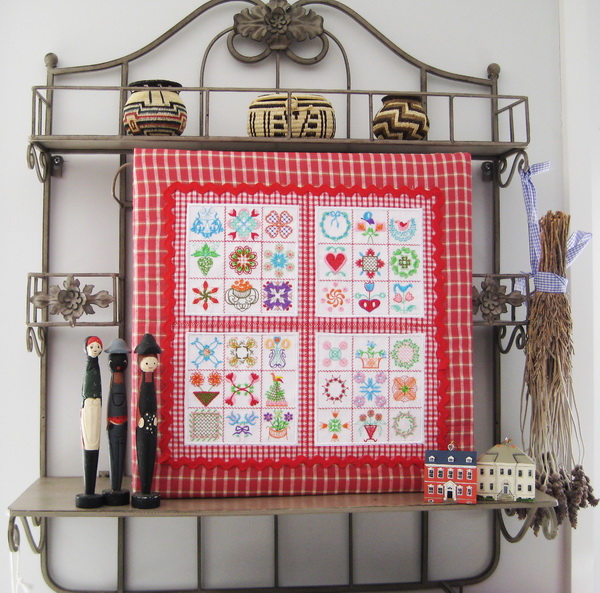
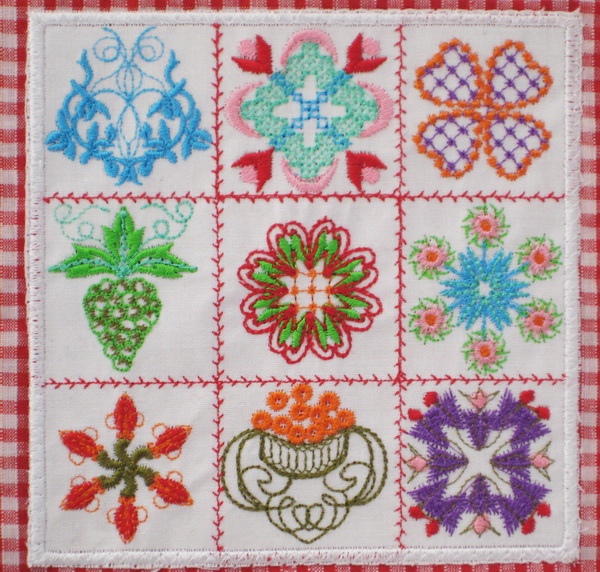
These designs would look great as a centre piece for a quilt. You can also make a quilt using each of the four designs but changing each square panel and the thread colours.
The four mini quilts would look lovely hanging using little wooden pegs from a metal quilt hanger as a display
- Stitch each of the four quilt panels on white cotton fabric.
- Zigzag stitch each of the panels onto a red and white gingham cotton fabric.
- Stitch the red and white gingham cotton fabric onto a check red fabric.
- Use the feather decorative stitch with red thread and stitch between each panel to help tie the designs together.
- To blend the check red fabric and gingham fabric together I then stitched a medium size rick rack over both fabrics.
- You do not have to use red gingham or red check fabrics you can use any other colour which would best suit your decor
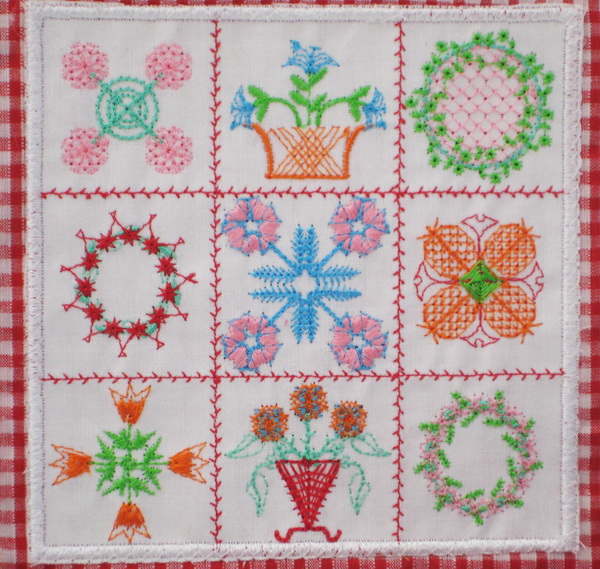
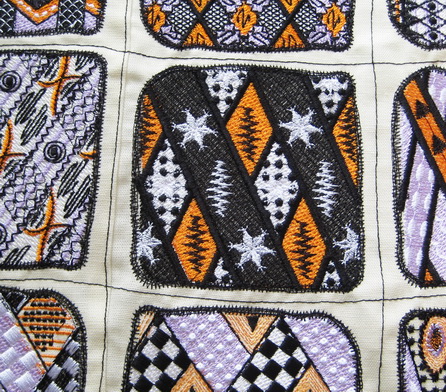
Close up of the stitched Balt quilt_01 showing you the detail stitches of the panel
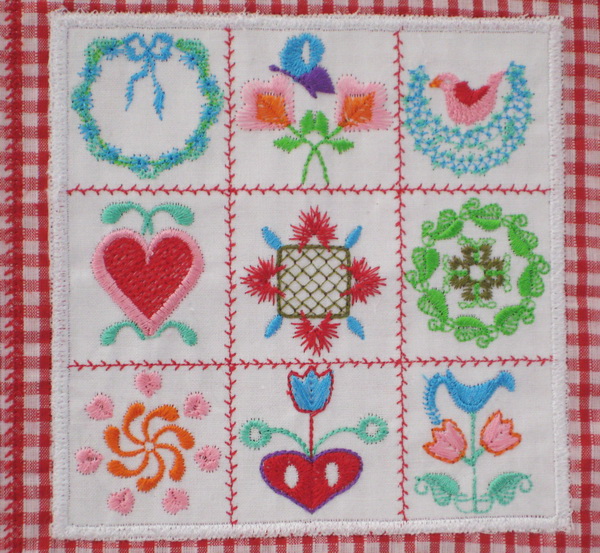
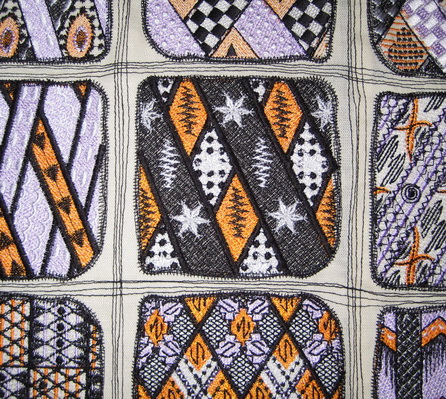
Close up of the stitched Balt quilt_02 showing you the detail stitches of the panel
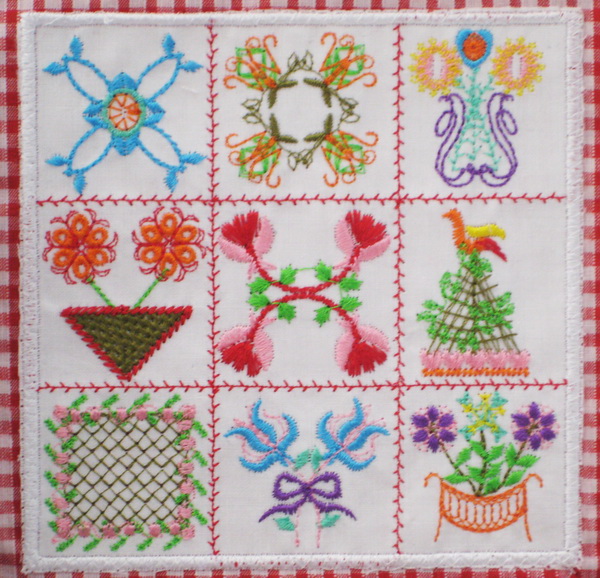
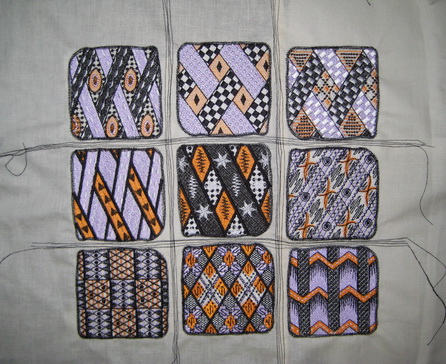
Close up of the stitched Balt quilt_03 showing you the detail stitches of the panel
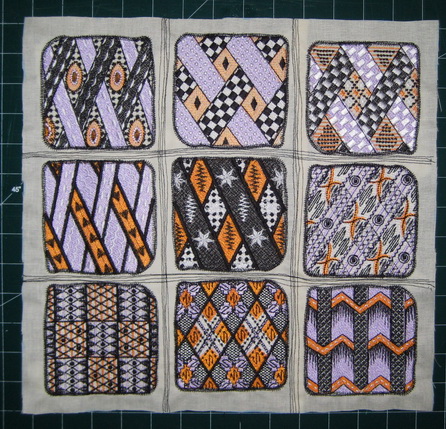
Close up of the stitched Balt quilt_04 showing you the detail stitches of the panel
Timeless Instructions
Timeless Bag
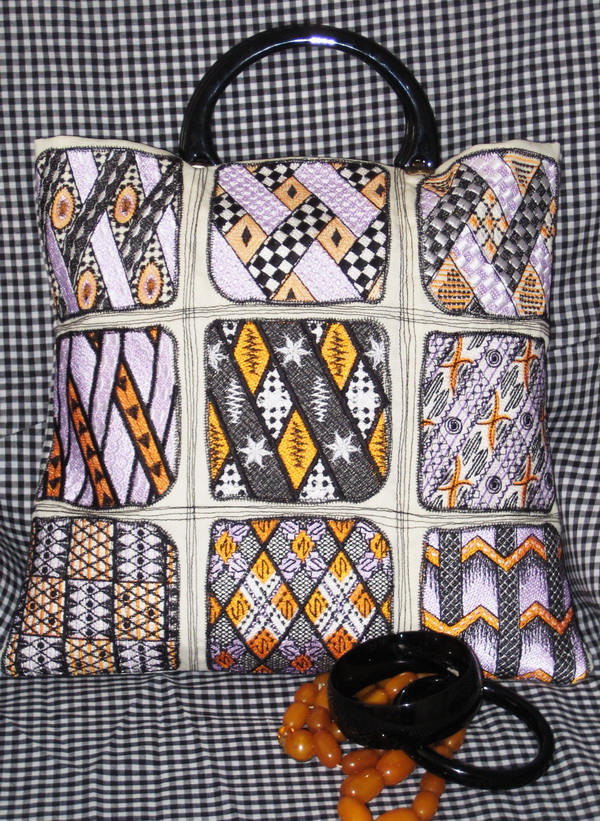
Size of bag 31.5cm or 12.4 inches width x 30 cm or 11.8 inches length
What you will need:
- 1.5 meters or 1.5 yards of a cream fabric (I used a linen)
- 1.5 meters or 1.5 yards of black and white gingham fabric for the back of the bag and the lining of the bag.
- Black handles
- ½ metre or ½ yard of wadding thin for the front and back of bag
Stitch out the following designs:
- Timeless_01
- Timeless_02
- Timeless_03
- Timeless_04
- Timeless_05
- Timeless_06
- Timeless_07
- Timeless_08
- Timeless_09
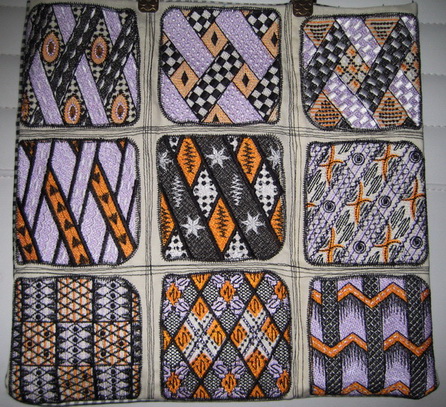
Once you have stitched all the designs out and stitched each of the 9 squares panels together, stitch over each of the joins using a straight stitch, this straight stitch does not have to be straight; actually it looks better if you go in and out
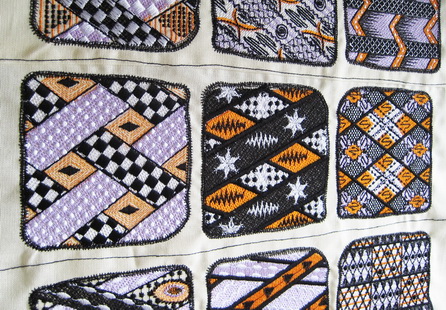
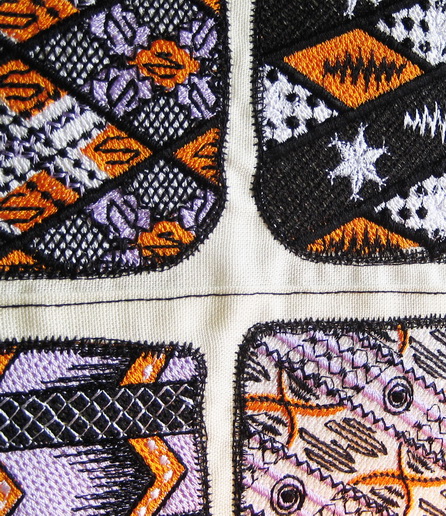
Stitching a straight stitch between each of the panels
As you can see the straight stitch is not straight going through all the panels
Do as many straight stitches through each panel that would best suite you
Finished doing the straight stitch
Bag finished
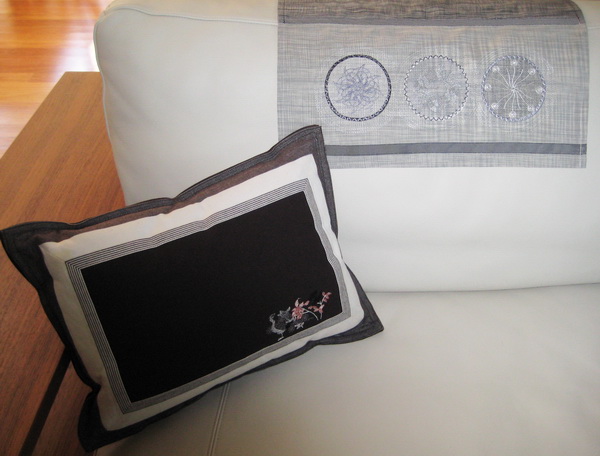
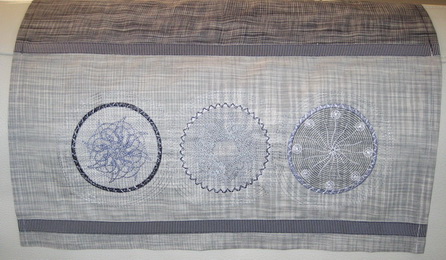
Timeless Head Rest
Size of head rest cover
78 cm or 30.7 inches in 17.5 inches in length 44.5 cm width
What you will need:
- 45 x 25 cm for the light grey fabric
- 57 x 45 cm for the contrasting dark grey fabric
Stitch the following designs
- Ud Timeless_14
- Ud Timeless_15
- Ud Timeless_16
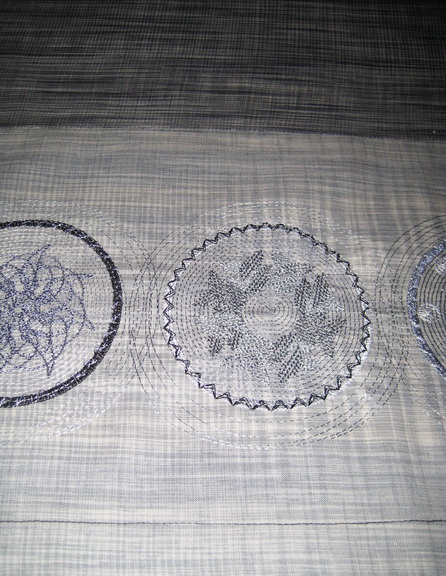
If you look closely I overlapped each of the designs.
Stitch a hem at the bottom of the rest
Join the contrasting dark grey fabric to the light grey fabric
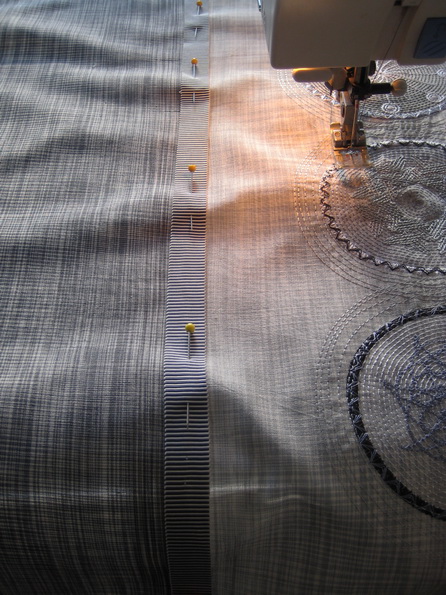
To bring the two contrasting fabrics together I used a black and white striped ribbon and stitched over the join of the contrasting fabric
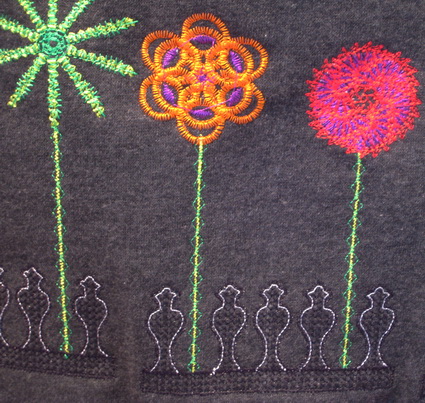
Timeless Jumper
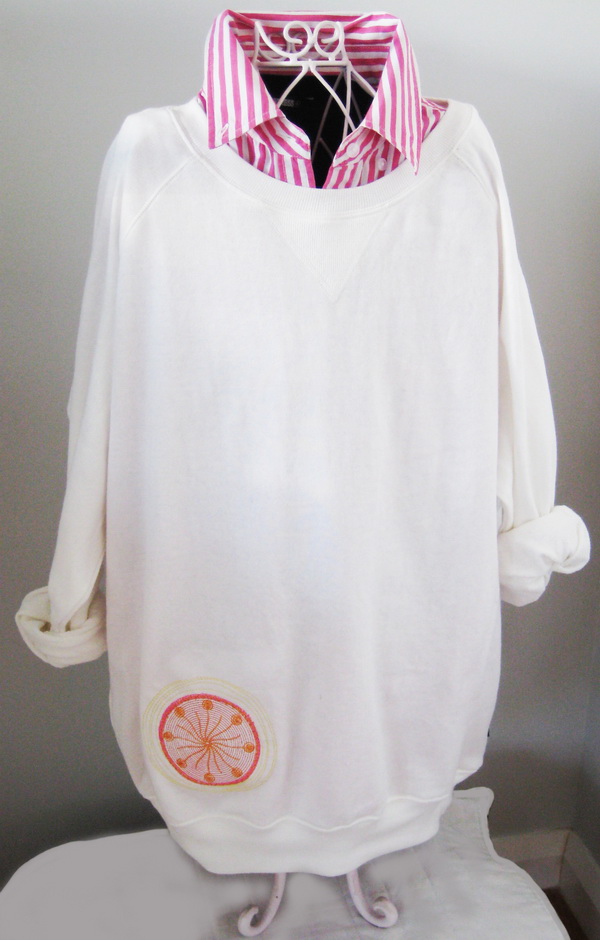
Stitched Ud Timeless_14 to one side of the white jumper
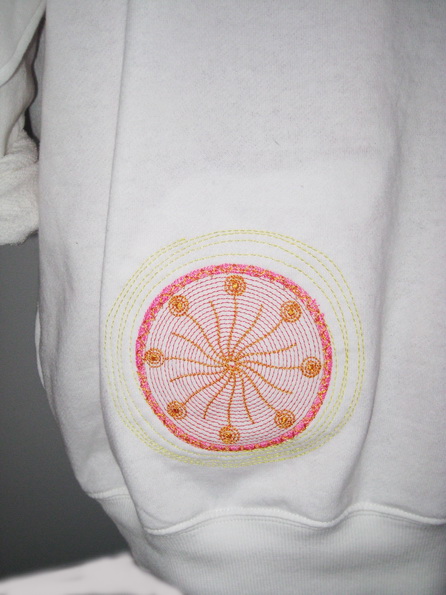
Close up of the design Ud Timeless_14
Close up, showing detail of design
Timeless Cushion
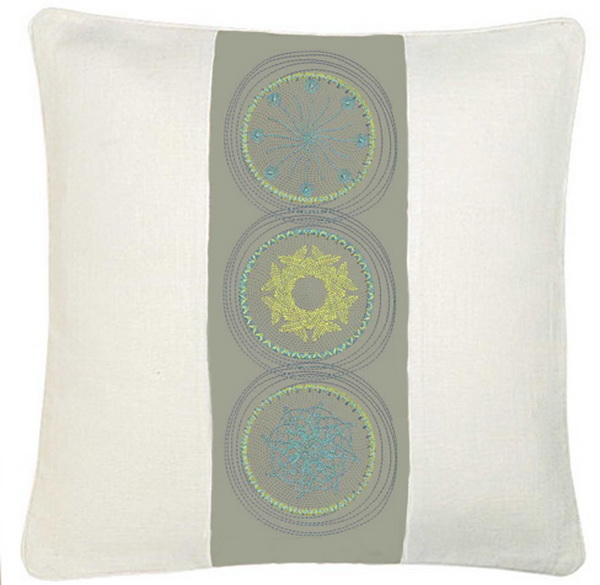
Stitch the following designs on the front of the cushion
- Ud Timeless_14
- Ud Timeless_15
- Ud Timeless_16
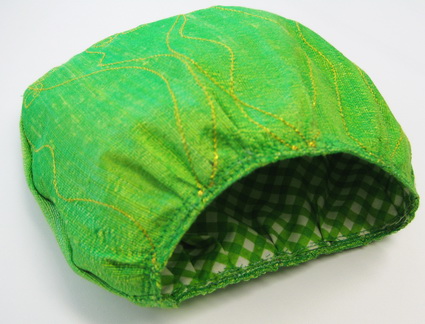
Colour Burst Instructions
Colour Burst Bag

Front of Bag

Back of Bag
The bag measures 16.5 x 18 cm or 6.5 x 7.1 inches approximately
What you need
- 1 metre or 1 yard of fabric (I always write more than you need in the way of fabric length)
- ½ metre of lining fabric or ½ yard of fabric
- ½ metre of stabilizer
- Small magnetic clasp or hand sew a snap
- Gold chain 140cm or 55 inches (I used an actual gold chain that I never use and just sits in my jewellery box) or you can purchase a gold chain from your local hardware shop
Stitch out the following designs
- Colour Bust_01
- Colour Burst_02 (Front of Bag)
- Colour Burst_03 (Back of Bag or if you wish you can stitch out 2 of “Colour Burst_02” and eliminate stitching out “Colour Burst_03”)
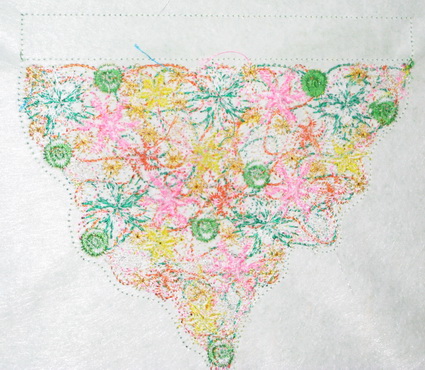
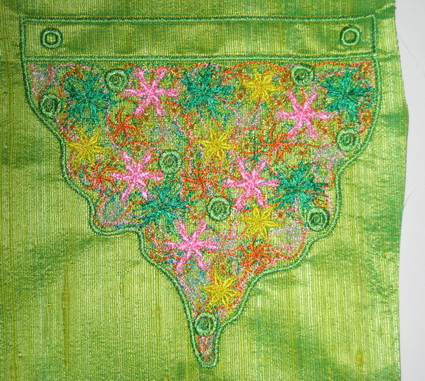
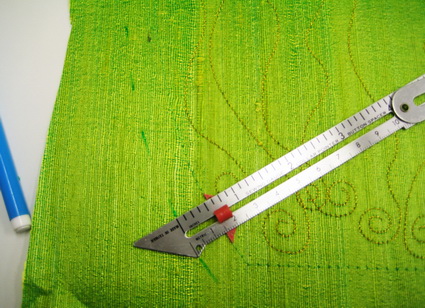
Stitch out “Colour Burst_01” I used a very fine silk.
Take the hoop out of the machine.
Please do not take the design out of the hoop
Before you lay the lining onto the hoop:
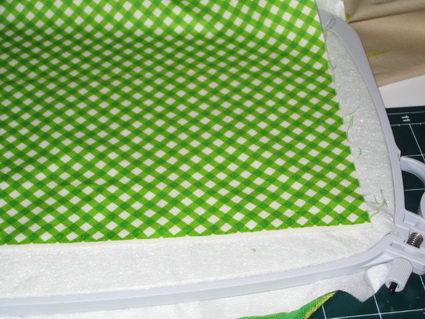
- Turn the hoop over so the wrong side of the design is facing you and lightly spray glue on the back of the design “Colour Burst_01”
- Lay over the design the lining fabric. I used a cotton fabric and press the fabric firmly onto the glue (this helps stop any movement of the lining fabric when you insert the hoop back into your machine)
- Insert the hoop back into your machine
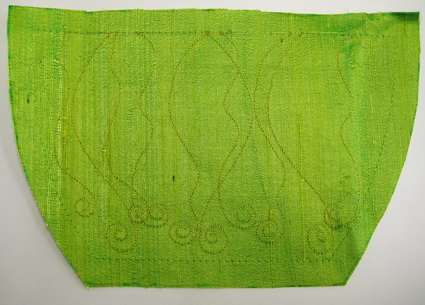
- Stitch the outline stitch which is No. 14 on your colour chart
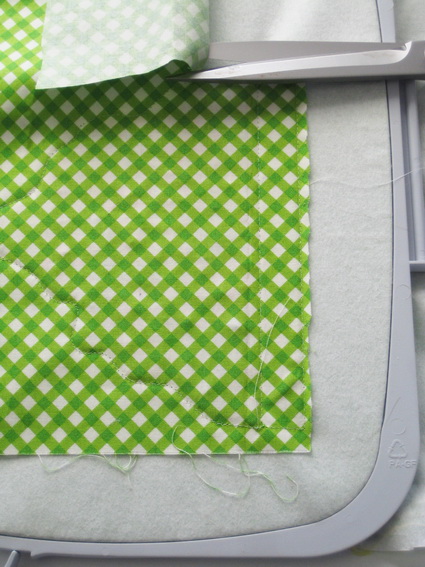
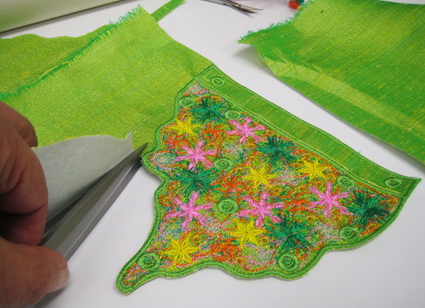
With a sharp pair of scissors cut away from the design any excess fabric
All the excess fabric cut away from the main design. I never cut to close to the outline stitches
Insert the hoop back into your machine so the satin stitch can be sewn with your machine.
This section of the bag is now finished and you can take the design out of the hoop
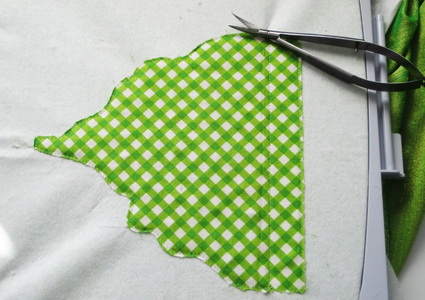
Using a very sharp pair of scissors cut as close as you can to the satin stitch border. Start of by cutting with a large pair of scissors and then change to a very small pair of scissors. The smaller scissors can cut into the rounded area more easily.
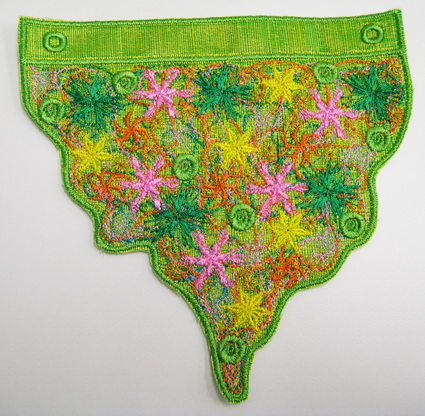
All the fabric cut away from the satin stitch border
Once you have finished stitching out “Colour Burst_02” take the design out of your hoop
Measure all around the design “Colour Burst_02” 1.5 cm or 5/8 inch seam allowance
Cut away any excess fabric from your seam allowance

At this time cut around both the front and back panels of your lining
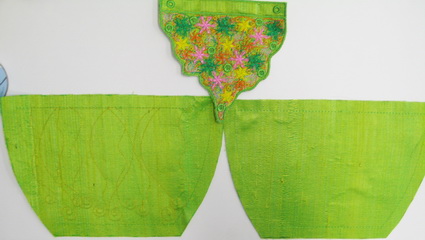
- Measure all around the design “Colour Burst_03” which will be the back of the bag 1.5 cm or 5/8 inch seam allowance
- Cut away any excess fabric from your seam allowance
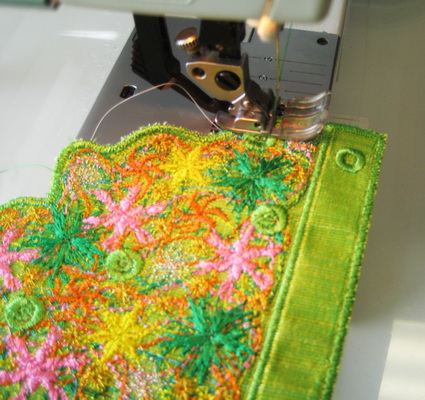
On the flap of the bag stitch over the satin stitch border a very close zigzag stitch but not quite a satin stitch this just gives the flap a nice finish
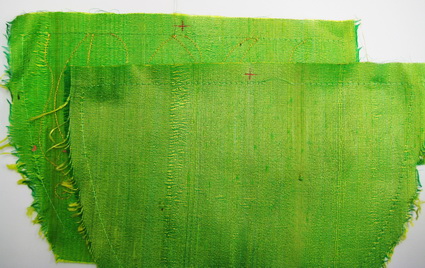
On the front and back panels mark clearly the centre of each panel top and bottom

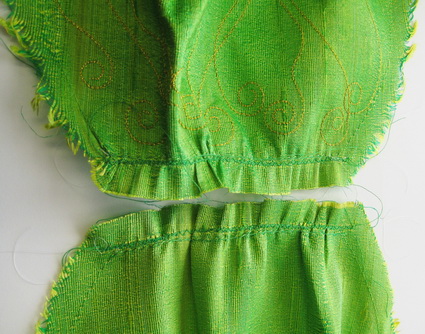
On both the front and back panels top and bottom stitch two rows of a large straight stitch so you can eventually gather the stitches
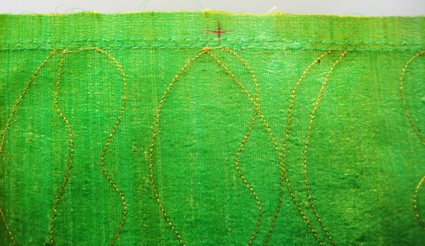
Showing you the two rows of straight stitches which will be your gathering stitches
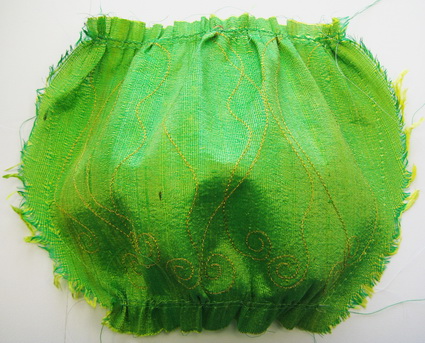
Gathering both top and bottom stitches on the front and back panel
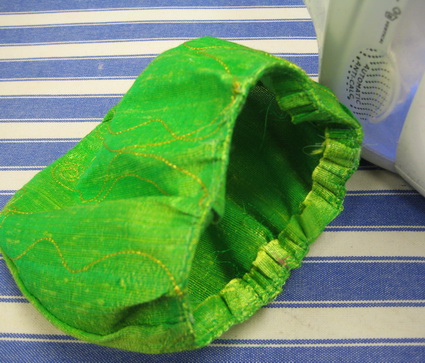
Gather the stitches front and back at the top panel to measure the same size as the flap of the bag
Gather the top and back panels at the bottom of each panel to measure the same width 5.9 inches or 15cm this includes the seam allowance
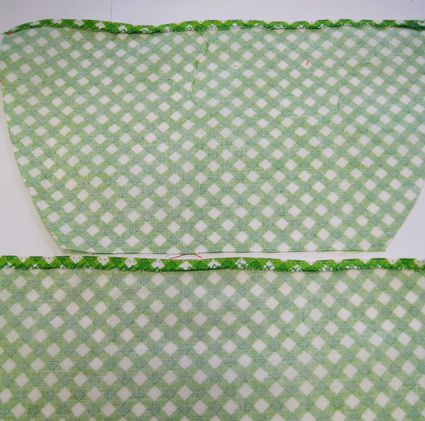
Stitch a hem on the top of each front and back panels
Press using your steam iron the seam at the top of the bag

Mark each front and back panel the centre
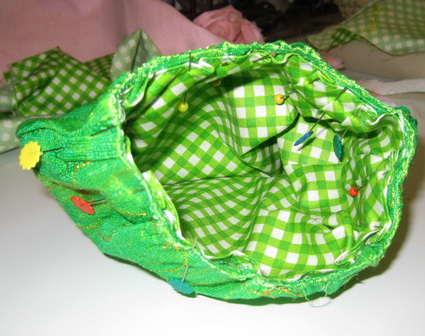
I did not bother gathering the lining fabric, I pleated, I find this a lot easier as I can keep the centre markings of the front and back panels matching the centre markings of the front and back lining
Hand sew the lining to the front and back panels of the bag
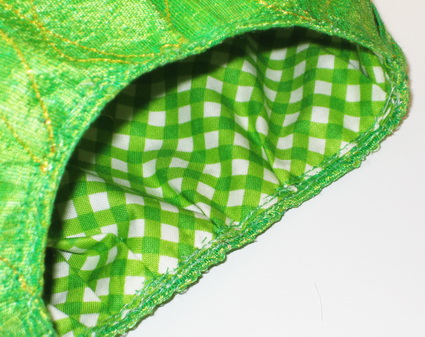
Using your straight stitch on your sewing machine, stitch over your hand stitching
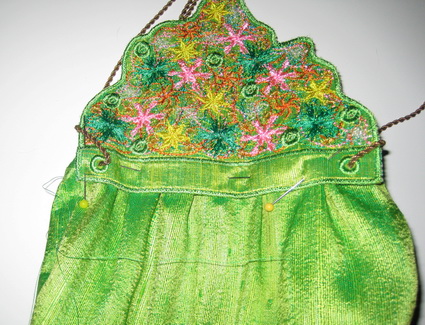
- Cut a hole in the two satin stitch circles and stitch down your gold chain to the flap panel
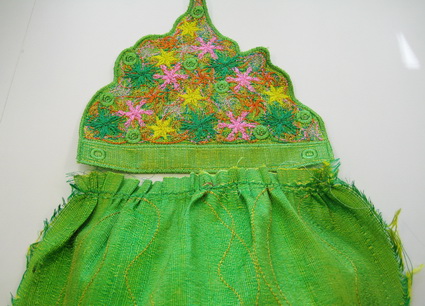
- Pin the flap onto the back panel of the bag
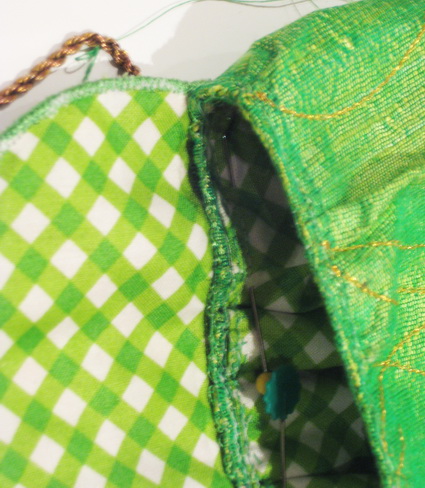
Showing you pinning the flap to the back panel of the bag

Hand stitch the flap piece to the back of the bag
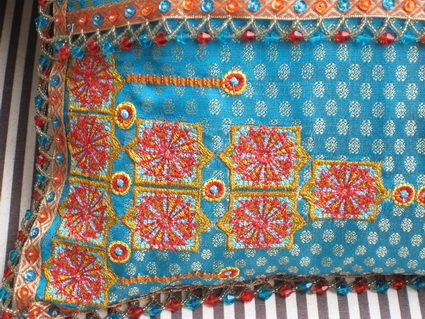
Damascus Spice Souk Instructions
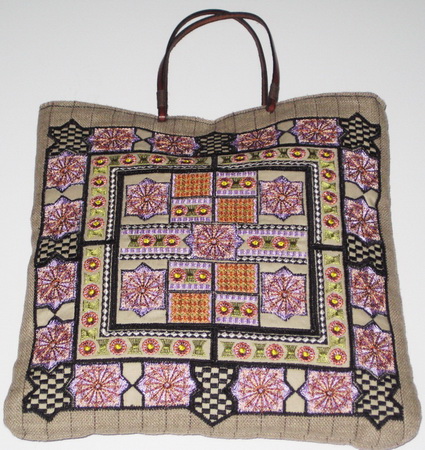
Instructions for the Damascus Spice Souk bag
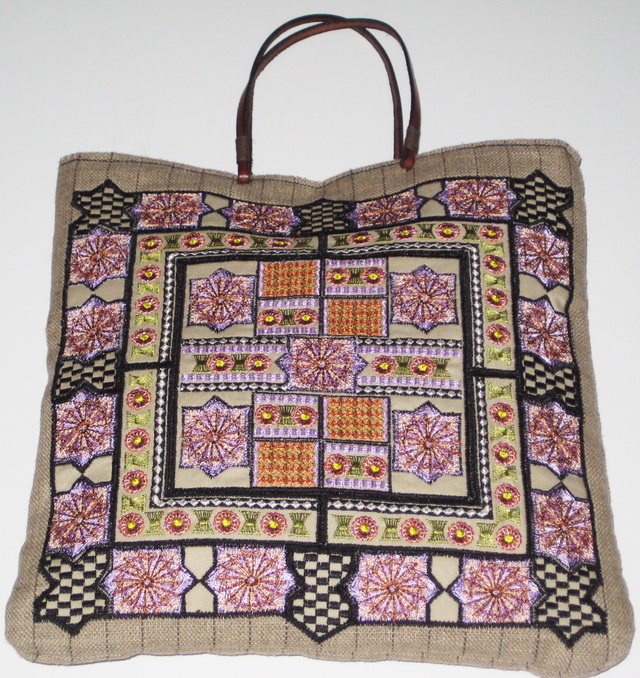
Size of the bag 10.5 x 11 inches or 27 x 28 cm
- 1 metre or 1 yard of a background fabric to stitch out all the designs for the bag
- 1 metre or 1 yard of fabric to make the bag
- ½ metre or ½ yard of lining fabric
- 1 metre or 1 yard of felt
- Handles
- Magnetic closure snap (optional)
Stitch out the following designs
- Spice souk_01
- Spice souk_02 four times
- Spice souk_04
- Spice souk_bot_04
- Spice souk_bot_04_mirr
- Spice souk_top_03
- Spice souk_top_03_mirr
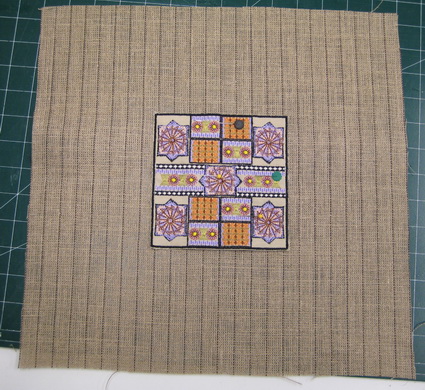
Cut out the fabric for the bag larger than you need for both the front and back
Pin in the centre of the fabric “Spice souk_01”
Lightly glue the design onto the fabric
Place all four of the “Spice souk_02” around “Spice souk_01” once you have all four in the correct position lightly glue each one down
All four of the “Spice souk_02” glued into the correct position
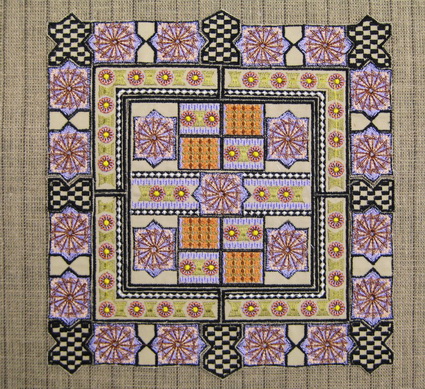
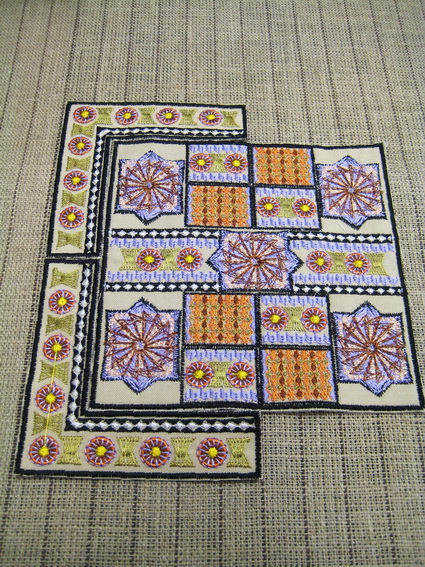
- Place “Spice souk_top_03” at the top left corner
- Place “Spice souk_top_03_mirr” at the top right corner
- In the top centre put one of the “Spice souk_04”
- Place “Spice souk_bot_04” at the bottom left corner
- Place “Spice souk_bot_04_mirr” at the bottom right corner
Once you have placed each of the designs correctly lightly glue each of the designs onto the fabric

The designs have all been lightly glue down to the fabric which is linen and due to my only have the blue felt I put a beige coloured fabric in between, as the blue felt may have been seen through the linen.
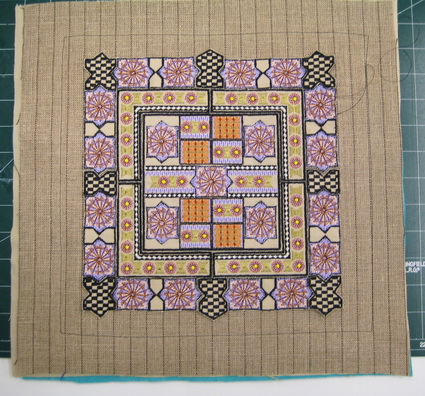
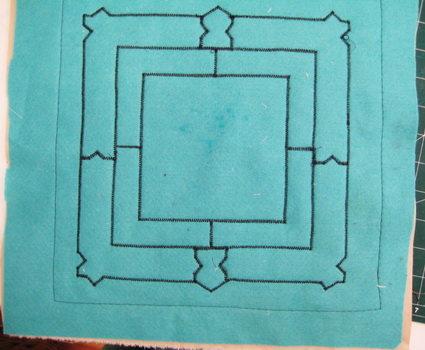
Straight stitch all the layers down to your background fabric
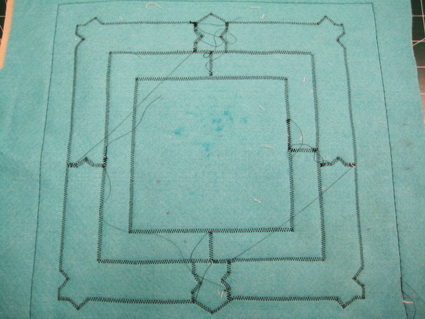
Zigzag stitch all the design down. Not too heavy a zigzag stitch just in case of movement and you can easily unpick if this should happen
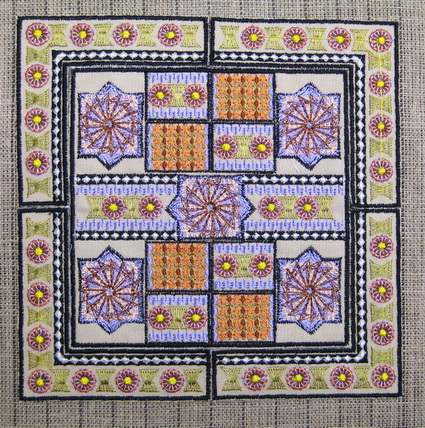
Over all the zigzag stitches, stitch each of the designs down using a satin stitch, this gives your work a nice finish
Satin stitched each design
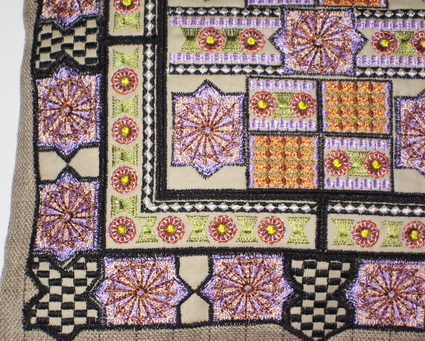
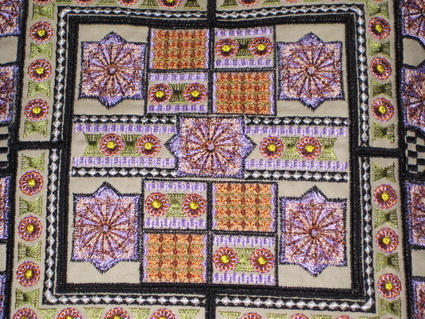
Close up of the satin stitch over each of the designs
- Stitch the front and back of the bag together
- Insert the lining you have made for the bag
- Place the handles on the bag
Instructions for the Damascus Spice Souk Cushion
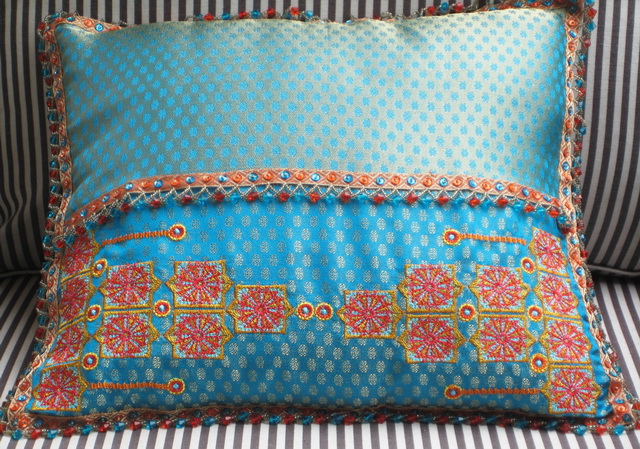
Stitch out “Spice Souk_09” twice
Close up of the work on the cushion
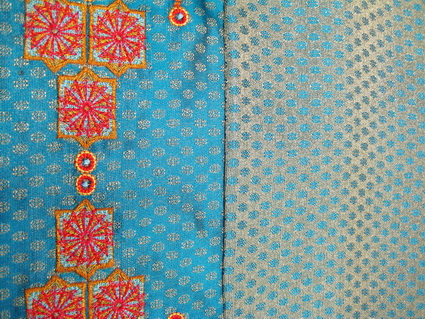
This fabric had a lovely back to it so I used both the front and back of the fabric to give the cushion a different look
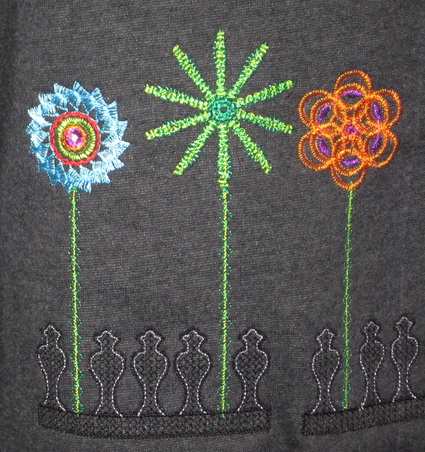
Damascus Spice Souk Jumper
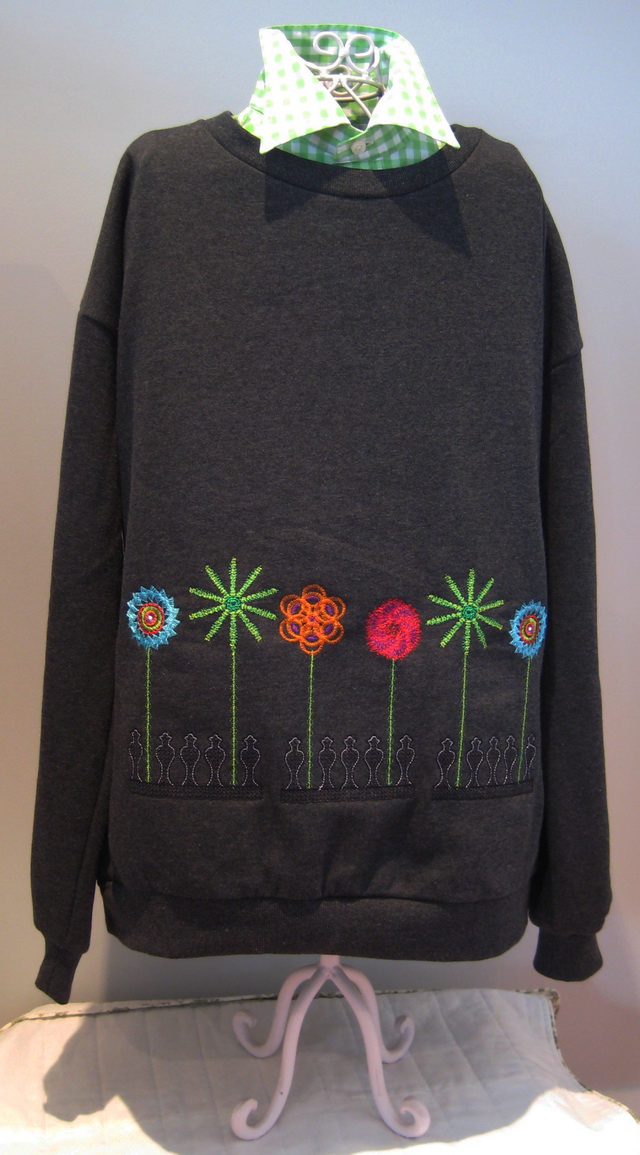
Stitch the following designs onto the jumper
Spice souk_05 twice
In the centre Spice souk_06
Machine Embroidery Designs
Latest Releases
Folklore Machine Embroidery Designs
Released on the 25th June 2019

6 designs included in the Folklore machine embroidery design set.
The Folklore design is suitable for a 6 x 10 inch or 240mm x 150mm hoop.
The Folklore design is available in DST, EMB, EXP, HUS, JEF, PES, VIP, VP3 and XXX.
The colour chart is included in the design set
As I am now digitizing with Wilcom embroidery software (which is a commercial software) we are unable to convert files to ART format. Bernina embroidery machines will now need to purchase designs in EMB or EXP format. Sorry for the inconvenience.


